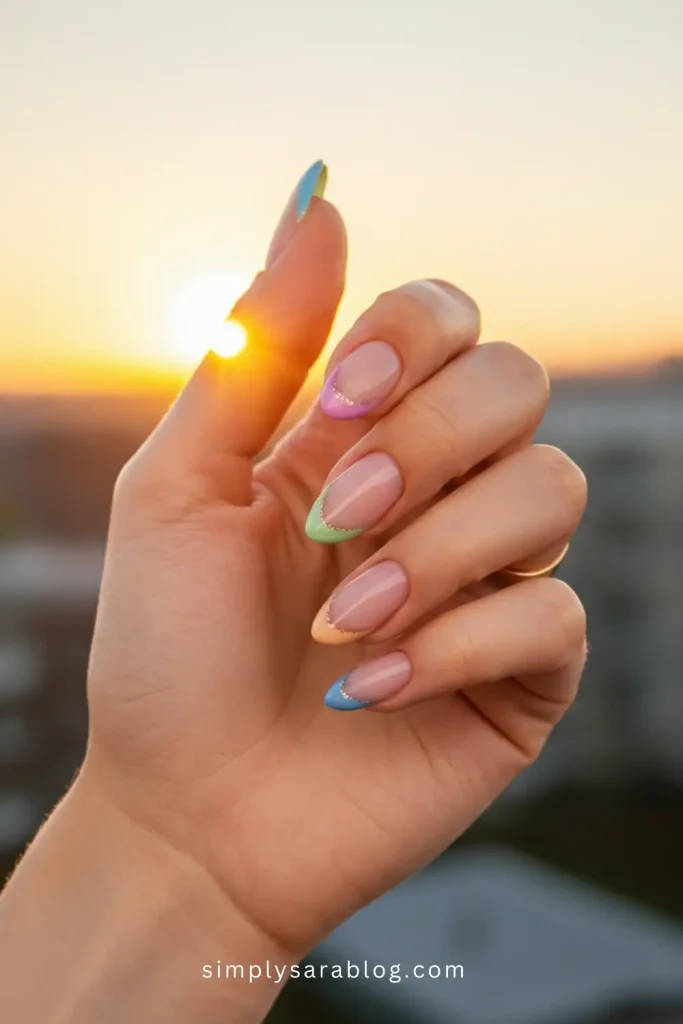
59 Gorgeous Spring Nail Art Designs for a Fresh Look
Spring nail art ideas are the perfect way to celebrate the season of renewal with vibrant creativity.
Inspired by blooming flowers, pastel shades, and cheerful patterns, these designs bring a fresh burst of life right to your fingertips.
Whether it’s delicate florals, whimsical hearts, or trendy geometric shapes, spring nails capture the essence of joy and growth.
From soft hues to bold accents, these artistic styles elevate your look
Best Spring Nail Art Design Ideas 2025
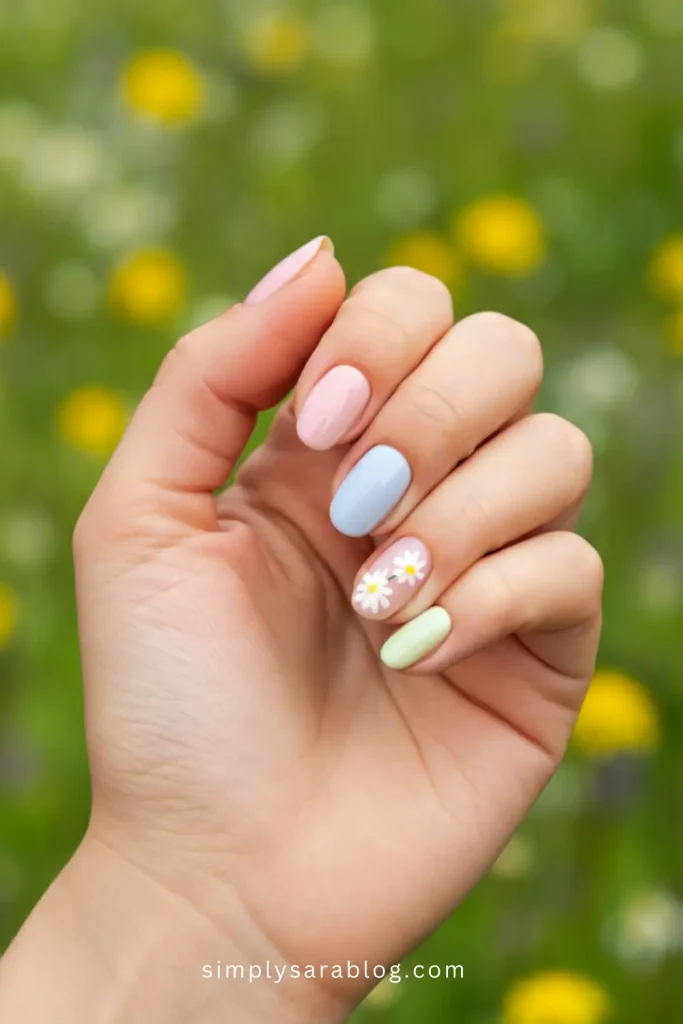
1. Early Spring Nail Ideas
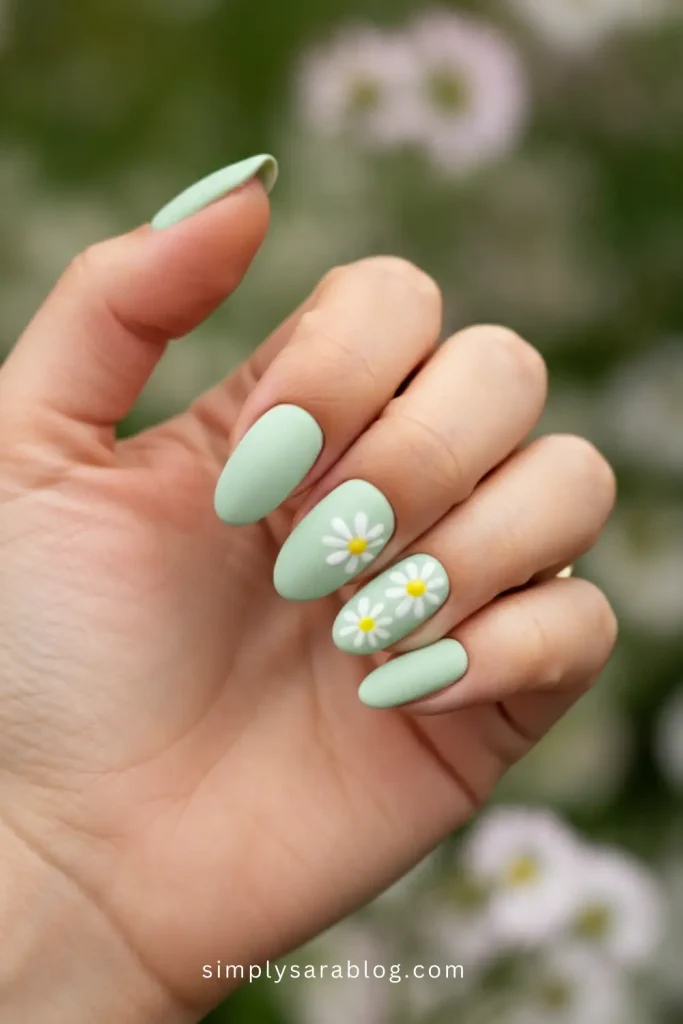
Overview: Picture soft pastel greens and delicate white daisy accents—this look captures the crisp beauty of early spring mornings. It’s smooth, charming, and reminds you of a fresh garden.
Steps:
- Apply a pastel green base coat.
- Use a dotting tool to make tiny white petals for daisies.
- Add a golden yellow dot in the middle of each daisy.
- Seal everything with a top coat.
Tools Needed: Pastel green nail polish, white nail polish, yellow nail polish, a dotting tool, and top coat.
Ideal For: Casual outings or when you want your nails to reflect the new life spring brings.
2. Fun Spring Nail Ideas
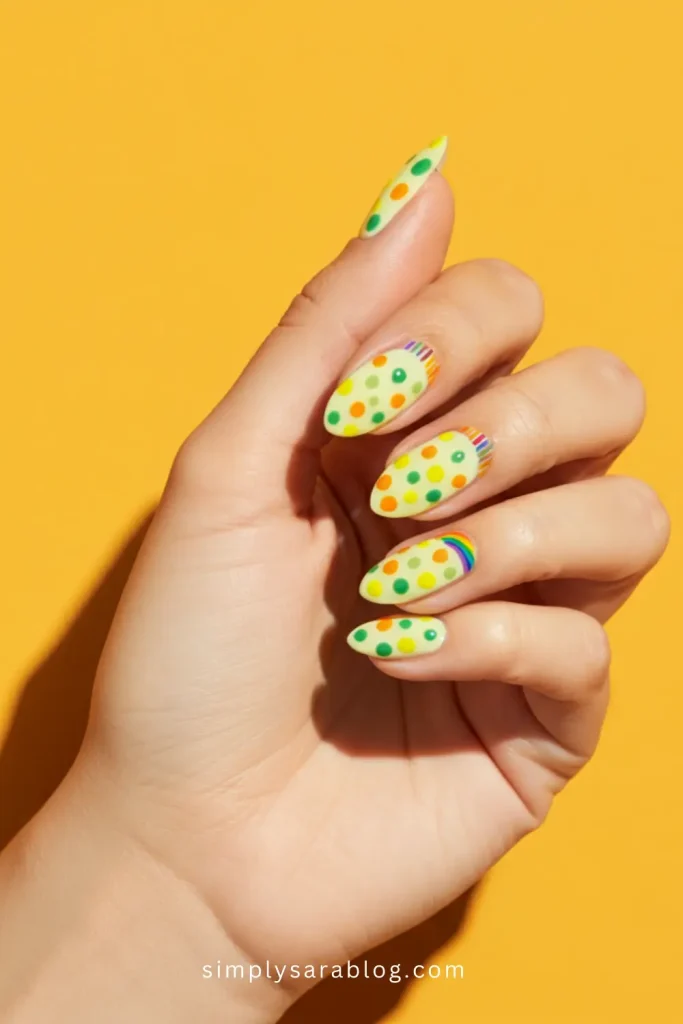
Overview: Bright colors and playful designs—think neon stripes or polka dots! This design is vibrant and screams fun for anyone with a lively spring vibe.
Steps:
- Paint your nails white as the base.
- Use nail tape or a thin brush to create diagonal neon stripes, or place colorful dots in random patterns.
- Finish with a glossy top coat.
Tools Needed: White polish, neon polishes, nail tape or thin brushes, top coat.
Ideal For: Weekend parties or adding fun to your everyday outfit.
3. Cute Spring Nail Ideas
Overview: Soft pink nails adorned with tiny hand-painted butterflies—they’re irresistibly sweet and super dainty. Perfect for showing your softer side!
Steps:
- Start with a baby pink polish base.
- Use a fine brush to paint tiny butterfly shapes with pastel blue and lavender polishes.
- Outline lightly with black and seal.
Tools Needed: Baby pink polish, pastel blue/lavender polish, fine nail brush, black nail polish, gloss top coat.
Ideal For: Romantic dates or when you’re in the mood for something lovable and girly.
4. Cool Spring Nail Ideas
Overview: Make a statement with metallic blue nails and silver geometric accents. This edgy yet spring-inspired look is bold and trendy.
Steps:
- Paint nails a metallic blue color.
- Add small silver lines or triangles using a striping brush.
- Apply a high-shine top coat to lock in the drama.
Tools Needed: Metallic blue polish, silver nail polish, striping brush, and top coat.
Ideal For: Music festivals, nightlife, or when you want nails as bold as your personality.
5. Hot Spring Nail Ideas
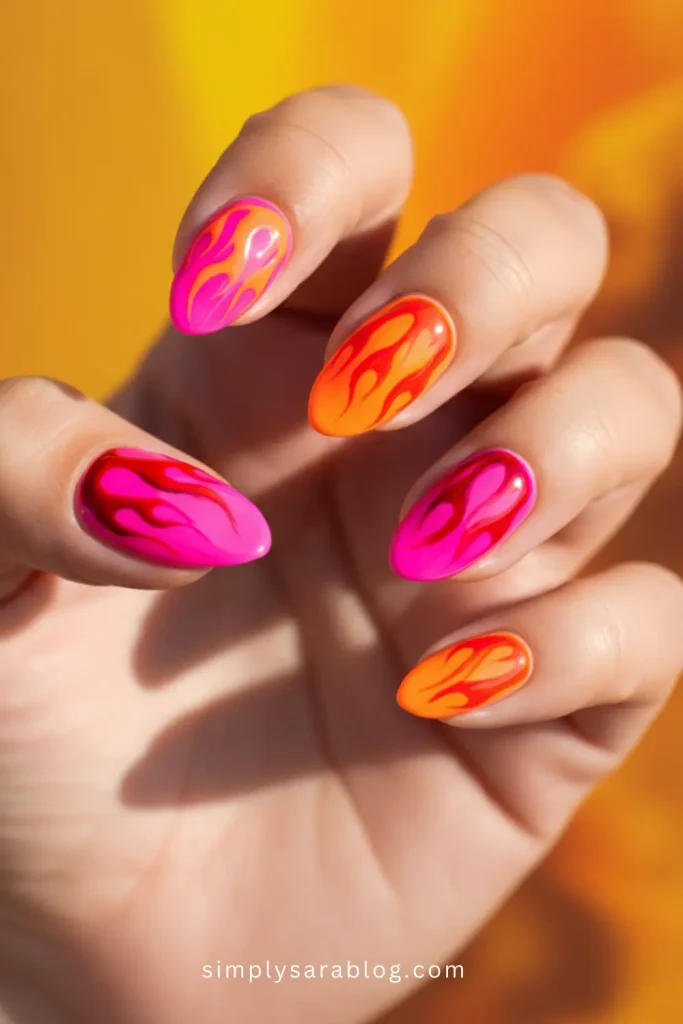
Overview: Go fiery with coral nails paired with golden chrome tips. They’re bold, bright, and perfect for making a sizzling statement this spring.
Steps:
- Apply coral nail polish as a base.
- Use gold chrome powder to coat the tips.
- Fix with a shiny top coat for extra pop.
Tools Needed: Coral polish, gold chrome powder, sponge applicator, and top coat.
Ideal For: Beach days or when you’re feeling bold and fabulous.
6. Unique Spring Nail Ideas
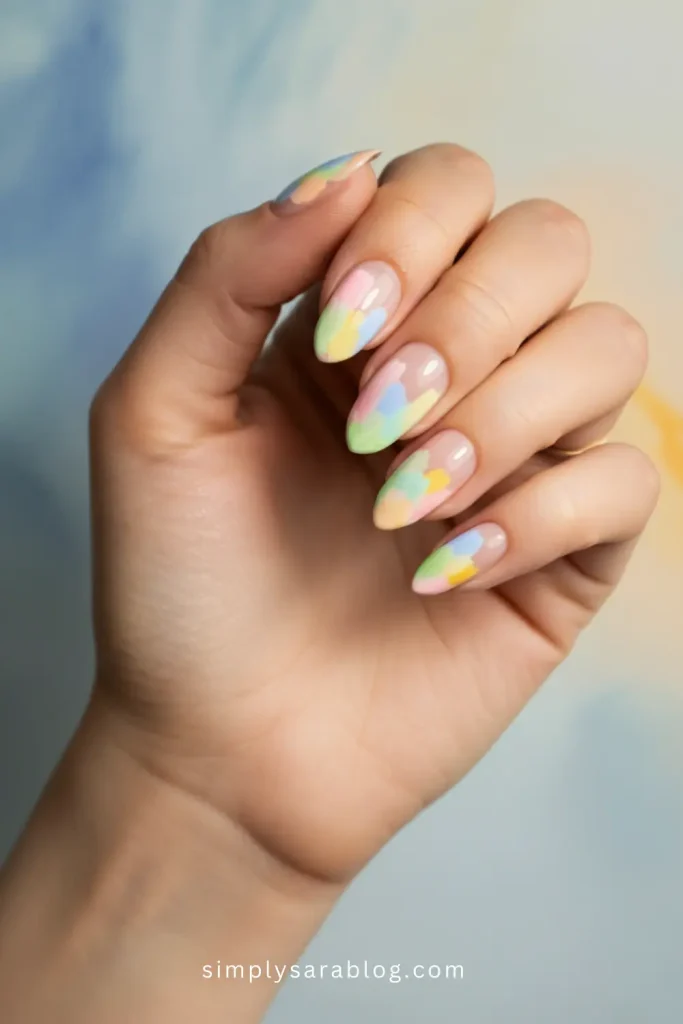
Overview: Abstract art on your nails with splashes of pastel blues, yellows, and greens. This design mimics watercolor art and is totally Instagram-worthy.
Steps:
- Apply a soft nude base.
- Dab blobs of pastel colors with a sponge and slightly blend edges.
- Add a matte top coat for a modern touch.
Tools Needed: Nude nail polish, pastel polishes, sponge, matte top coat.
Ideal For: Art lovers or anyone who wants to turn their nails into mini canvases.
7. Easy Spring Nail Ideas
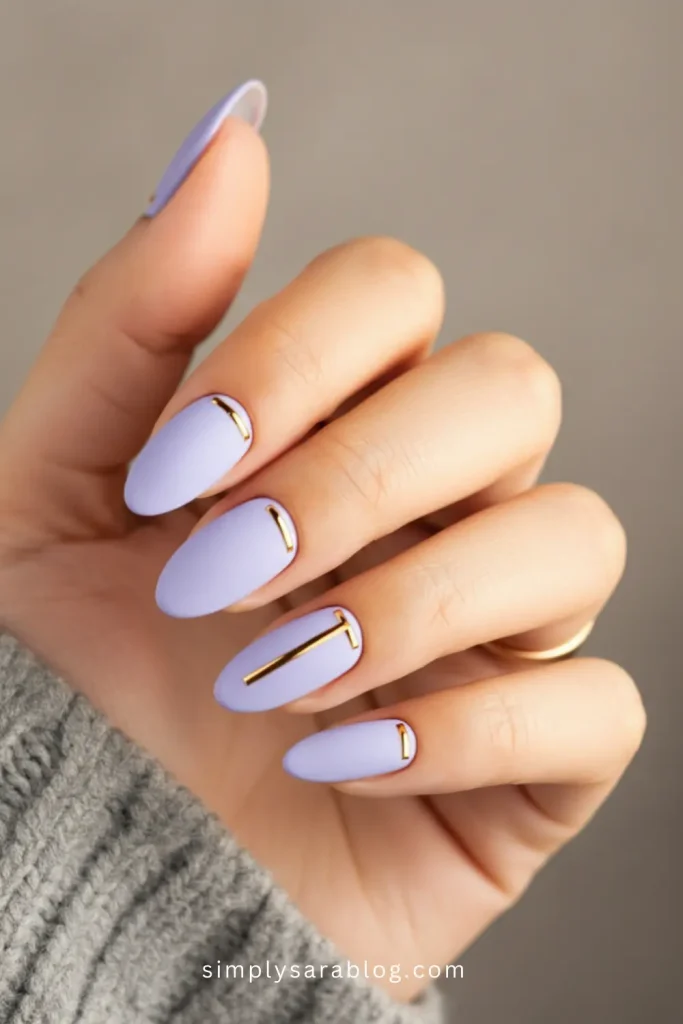
Overview: Light lavender nails with a single gold stripe down the middle. Chic and minimal, this look is flattering and takes only minutes!
Steps:
- Paint nails lavender.
- Use nail tape or a thin brush to create a sleek gold line down the center of each nail.
- Finish with a top coat.
Tools Needed: Lavender polish, gold nail polish or tape, top coat.
Ideal For: Low-maintenance days or if you love uncomplicated chicness.
8. Pretty Spring Nail Ideas
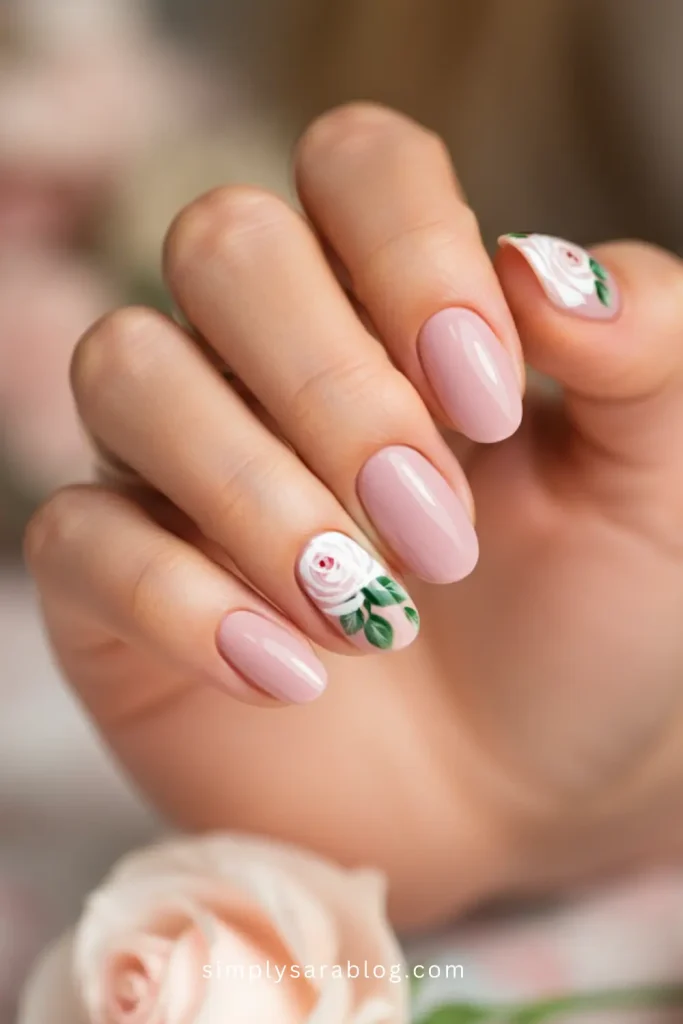
Overview: Soft blush pink nails adorned with tiny white roses and subtle green leaves—this design is effortlessly elegant and radiates garden vibes. It’s feminine and brings a simple yet beautiful touch to your style.
Steps:
- Begin with a blush pink base coat.
- Use a fine brush to paint small white roses on select nails.
- Add green leaf accents around the roses.
- Seal everything with a glossy top coat.
Tools Needed: Blush pink polish, white polish, green polish, fine nail brush, and glossy top coat.
Ideal For: Weddings, bridal showers, or any moment you want a soft and pretty nail look.
9. Simple Spring Nail Ideas
Overview: Classic nude nails with tiny silver rhinestones for a hint of sparkle. It’s timeless, understated, and perfect for minimalist lovers who still want a touch of glam.
Steps:
- Paint nails with a sheer nude base coat.
- Place a small silver rhinestone near the cuticle of each nail.
- Secure the rhinestones with clear top coat.
Tools Needed: Nude nail polish, silver rhinestones, a rhinestone applicator, and top coat.
Ideal For: Office days, brunch, or any occasion where you prefer effortless elegance.
10. Neutral Spring Nail Ideas
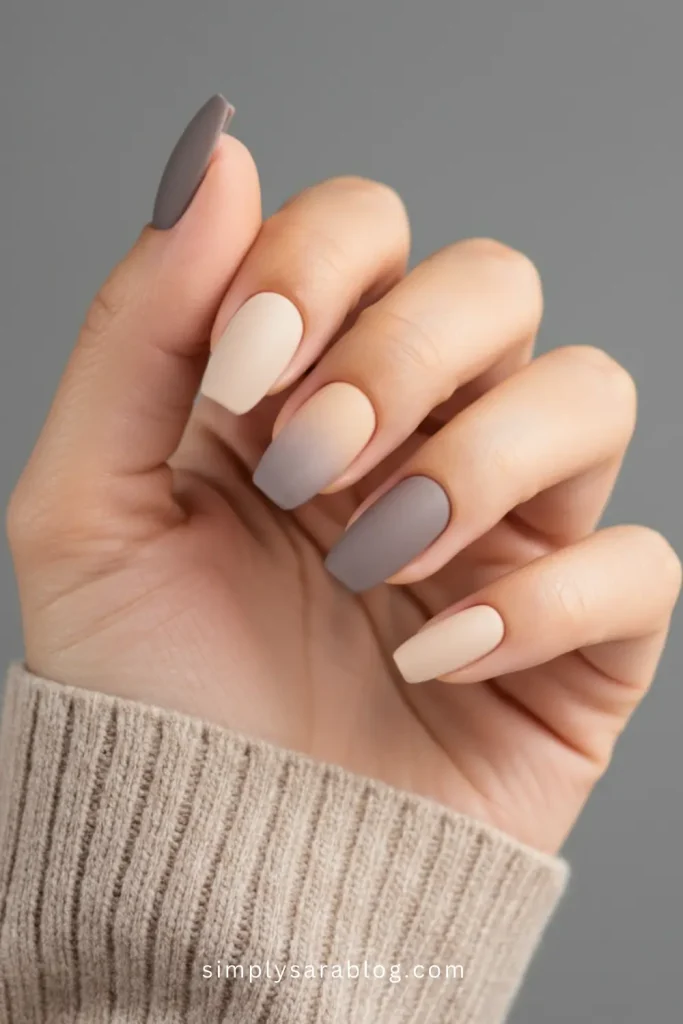
Overview: Shades of beige and taupe in a gradient effect that’s simple yet chic. This ombre design proves that neutral doesn’t mean boring!
Steps:
- Choose three to four neutral tones like beige, taupe, and cream.
- Blend the shades on each nail using a sponge for a gradient look.
- Apply a matte top coat for a modern finish.
Tools Needed: Multiple neutral polishes, sponge, and matte top coat.
Ideal For: Everyday wear, work settings, or when you want a polished-yet-neutral vibe.
11. Spring Nail Ideas Dip
Overview: Lavish lavender dip nails accented with subtle white marble effects—perfect if you want a durable manicure with a touch of luxury for spring.
Steps:
- Start with a dipping powder system and apply lavender powder.
- Create marble veins using a fine brush and white acrylic paint.
- Seal with a shiny top coat from the dip system.
Tools Needed: Dip powder system in lavender, white paint, fine brush, and dip system top coat.
Ideal For: Long-lasting nails that still have a touch of uniqueness and style.
12. Trendy Spring Nail Ideas
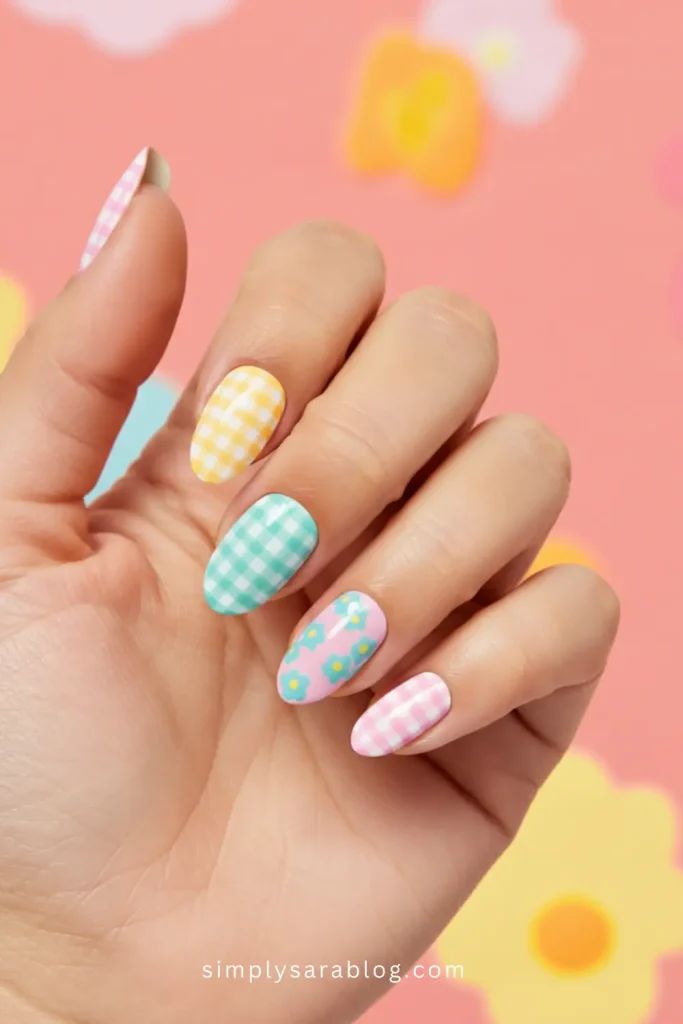
Overview: Mix and match patterns like gingham, florals, and mini stripes on a pastel palette for a trendy look. Each nail gets its own design, making your manicure a spring statement piece!
Steps:
- Paint each nail in pastel hues.
- Use a fine brush or stamping tools to create gingham, floral, or stripe patterns.
- Seal it all with a glossy top coat.
Tools Needed: Pastel polishes, fine brushes or nail stamping tools, and top coat.
Ideal For: Fashion-forward occasions or when you want your nails to make a bold seasonal statement.
13. Plain Spring Nail Ideas
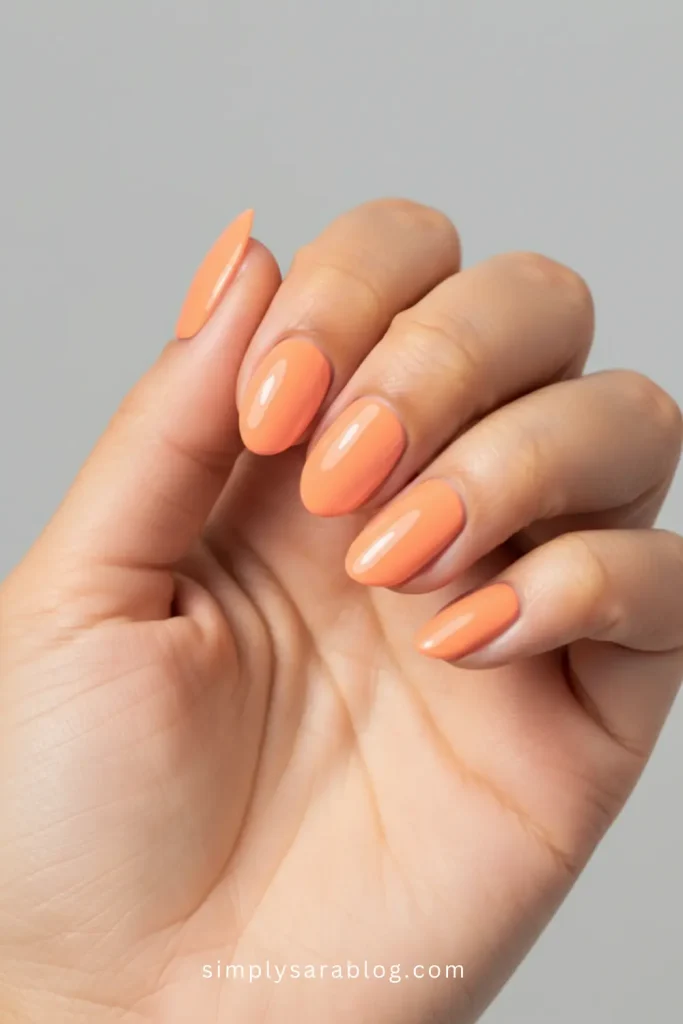
Overview: A clean and simple design with just one coat of soft peach polish. This look is refreshingly minimal, bringing the season’s warm vibes to your nails without all the fuss.
Steps:
- Apply a soft peach nail polish evenly across all nails.
- Top with a shiny clear coat to enhance the color.
Tools Needed: Peach polish and glossy top coat.
Ideal For: Everyday wear or when you want a fresh, polished, and simple look.
14. Elegant Spring Nail Ideas
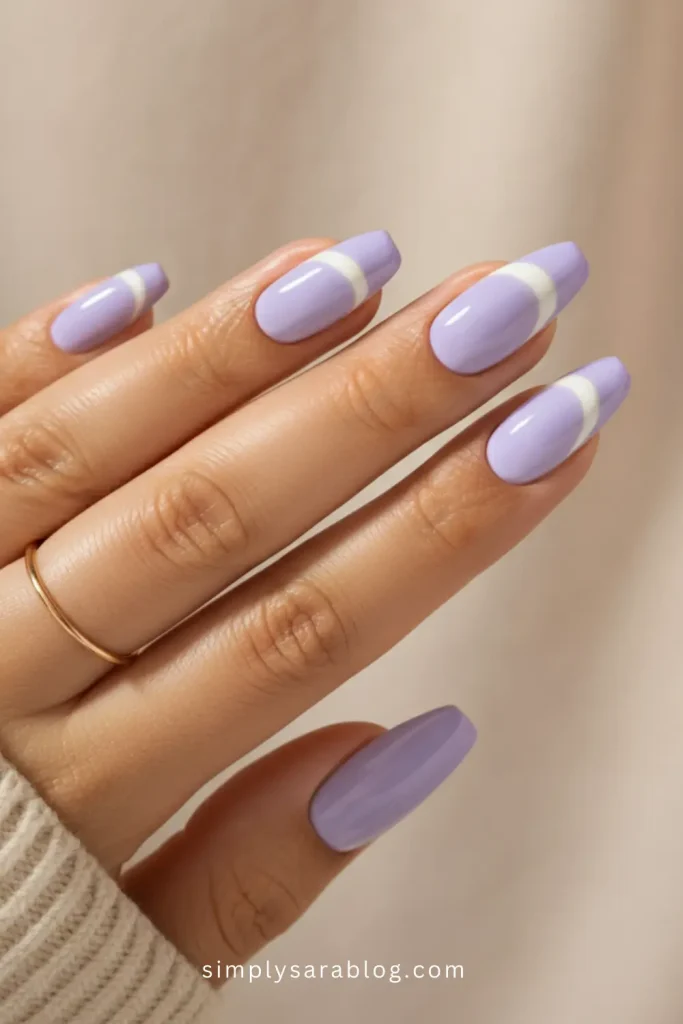
Overview: French tips with an elegant twist—use a light lavender base with white crescent moon accents instead of traditional tips. It’s classy with a fresh spring update.
Steps:
- Start with a lavender base coat.
- Use a fine brush to paint thin white crescent shapes near the cuticles.
- Complete the look with a glossy top coat.
Tools Needed: Light lavender polish, white polish, fine brush, and top coat.
Ideal For: Formal occasions or when you want a sophisticated but modern nail design.
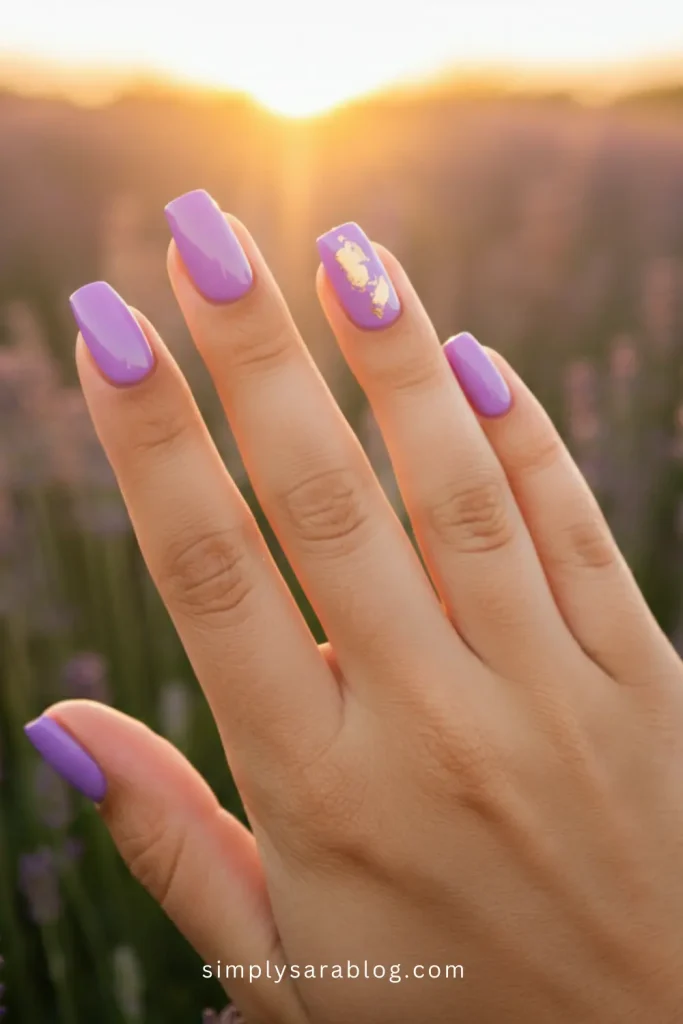
15. Graceful spring nails
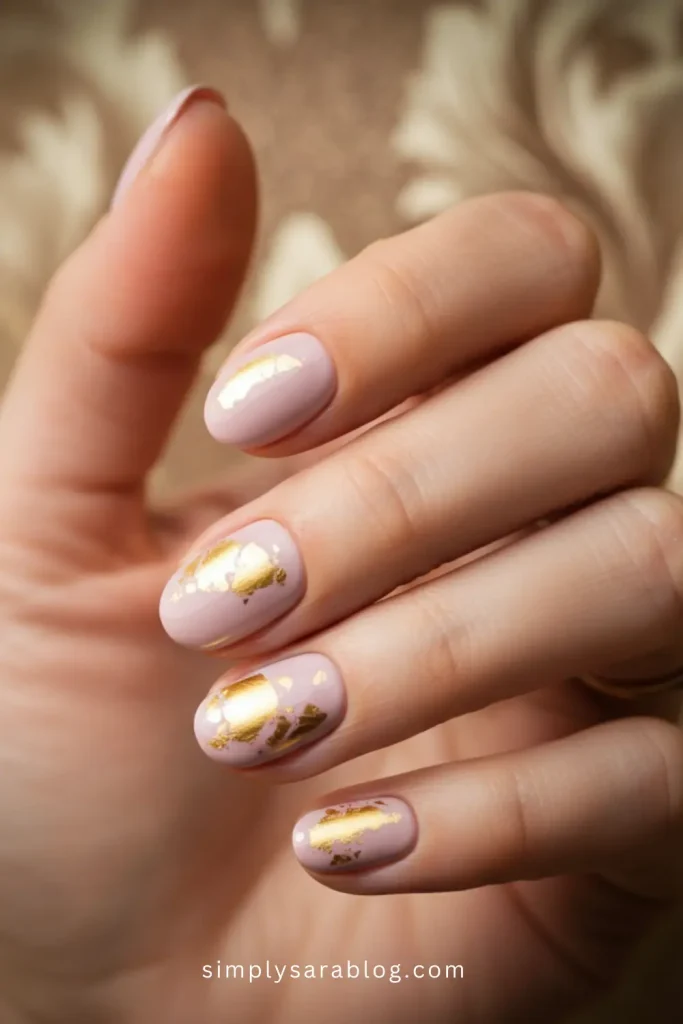
Overview: Pale pink nails with gold foil flakes scattered artfully across a few accent nails. This design is graceful, luxurious, and effortlessly pretty.
Steps:
- Paint nails pale pink.
- Use tweezers to apply small pieces of gold foil onto one or two nails.
- Seal the entire design with a clear top coat.
Tools Needed: Pale pink polish, gold foil, tweezers, and top coat.
Ideal For: Special celebrations or when you want to bring a touch of glamour to your spring style.
16. Nice Spring Nail Ideas
Overview
Bright and cheerful designs inspired by the spring season—think pastel hues, delicate patterns, and happy vibes. Perfect for a fresh seasonal upgrade.
Step-by-Step Instructions
- Apply a base coat to protect your nails.
- Pick soft pastels (like mint green or baby pink) and apply two coats.
- Use a nail stamping kit to add spring-themed patterns (e.g., flowers or butterflies).
- Seal with a top coat for shine and durability.
Tools
- Base and top coat
- Pastel nail polishes
- Nail stamping kit
Ideal For
Anyone who loves minimal yet festive nail designs that fit perfectly into daily life.
17. Short Spring Nail Ideas
Overview
Keep it sweet and simple! Short nails with soft pastels or subtle glitter catch the season’s light beautifully.
Step-by-Step Instructions
- File nails into a neat, short shape.
- Apply a pale yellow shade as the base.
- Add fine glitter over the tips for sparkle.
- Use a top coat to seal and shine.
Tools
- Nail file
- Pale yellow polish
- Glitter top coat
Ideal For
Anyone on the go or those who love a low-maintenance but stylish look.
18. Long Spring Nail Ideas
Overview
Long nails give you a larger canvas to create beautiful artwork—think dreamy flowers, ombre patterns, or abstract pastel swirls.
Step-by-Step Instructions
- Shape your nails into your desired length.
- Create an ombre effect by blending white and baby blue polish with a sponge.
- Paint small flowers using a detailed nail art brush.
- Finish with a glossy top coat.
Tools
- Nail art brush
- White and blue polish
- Cosmetic sponge
Ideal For
Perfect for photoshoots, weddings, or making everyday life feel a bit more magical.
19. Medium Spring Nail Ideas

Overview
Mid-length nails are super versatile for spring florals and soft palettes.
Step-by-Step Instructions
- Shape your nails into rounded or squared mid-length shapes.
- Paint nails a soft pink shade.
- Use a dotting tool for white polka dots or small flowers.
- Seal with a top coat.
Tools
- Dotting tool
- Soft-colored nail polish, like pink
- Top coat
Ideal For
Anyone who loves balance—medium nails are chic, comfy, and super stylish.
20. Rounded Spring Nail Ideas

Overview
Soft, rounded nails with a juicy pop of color—perfect for that classy yet playful look.
Step-by-Step Instructions
- File nails into a round shape.
- Apply a juicy coral shade as your base.
- Draw small gold lines across the tips for a chic touch.
- Gloss it up with a shiny top coat.
Tools
- Coral nail polish
- Fine nail art brush (for gold lines)
- Top coat
Ideal For
Those who love a bold yet understated vibe.
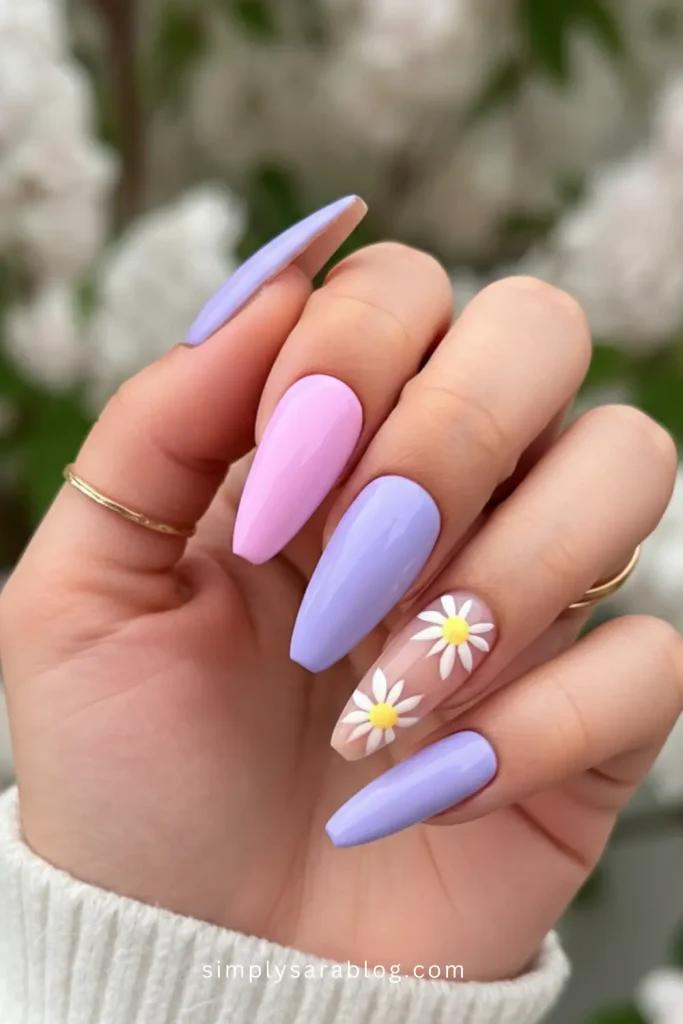
21. Almond Spring Nail Ideas
Overview
Almond-shaped nails offer a soft, feminine touch ideal for intricate floral patterns or pastel gradients. They’re classy yet playful, perfect for a spring aesthetic.
Step-by-Step Instructions
- Shape your nails into an almond form.
- Apply a gradient effect using soft pink and lavender shades.
- Add small daisies with a dotting tool for a floral accent.
- Finish with a glossy top coat.
Tools
- Nail file
- Pastel pink and lavender polish
- Dotting tool
Ideal For
Great for romantic dates, brunches, or anyone who wants a soft, elegant look with a spring vibe.
22. Acrylic Spring Nail Ideas

Overview
Acrylic nails are the go-to option for those who want durable, longer nails with room for bold, detailed spring art designs. Try abstract tulip patterns or layered decals this season!
Step-by-Step Instructions
- Start with acrylic extensions.
- Paint a pastel base (mint green or pale peach).
- Add tulip decals or paint abstract floral designs.
- Seal with a strong top coat.
Tools
- Acrylic kit
- Pastel polishes
- Nail art decals (or fine art brush)
Ideal For
Perfect for nail enthusiasts who love extra length, durability, and intricate designs.
Top 18 Spring Acrylic Nail Ideas To Freshen Up Your Look
23. Coffin Spring Nail Ideas
Overview
Coffin-shaped nails are bold and stylish, adding a modern edge to spring florals or colorful ombre effects. The perfect mix of trend and freshness!
Step-by-Step Instructions
- Shape nails into a coffin silhouette.
- Create an ombre design with pastel yellow and peach using a sponge.
- Use a fine brush to add dainty golden vine details.
- Apply a clear top coat.
Tools
- Nail file
- Pastel polishes
- Sponge
- Fine nail art brush
Ideal For
Perfect for trendsetters who appreciate bold designs and statement-worthy nail shapes.
22 Stunning Coffin Spring Nail Ideas You’ll Want To Copy
24. Square Spring Nail Ideas
Overview
Square nails offer a clean and stylish look. They create the perfect backdrop for lively spring patterns like polka dots, rainbows, or even bumblebee-inspired designs.
Step-by-Step Instructions
- File nails into a square shape.
- Paint nails with a daisy-white shade as your base.
- Use a dotting tool to create colorful polka dots, mixing pastels together.
- Finish with a matte top coat.
Tools
- White nail polish
- Dotting tool
- Matte top coat
Ideal For
Anybody who loves playful patterns and crisp, clean nail shapes that can easily be styled up or down.
25. Oval Spring Nail Ideas
Overview
Oval nails are timeless and versatile. Spring designs like botanical leaves or pastel marble patterns work beautifully on this classic shape.
Step-by-Step Instructions
- File your nails into a soft oval shape.
- Apply a nude or light pink polish as a base.
- Use a fine detail brush to paint green botanical leaves on one or two nails.
- Top it off with a gloss coat.
Tools
- Nail file
- Light pink polish
- Fine detail brush
Ideal For
A great choice for minimalists who love subtle, nature-inspired details in their nail art.
26. Ombre Spring Nail Ideas
Overview
Ombre nails combine multiple spring tones, transitioning seamlessly from one color to another. Think soft pastels fading into creamy whites.
Step-by-Step Instructions
- Choose two or three pastel nail polishes.
- Use a sponge to blend the colors from light to dark.
- Apply a clear top coat once dry to smooth out the look.
Tools
- Cosmetic sponge
- Pastel polishes
- Top coat
Ideal For
Ideal for anyone who loves smooth gradients of color and a fresh, modern aesthetic.
27. Chrome Spring Nail Ideas
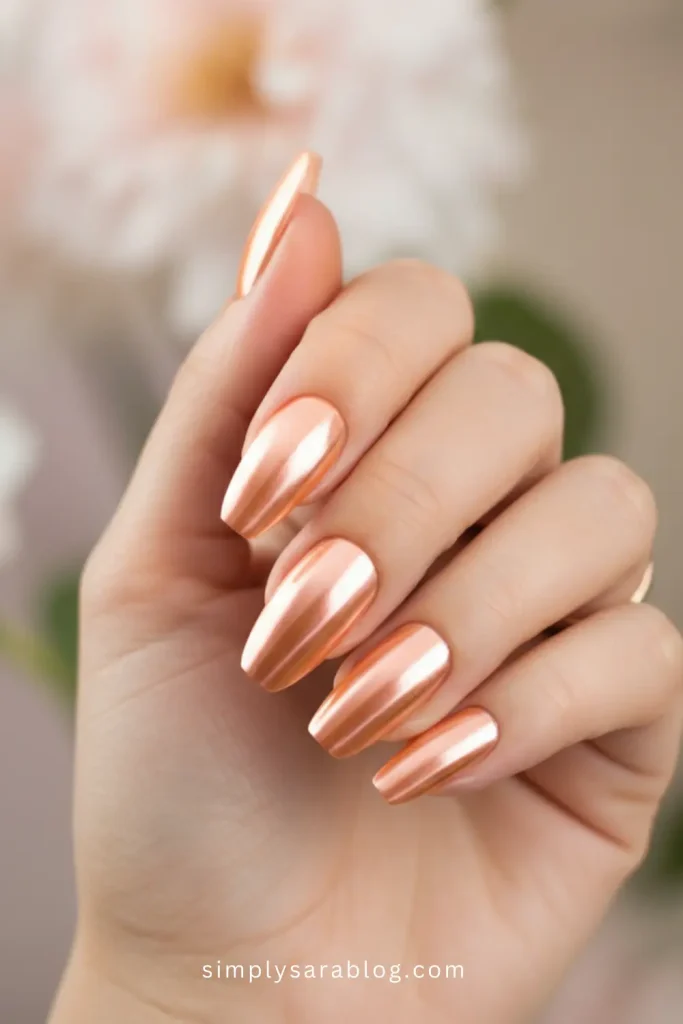
Overview
Chrome nails reflect light like magic, and when paired with fresh spring colors, you get a futuristic yet approachable vibe.
Step-by-Step Instructions
- File nails and apply a pastel polish base.
- Use a chrome powder and rub it onto each nail.
- Seal with a no-wipe top coat.
Tools
- Chrome powder
- Nail polish base
- Top coat
Ideal For
Perfect for anyone who loves standout, shiny designs that turn heads wherever they go.
28. Stiletto Spring Nail Ideas
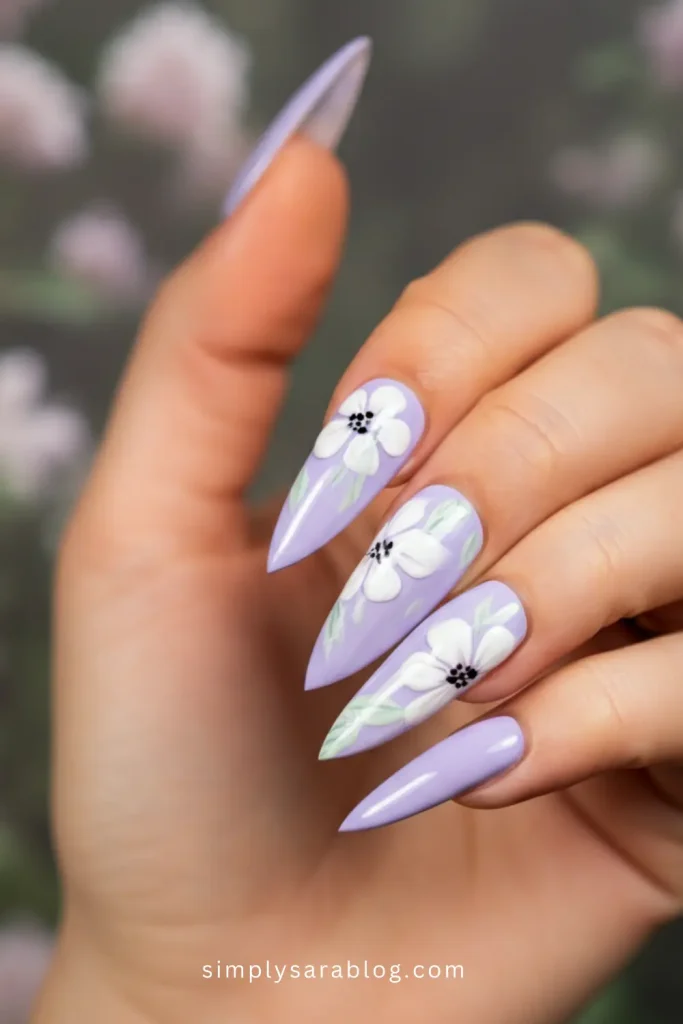
Overview
Stiletto nails are edgy and bold, offering a unique way to incorporate spring themes like abstract flowers or geometric pastel elements for a striking and creative look.
Step-by-Step Instructions
- File nails into a sharp stiletto shape.
- Apply a pastel pink or lilac base coat.
- Create abstract floral designs using a toothpick or fine nail brush.
- Seal with a clear, glossy top coat.
Tools
- Nail file
- Pastel polish
- Fine nail art brush
Ideal For
Stiletto nails are perfect for those who love dramatic, trend-forward designs that make a statement for spring parties or festivals.
29. French Tip Spring Nail Ideas
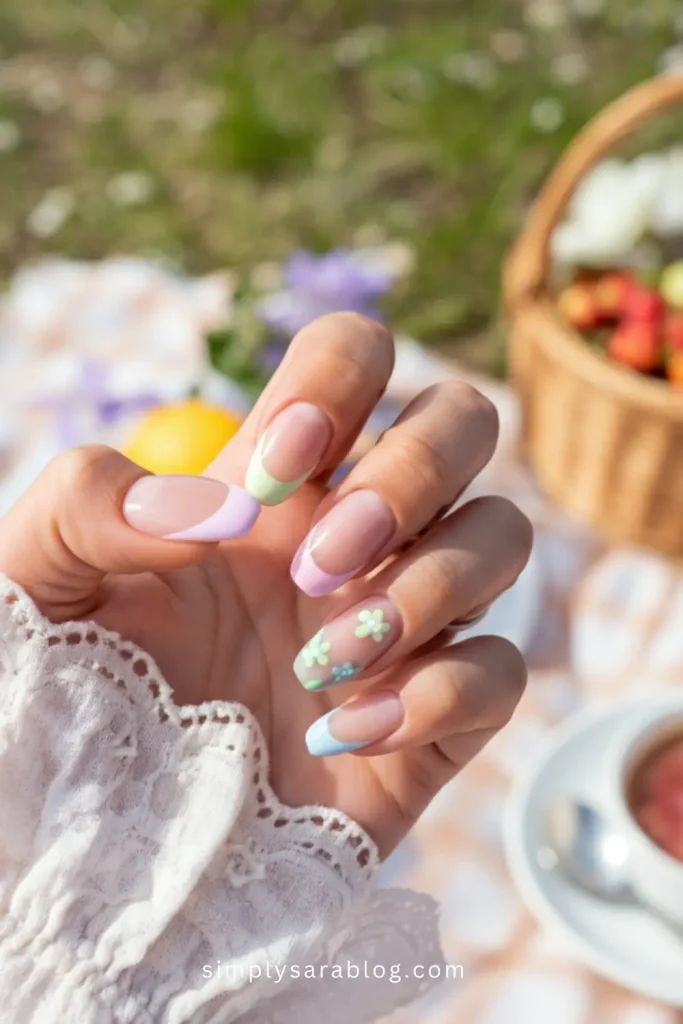
Overview
French tips are a timeless favorite. Add a spring twist by replacing traditional whites with pastel tips or floral accents for a fresh and modern vibe.
Step-by-Step Instructions
- Paint nails with a clear or nude base coat.
- Use pastel polishes to create tips (light blue or mint green).
- Add tiny floral stickers near the tip line.
- Seal with a clear top coat.
Tools
- Nude or clear polish
- Pastel polishes for tips
- Nail art stickers (flowers)
Ideal For
Anyone seeking a subtle, elegant design that’s perfect for professional settings, weddings, or a polished everyday look.
30. March Spring Nail Ideas
Overview
March nail art captures early spring themes—think soft greens, blossoms, or even rainy-day motifs paired with cheerful hues.
Step-by-Step Instructions
- Apply a soft pastel green or pale blue base coat.
- Use a dotting tool to create a scattered “raindrop” effect in gloss or glitter.
- Add small cherry blossom designs on accent nails.
- Finish with a top coat.
Tools
- Pastel green or blue polish
- Dotting tool
- Fine nail brush
Ideal For
Perfect for anyone longing to transition into spring with light floral or nature-inspired designs on their fingertips.
31. Colorful Spring Nail Ideas
Overview
Celebrate spring with vibrant, rainbow-inspired nails bursting with joy and energy. Each nail can showcase a different spring color for a lively, cheerful manicure.
Step-by-Step Instructions
- Choose a range of pastel polishes (pink, yellow, mint, lavender).
- Paint each nail with a different shade.
- Add simple designs, like stripes or dots, to a few nails.
- Finish with a shiny top coat.
Tools
- A variety of pastel polish colors
- Nail art brush or striping tape
Ideal For
Ideal for those who love playful, eye-catching nails that pop in any situation, from brunches to outdoor hangouts!
32. BIAB Spring Nail Ideas
Overview
Builder in a Bottle (BIAB) nails provide a strong base for delicate spring patterns while promoting nail health. Minimalist florals or sheer tones work beautifully.
Step-by-Step Instructions
- Apply a builder gel layer for added strength and cure under a lamp.
- Paint nails with a sheer nude or pink polish. Cure again.
- Add dainty floral stickers or hand-drawn designs.
- Seal with a gel top coat.
Tools
- Builder gel
- UV/LED lamp
- Floral nail stickers
Ideal For
Great for those looking for a durable yet natural manicure with soft, seasonal touches that last for weeks.
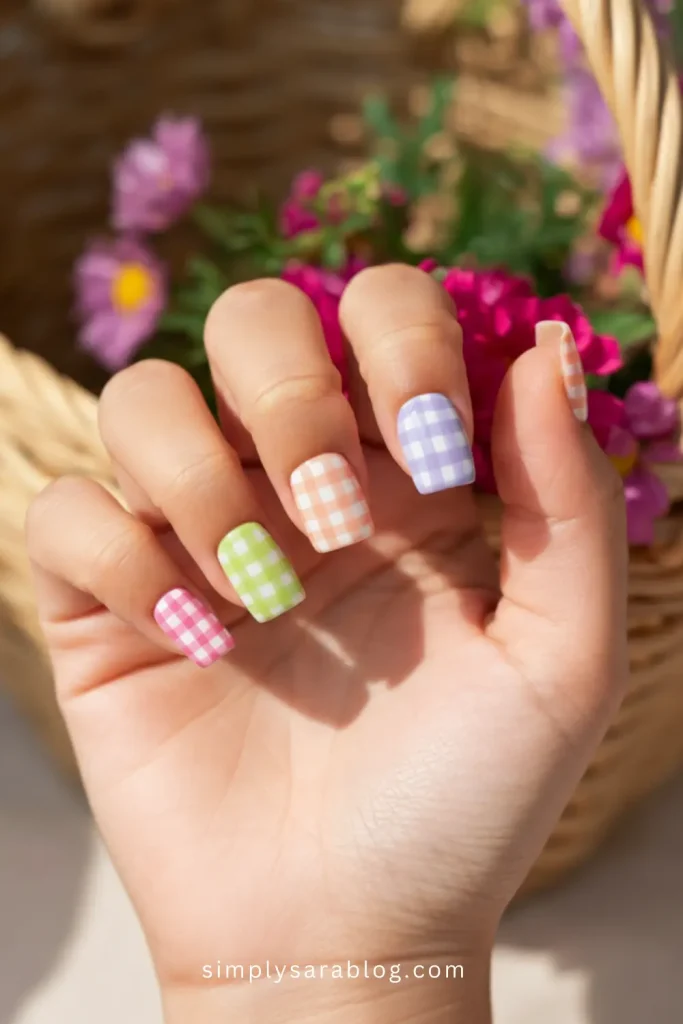
33. Preppy Spring Nail Ideas
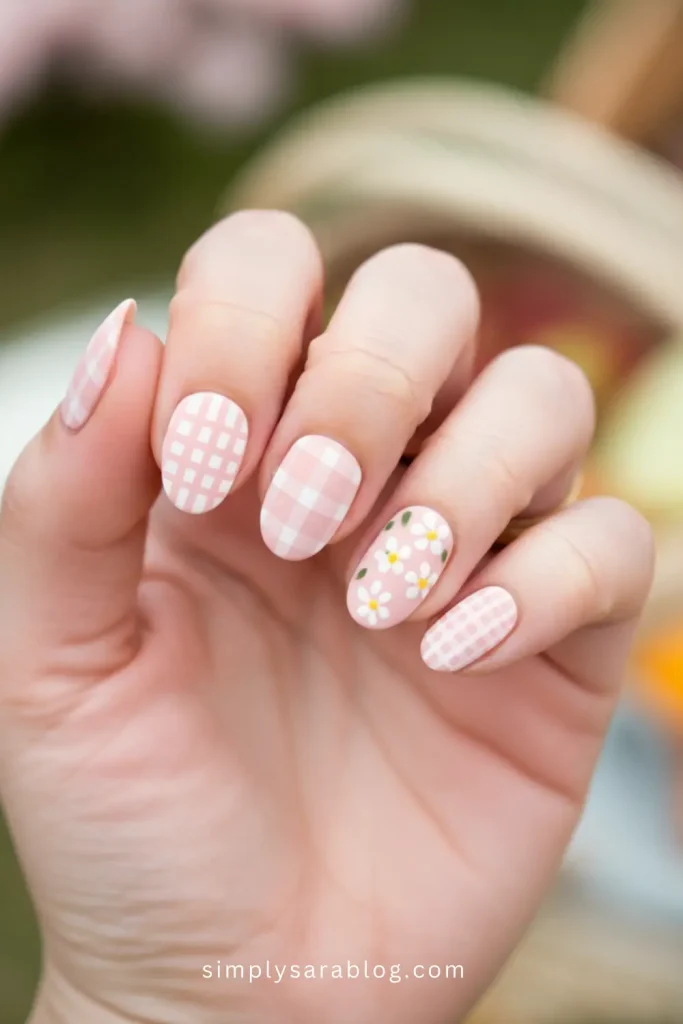
Overview
Channel vintage spring vibes with preppy designs like gingham patterns, polka dots, or pastel stripes that feel both trendy and nostalgic.
Step-by-Step Instructions
- Paint nails with a pastel base (such as pink or blue).
- Use a striping brush to create a gingham or plaid design in white.
- Add subtle floral or bow accents.
- Seal with a matte top coat for a chic finish.
Tools
- Pastel polish
- Nail striping brush
- Matte top coat
Ideal For
Perfect for fans of retro aesthetics, tea parties, and any occasion where a polished look is essential.
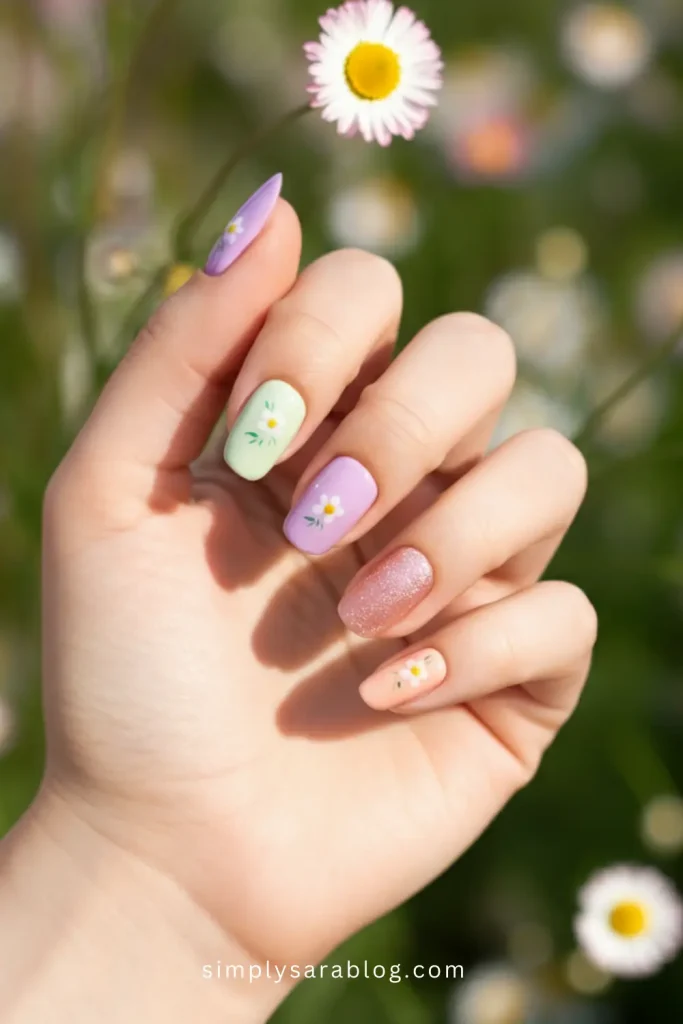
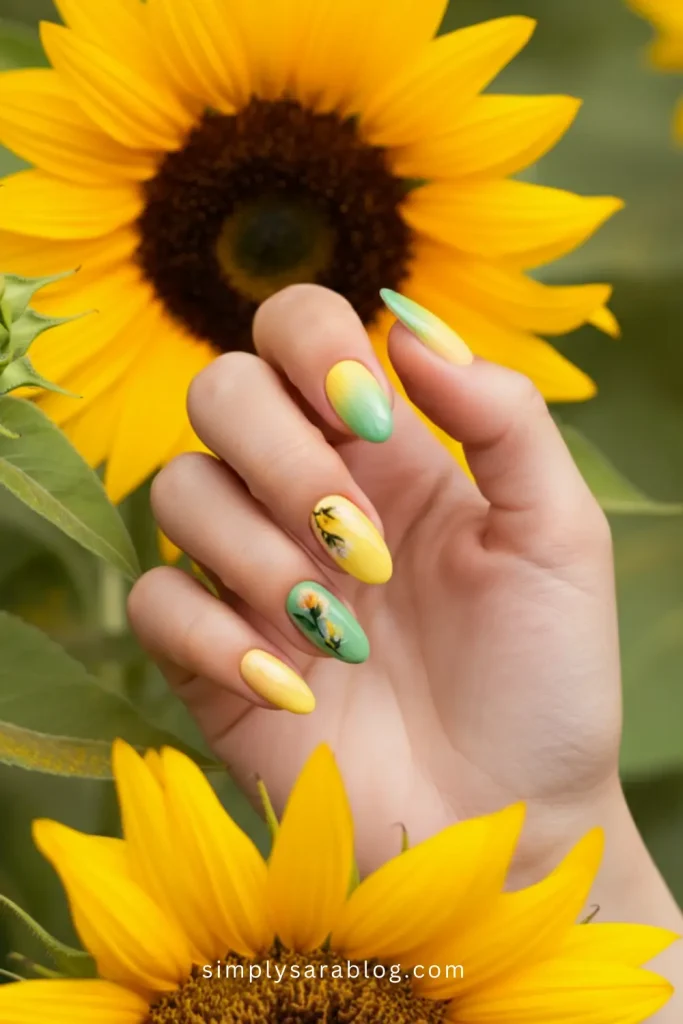
34. Flowers Spring Nail Ideas

Overview
Floral nail art epitomizes spring! Whether painted or applied as stickers, blooming designs create a fresh, cheerful aesthetic that celebrates the season.
Step-by-Step Instructions
- Apply a lavender base coat.
- Use a dotting tool to create flower petals in white and pink.
- Add a yellow dot in the center of each flower.
- Finish with a shiny top coat.
Tools
- Dotting tool
- Lavender, pink, white, and yellow polishes
- Clear top coat
Ideal For
Ideal for spring lovers who want to celebrate the season’s flowers with nails that brighten their day (and everyone else’s).
35. Gel Spring Nail Ideas
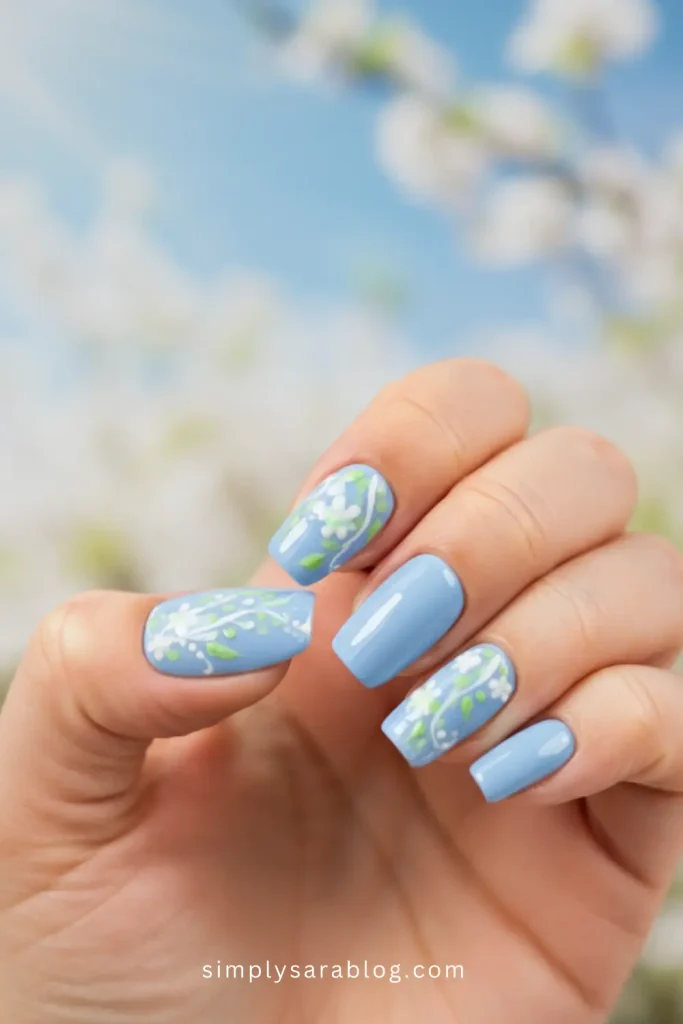
Overview
Long-lasting and glossy, gel nails are perfect for showcasing detailed spring designs, from blossoming vines to artistic ombre gradients that stay chip-free.
Step-by-Step Instructions
- Apply a gel base polish and cure.
- Use soft spring shades like sky blue or blush pink, curing each layer.
- Add floral or vine details using a nail brush.
- Seal with a glossy or matte gel top coat. Cure once more.
Tools
- Gel base and top coat
- UV/LED lamp
- Spring-color gel polish
Ideal For
Best suited for anyone who wants professional-quality, long-lasting nail art with endless style possibilities for spring.
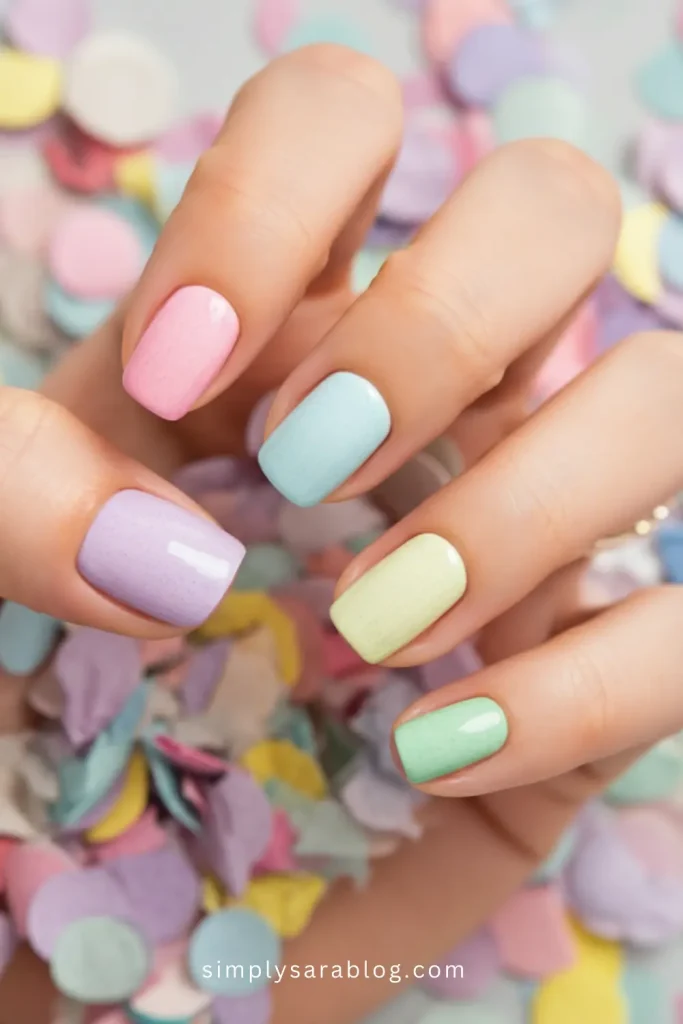
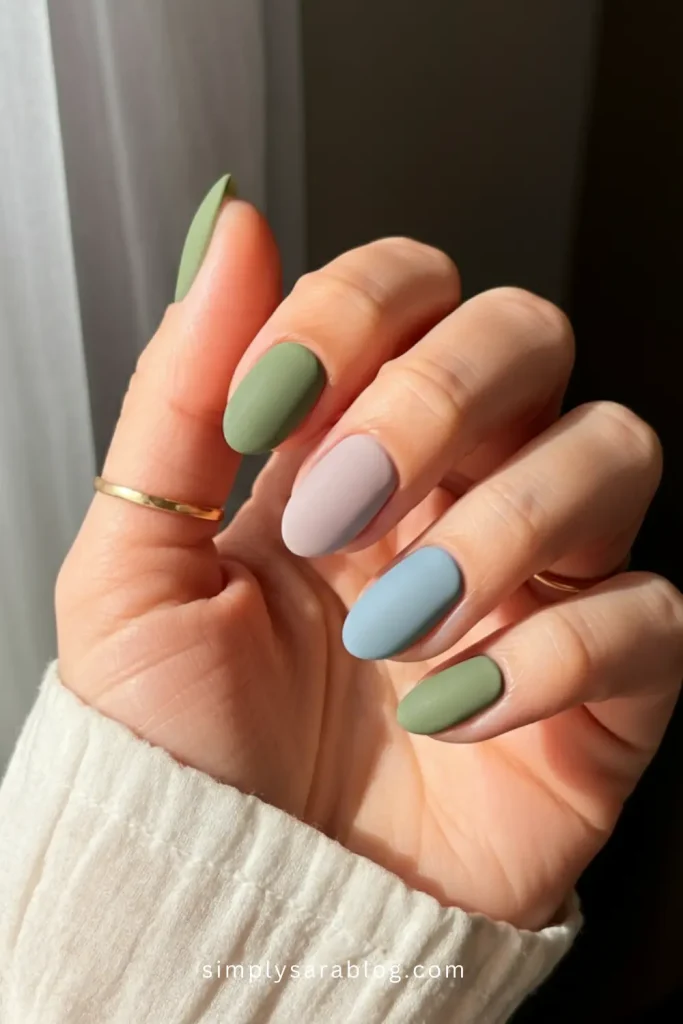
36. Pastel Spring Nails

Overview: Nothing says spring like soft pastel colors. Try alternating shades like mint green, baby pink, pale yellow, and lavender for a cheerful, polished look. It’s delicate, timeless, and perfect for the season.
Step-by-step Instructions:
- Apply a base coat to protect your nails.
- Choose four or five pastel polishes.
- Paint each nail a different color, layering for opacity.
- Seal with a glossy top coat.
Tools Needed: Base coat, pastel nail polishes, top coat, nail buffer.
Ideal For: Anyone who loves a classic but playful spring vibe.
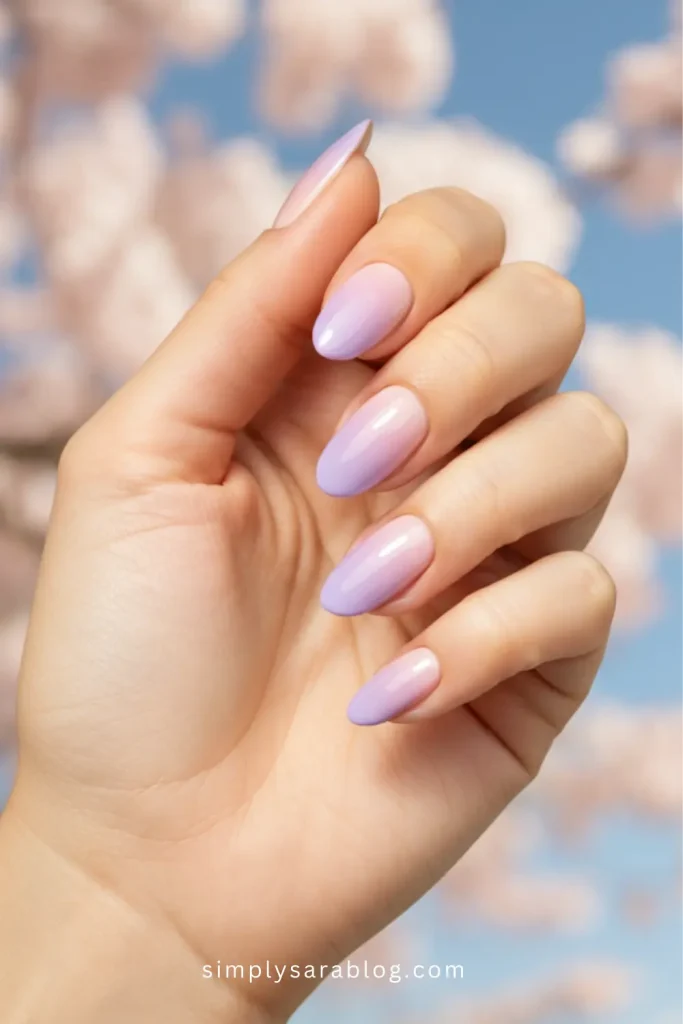
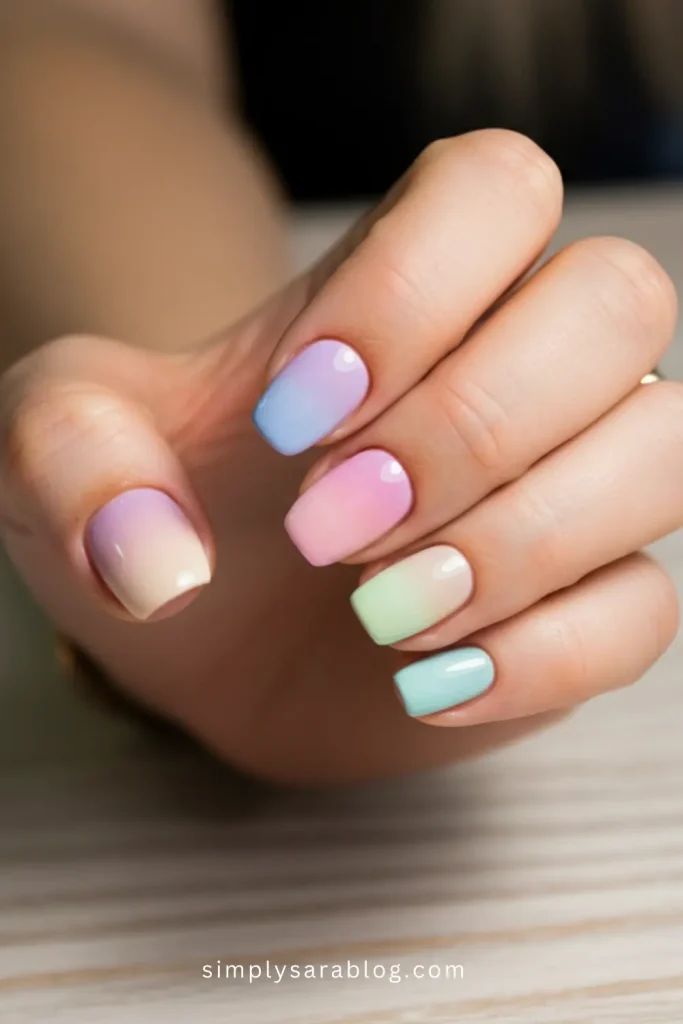
37. Winter-to-Spring Gradient Nails
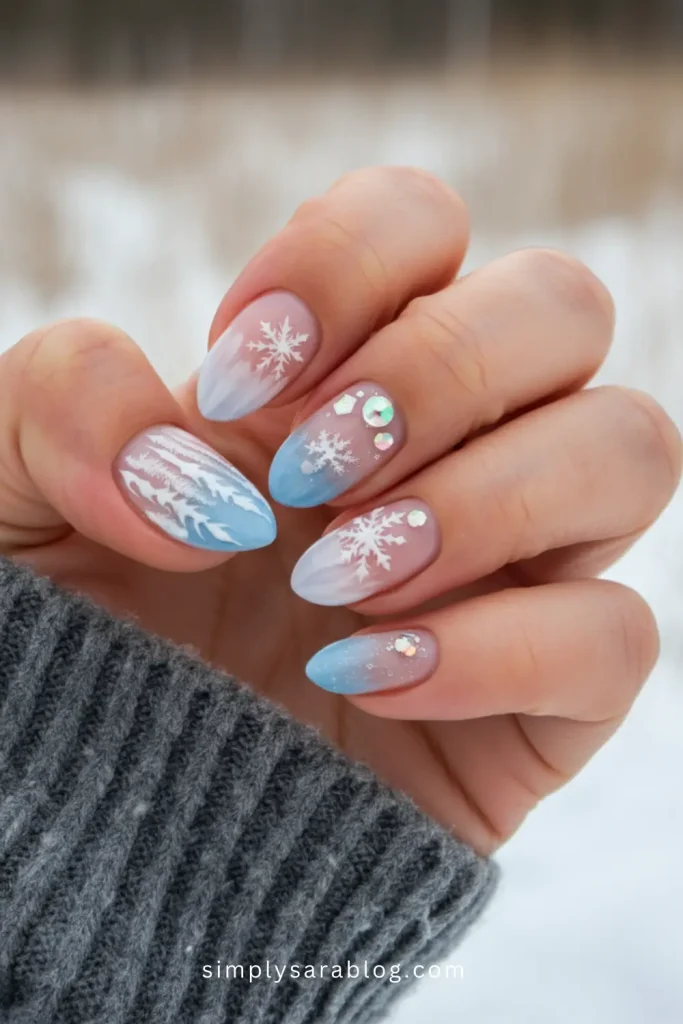
Overview: Blend winter tones into spring hues with a gradient design. Think icy blue fading into soft pink. This design embodies that seasonal transition like a dream.
Step-by-step Instructions:
- Start with a base coat.
- Apply the lighter color (like pink) as your base.
- Use a sponge to blend an icy blue into the pink.
- Clean edges with a nail brush and finish with a top coat.
Tools Needed: Base coat, gradient sponge, two nail colors, nail cleanup brush, top coat.
Ideal For: Those who can’t fully say goodbye to winter hues just yet.
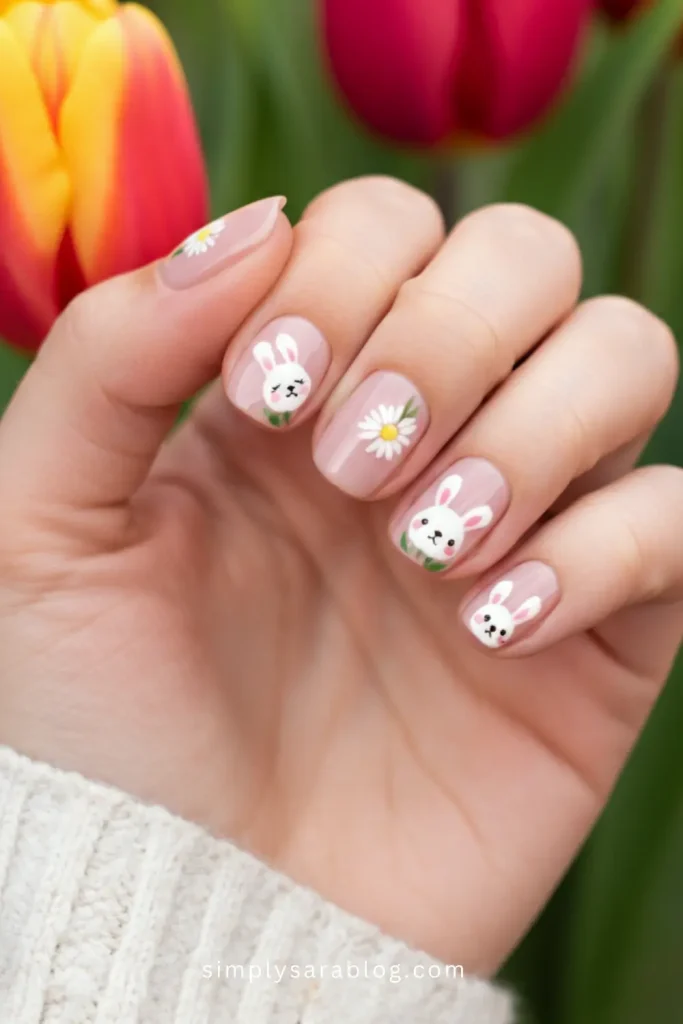
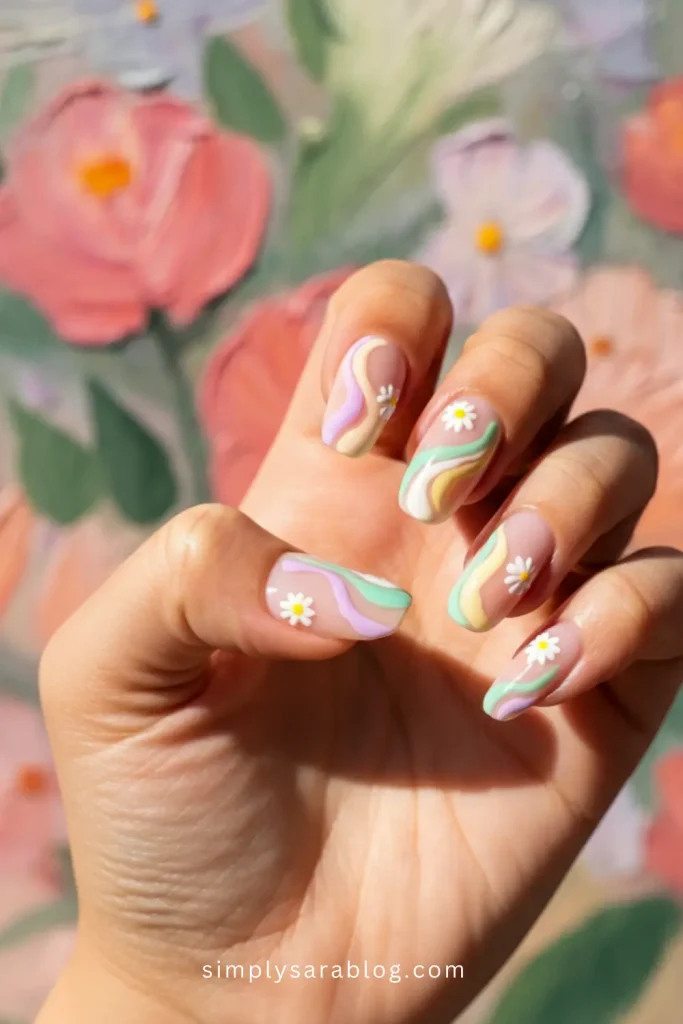
38. Subtle Spring Daisies
Overview: Simple daisies on neutral nails? Count me in! This design is sweet, minimal, and adds a whimsical touch to your nails without being too loud.
Step-by-step Instructions:
- Apply a sheer beige or neutral pink polish as the base.
- Use a dotting tool to create white petals.
- Add a small yellow dot in the center of the petals.
- Seal with a top coat.
Tools Needed: Sheer base polish, white and yellow polishes, dotting tools, top coat.
Ideal For: A soft, romantic look perfect for picnics or brunch dates.
39. Ancient Spring Vibes
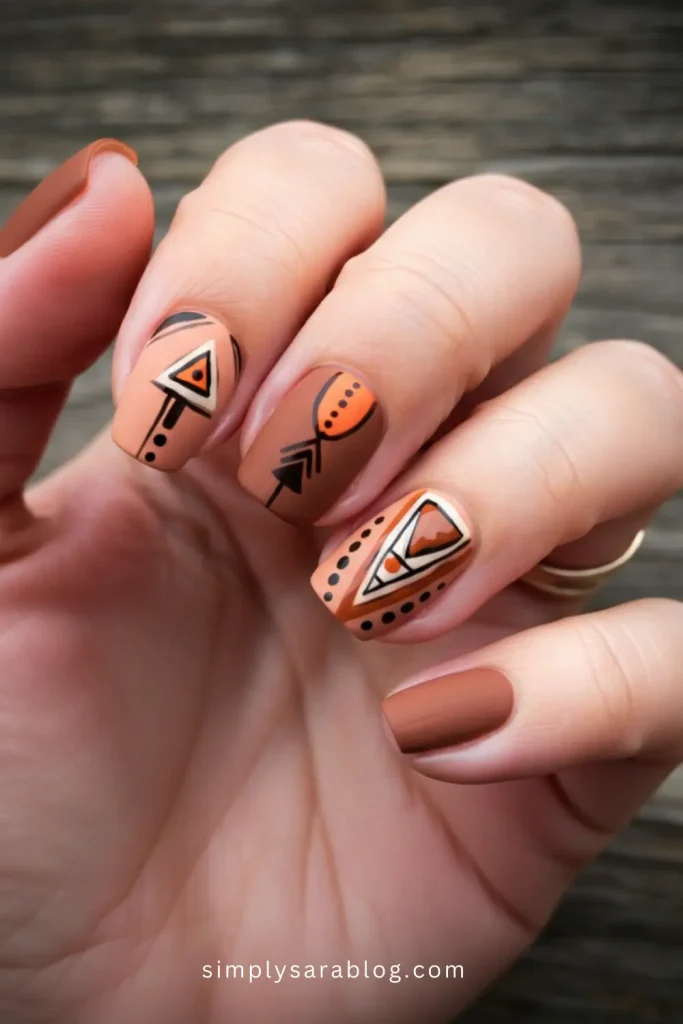
Overview: Channel ancient art with earthy tones and geometric patterns. Browns, greens, and soft oranges with bold shapes exude modern boho vibes.
Step-by-step Instructions:
- Start with an earthy-tone base coat.
- Use a thin striping brush to sketch triangles, dots, and lines in contrasting colors.
- Allow the design to dry, then finish with a matte top coat.
Tools Needed: Nail art brushes, earth-tone nail polishes, matte top coat.
Ideal For: Anyone who loves a unique, artistic look with a vintage twist.
40. Aesthetic Florals
Overview: Think soft floral detailing on pastel or nude nails. Small roses or wildflowers drawn delicately can make your nails look like mini canvases.
Step-by-step Instructions:
- Paint your nails a neutral or soft pastel base color.
- Use a fine brush to draw tiny flowers with two shades of one color.
- Add green strokes for leaves.
- Seal the look with a transparent top coat.
Tools Needed: Nail art brush, pastel and green polishes, top coat.
Ideal For: Nature lovers who want understated elegance.
41. Spring Shellac Shine

Overview: Get long-lasting shine with a shellac polish featuring light, glossy spring shades like peach, lilac, or pearlescent white.
Step-by-step Instructions:
- Prep nails with a base coat.
- Apply two layers of shellac polish of your choice, curing under an LED/UV lamp after each.
- Finish with a high-shine top coat and cure again.
Tools Needed: Shellac polish, LED/UV lamp, base and top coat.
Ideal For: Busy bees who need long-lasting, chip-proof nails.
42. SNS Spring Pastels
Overview: Nail powder-dipping systems (SNS) meet spring pastels for a dreamy long-lasting look. You won’t need polish—just dip and go!
Step-by-step Instructions:
- Buff and clean your nails.
- Apply a bonding base, dip nails into pastel-colored powder.
- Repeat until you achieve the desired color depth.
- Add an activator and finish with a top coat.
Tools Needed: SNS nail-dipping powders, base bond, activator, top coat.
Ideal For: Minimal effort but salon-quality nails.
43. Late Spring Blooms
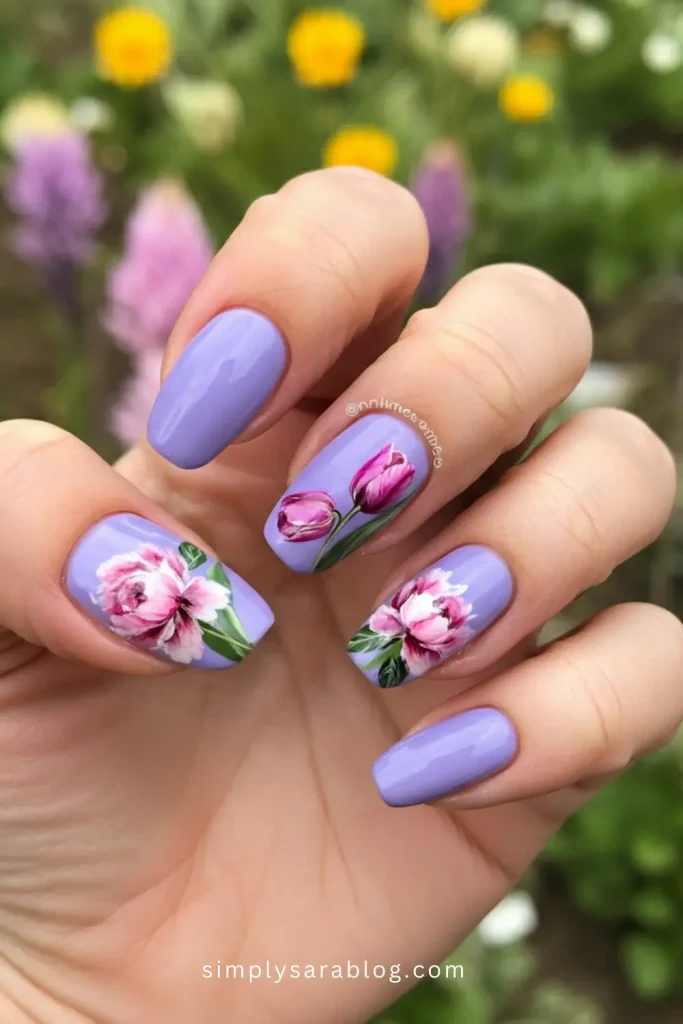
Overview: Late spring calls for bolder florals and richer tones. Picture soft lavender adorned with detailed peonies or tulips. Perfect for showcasing the full bloom of the season on your nails with intricate yet lively designs.
Step-by-step Instructions:
- Apply a lavender or soft pink base coat.
- Use a fine nail art brush to paint tiny peonies or tulips with varying shades.
- Add thin green stems for definition.
- Seal with a glossy top coat.
Tools Needed: Lavender or pink polish, nail art brushes, floral-toned polishes, top coat.
Ideal For: Celebrating late spring in full floral glory.
44. One-Color Wonders
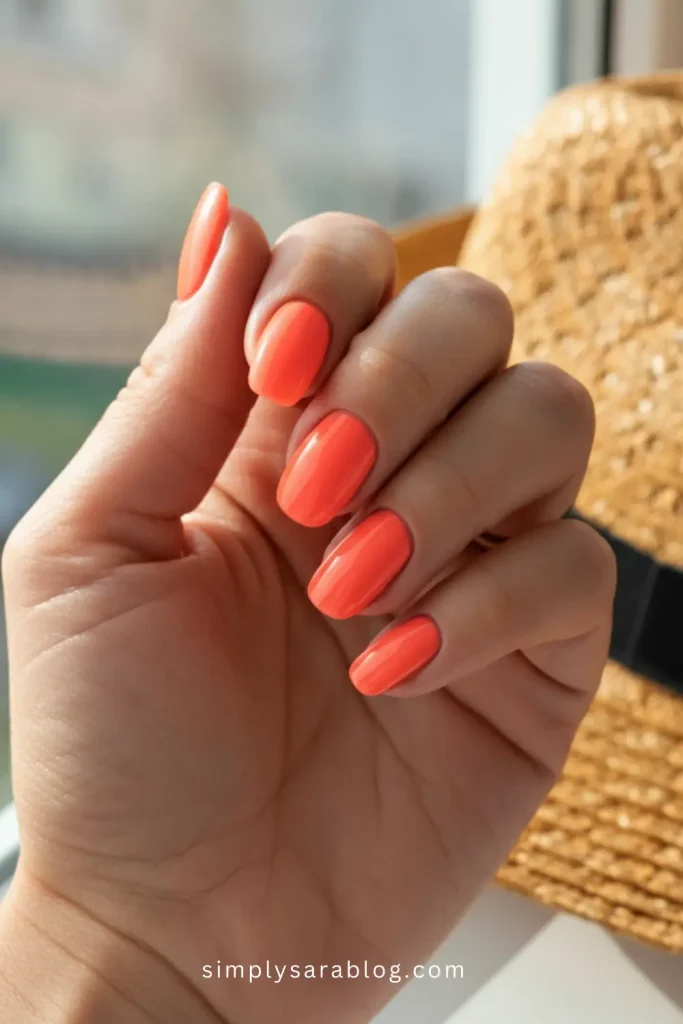
Overview: Spring doesn’t always need extravagant designs. A single bold color—like coral, mint green, or buttercup yellow—makes a statement that’s chic, fresh, and easy to pull off.
Step-by-step Instructions:
- Apply a clear base coat to prep your nails.
- Choose a vibrant spring shade and paint evenly in two coats.
- Finish with either a matte or glossy top coat for your desired look.
Tools Needed: Base coat, single spring nail polish, top coat.
Ideal For: Minimalists who love bold simplicity.
45. Spring-Manicure Staples

Overview: Think of this as a hybrid between nail art and a salon-perfect manicure. Clean cuticles, a natural nail shape, and an understated design, like tiny hearts at the base or micro dots.
Step-by-step Instructions:
- Trim, file, and clean your nails.
- Select a sheer pink or nude polish for a natural base.
- Add tiny designs with nail stickers or a fine brush.
- Seal it with a glossy top coat.
Tools Needed: Nail care tools, sheer or nude polish, stickers or thin brush, top coat.
Ideal For: Enhancing natural nails for a polished yet subtle effect.
Text Image Prompt: Naturally manicured nails with tiny hearts or dots, holding a cup of herbal tea.
46. Matte Florals
Overview: Bring spring flowers to matte nails for a trendy, muted take on florals. The matte finish adds depth and sophistication to pastel hues and intricate flower designs.
Step-by-step Instructions:
- Start with a matte base coat.
- Paint a soft pastel base color.
- Use nail art brushes to draw matte florals in complementing tones.
- Finish with a matte top coat to lock it in.
Tools Needed: Matte base polish, matte nail polishes, nail art tools, matte top coat.
Ideal For: Fashion-forward folks who love understated yet elegant designs.
47. Minimalist Magic
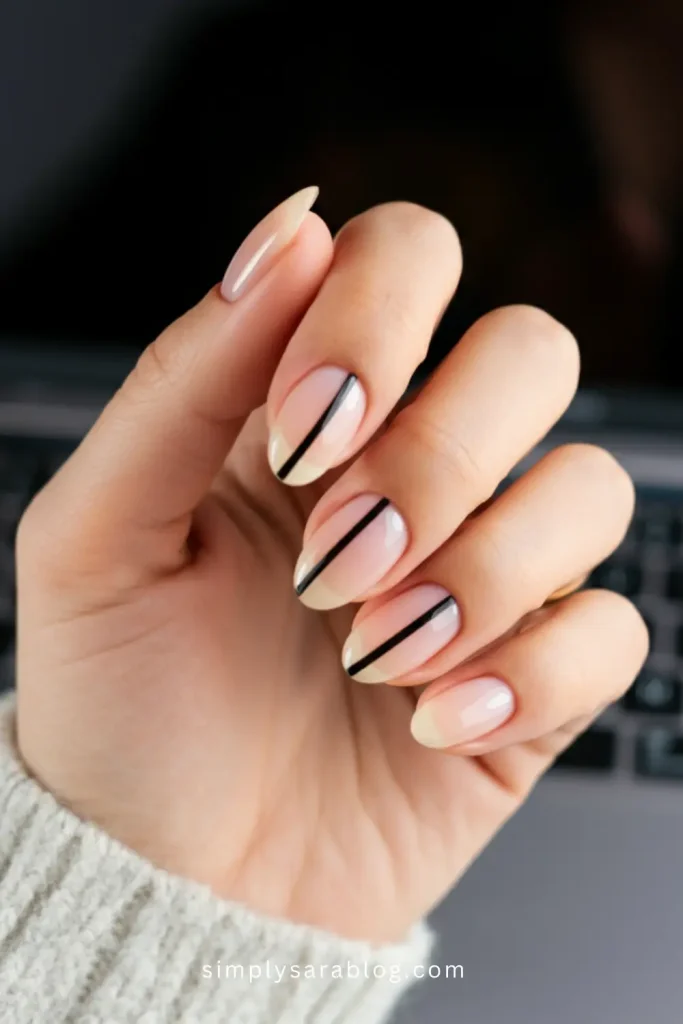
Overview: Less is more with minimalist nail art. Think skinny lines, tiny dots, or a single diagonal stripe on a neutral base for a clean, modern vibe.
Step-by-step Instructions:
- Apply a sheer nude or beige base coat.
- Use striping tape for precise lines or dotting tools for small dots.
- Keep the design minimal and spaced out.
- Seal with a clear top coat.
Tools Needed: Sheer base polish, striping tape or dotting tools, top coat.
Ideal For: Fans of clean, geometric looks that go with any outfit.
48. Spring Multi-Colors
Overview: Celebrate spring with all the colors! Incorporate mini rainbows, abstract color blocks, or mismatched pastel hues across your nails. It’s playful and perfect for those who adore lively designs.
Step-by-step Instructions:
- Apply a base coat.
- Select a mix of pastel colors.
- Paint each section of the nail in abstract blocks or alternating shades.
- Finish with a glossy top coat to enhance shine.
Tools Needed: Base coat, multiple pastel polishes, detailing brush, top coat.
Ideal For: The bold and adventurous, ready to light up their nails.
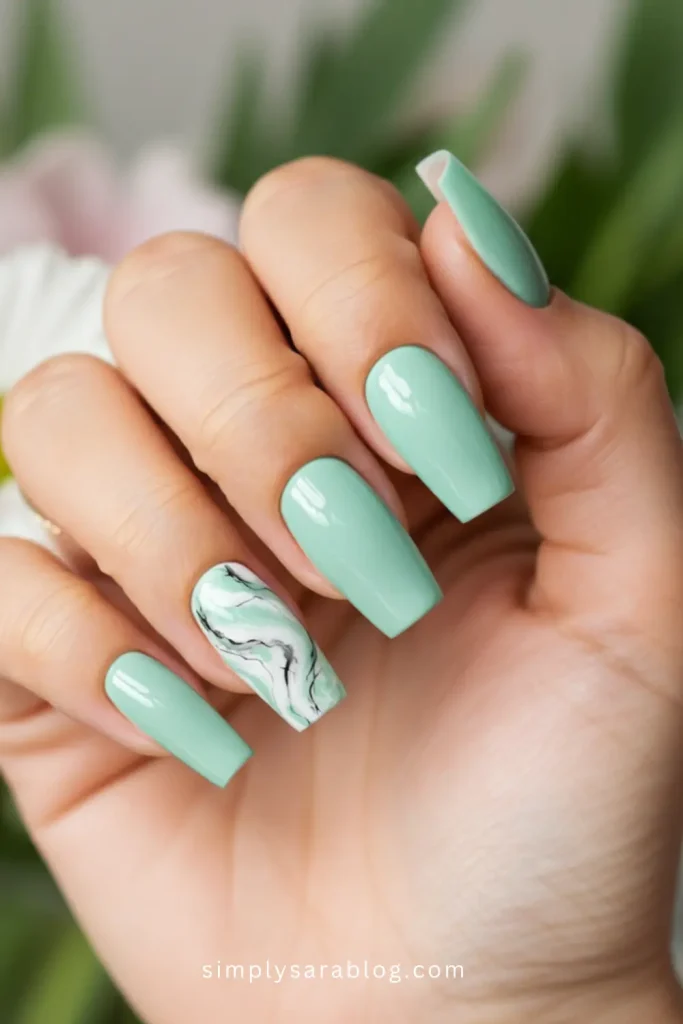
49. Marble Nails
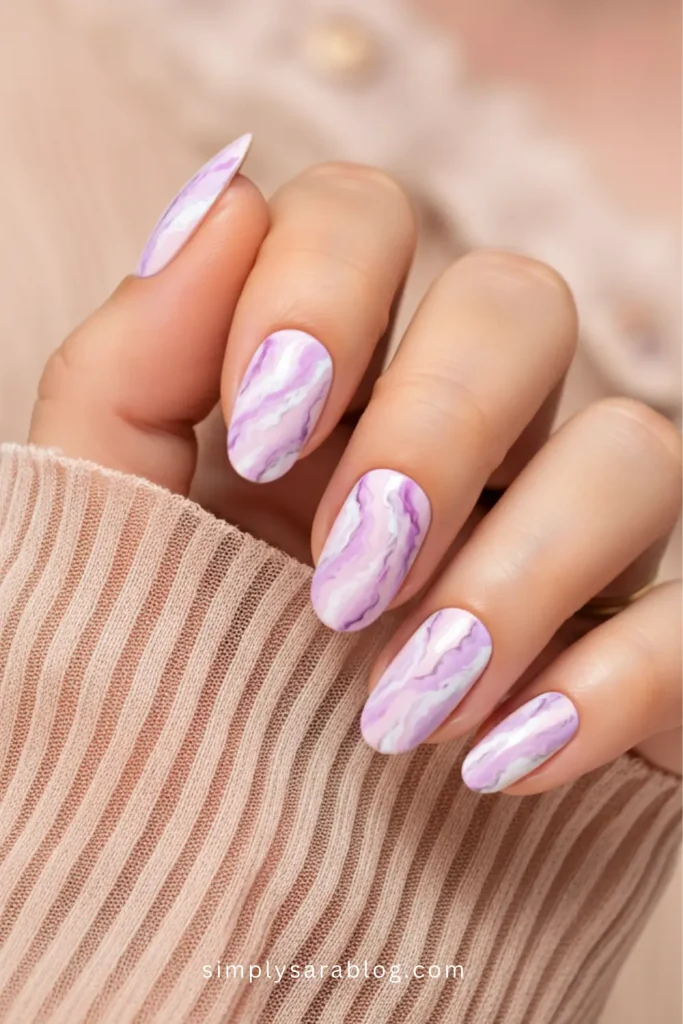
Overview: Marble nails bring an undeniably elegant look. This spring, update it with soft pinks, whites, or lilac marbling. They’re classy, sleek, and impressively high-end looking.
Step-by-step Instructions:
- Apply a white or light pink base coat.
- Use a detail brush to swirl darker shades for a marble effect.
- Blend with a tiny sponge if necessary.
- Lock in with a top coat.
Tools Needed: White/light base polish, darker accent polishes, nail art brush, top coat.
Ideal For: A chic, sophisticated look for springtime events.
50. Minimal Matte Pastels
Overview: Combine matte finishes with pastel colors for an effortlessly stylish look. Muted greens, soft blues, or pale lavender with a velvety matte finish scream understated luxury.
Step-by-step Instructions:
- Start with a matte base coat for smooth application.
- Choose a soft pastel polish and apply two thin coats.
- Finish with a matte top coat for that perfect velvety feel.
Tools Needed: Matte base polish, pastel shades, matte top coat.
Ideal For: A simple yet trendy design to match any daytime outfit.
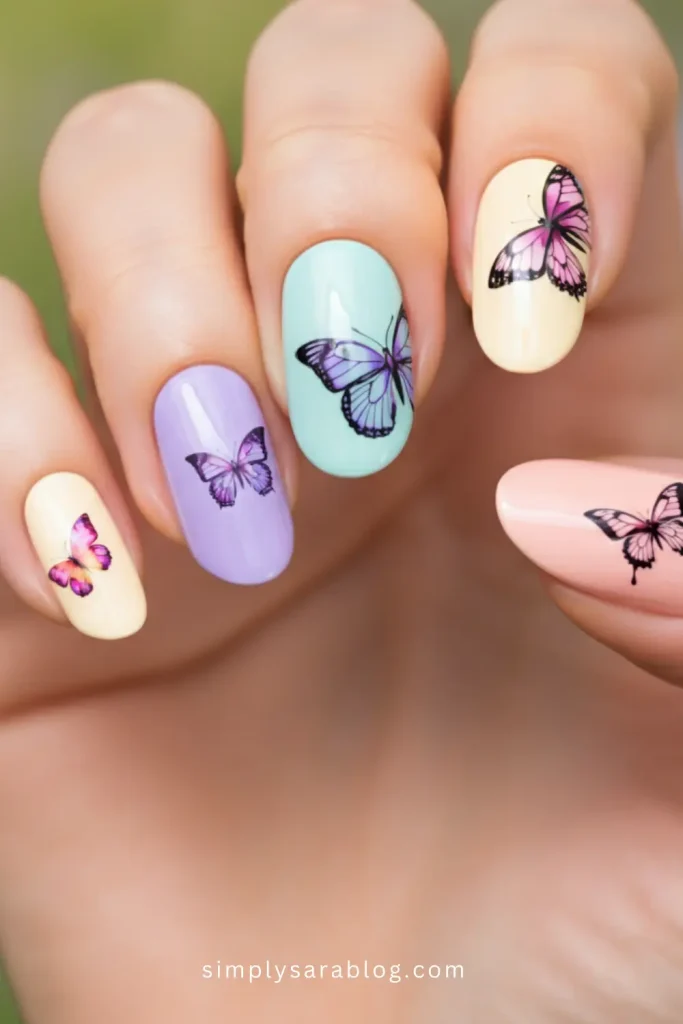
51. Spring Butterfly Nails
52. Spring Ballerina Nails
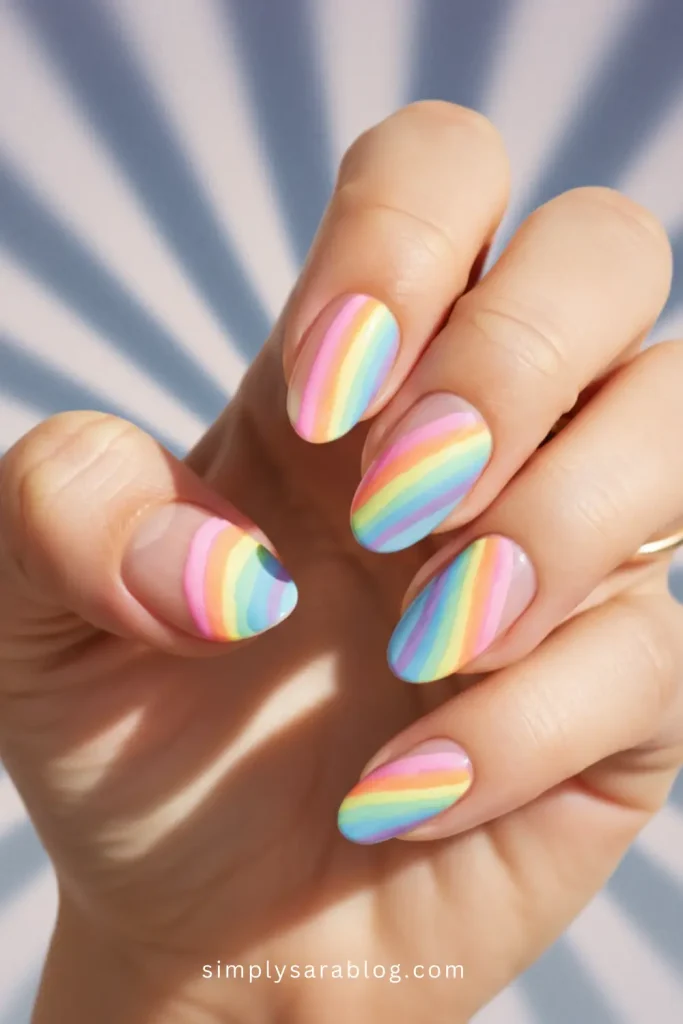
53. Spring Rainbow Nails
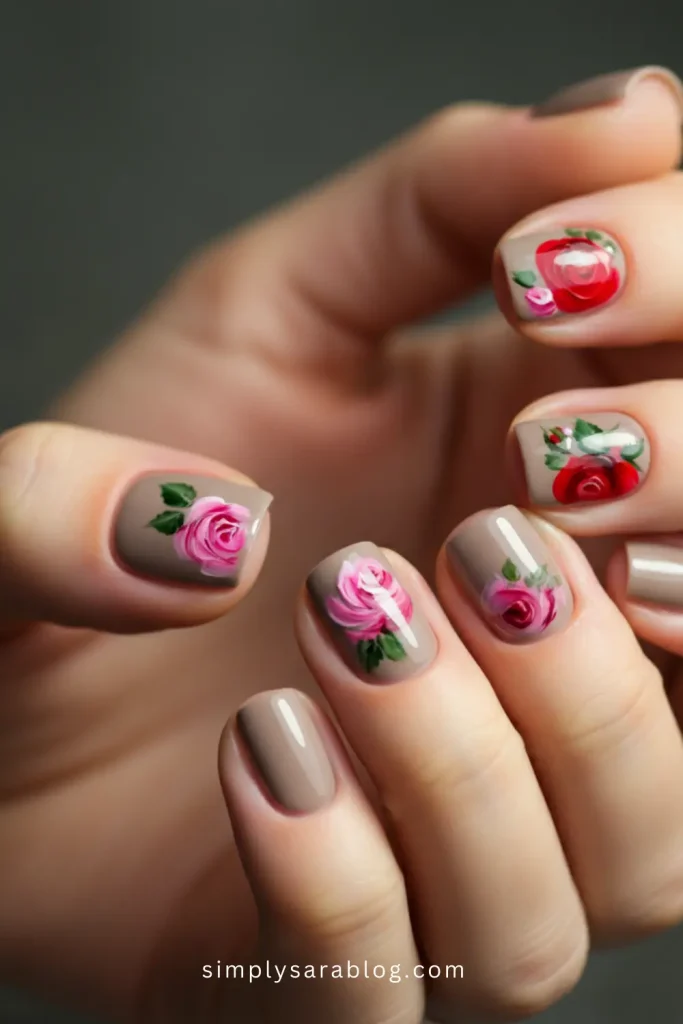
54. Spring Rose Nails
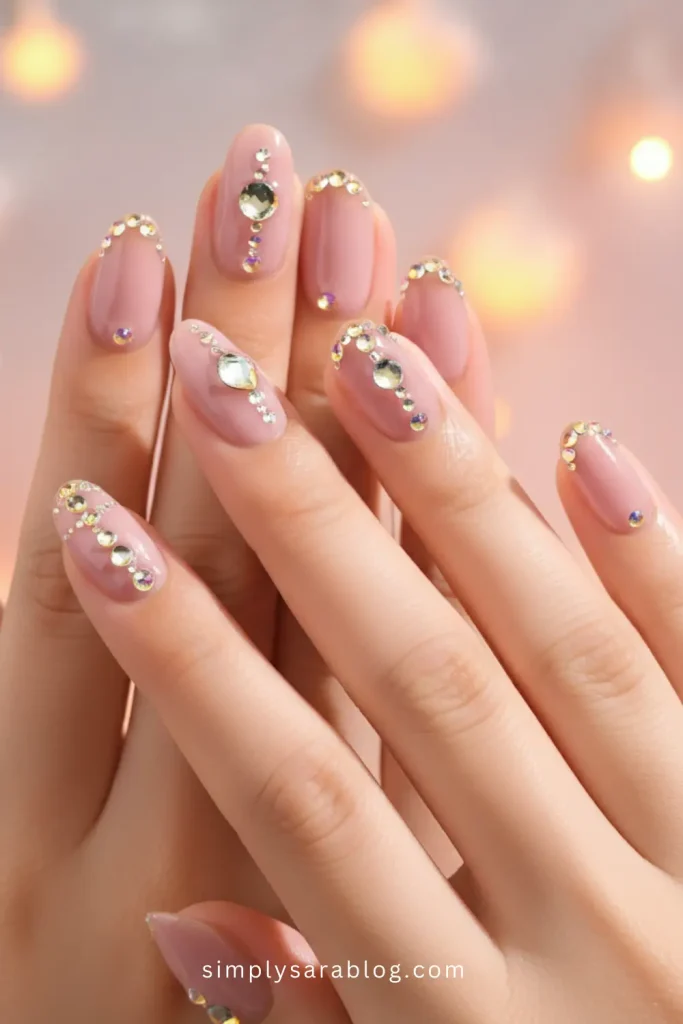
55. Spring Rhinestone Nails
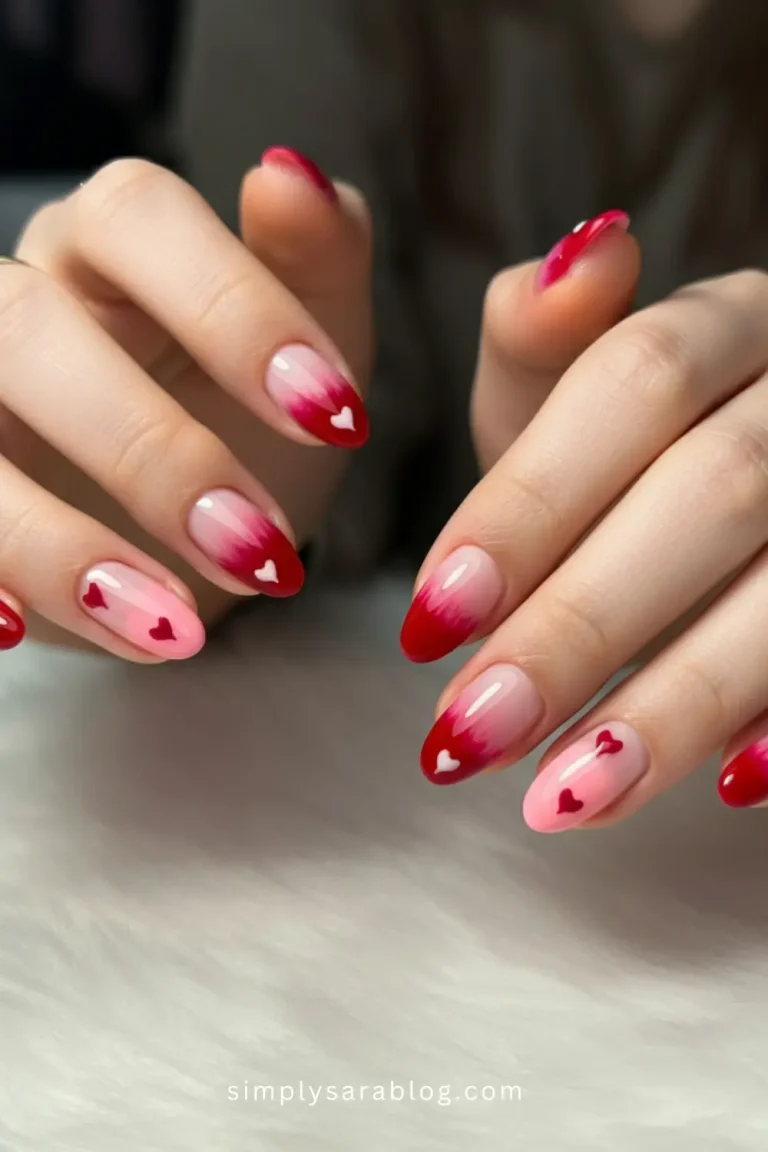
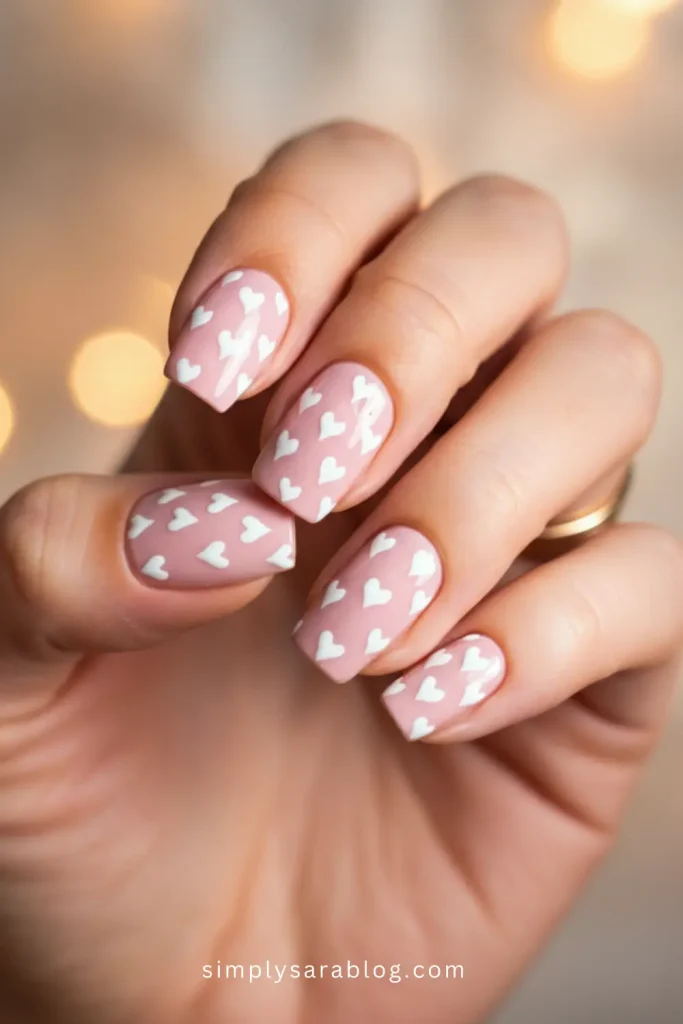
56. Spring Heart Nails
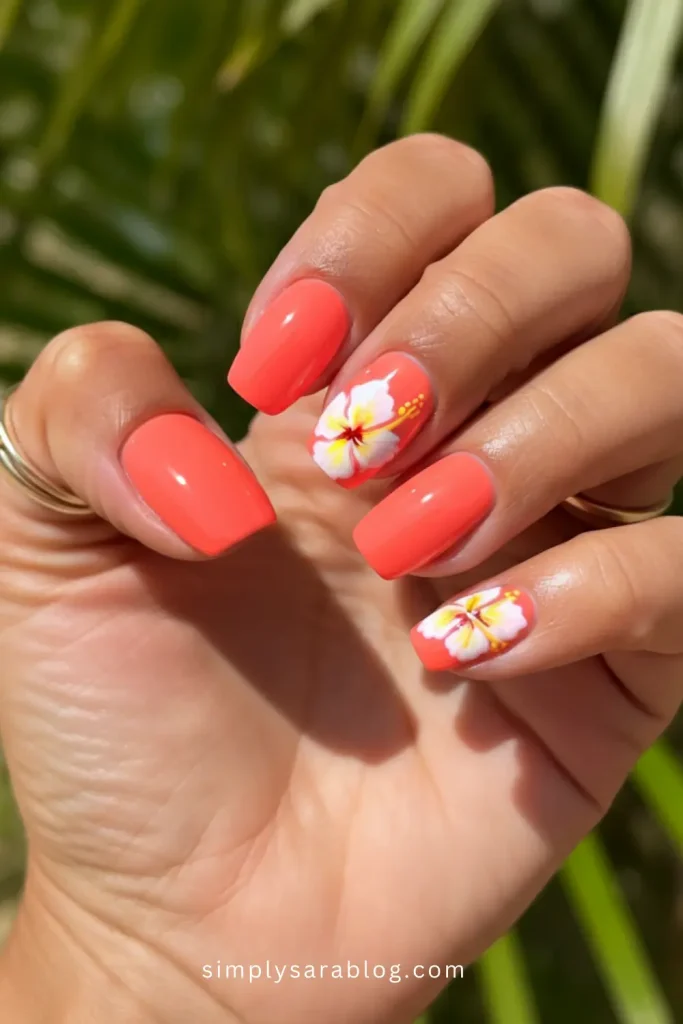
57. Spring Hibiscus Nails
58. Spring Lilac Nails
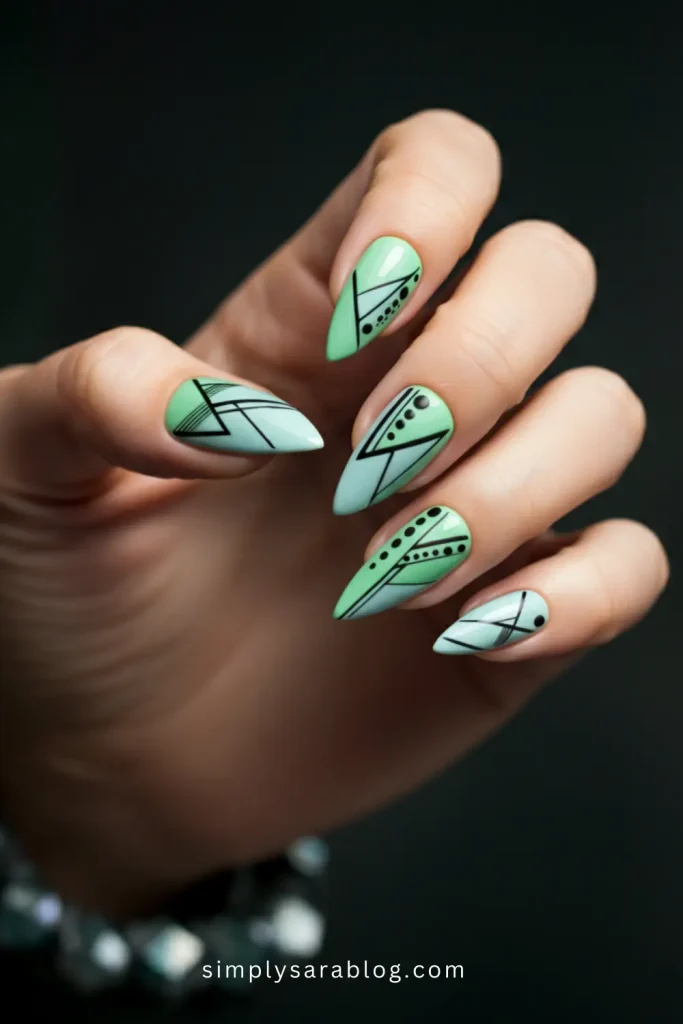
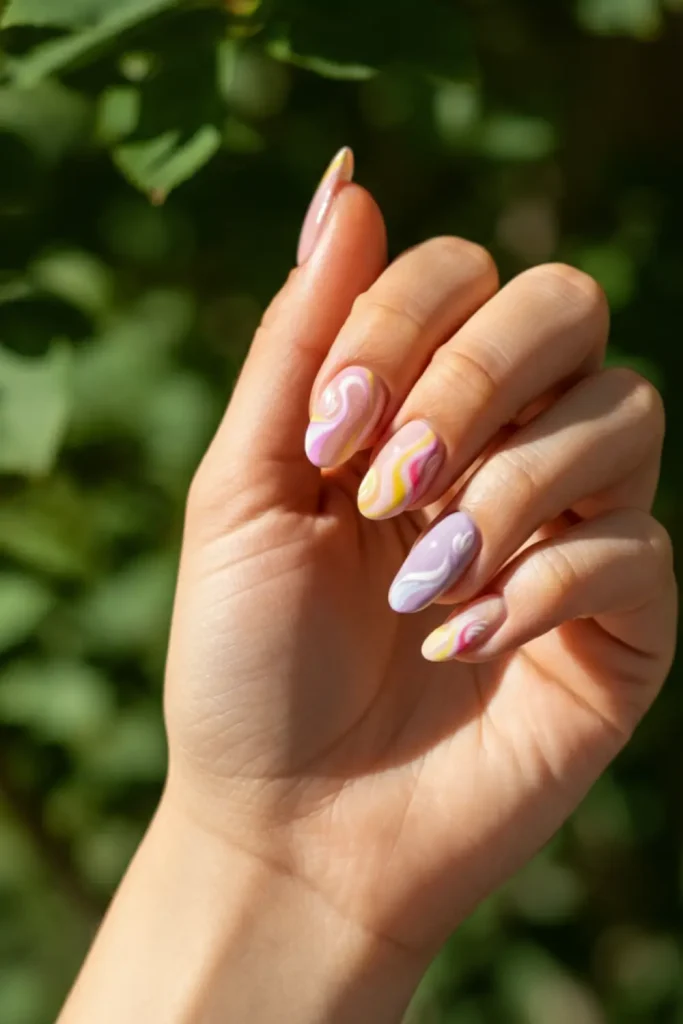
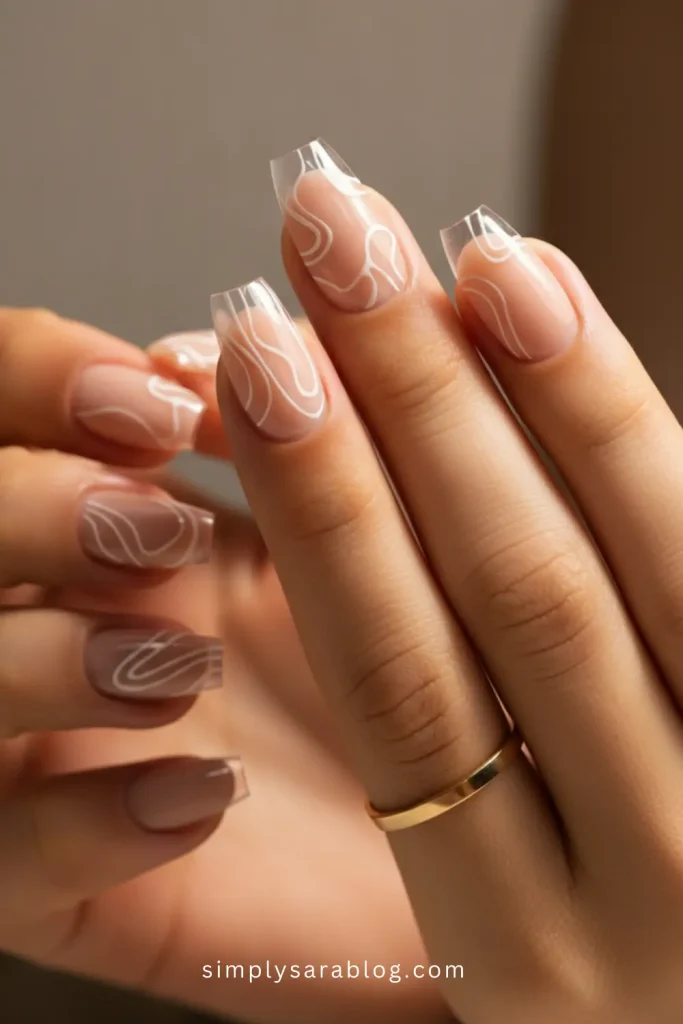
59. Spring Line Art Nails
Tips for Choosing the Right Spring Nail Art
Make your nail art stand out by keeping these tips in mind when choosing a design:
- Match Your Style: Whether you’re playful, romantic, or minimalist, go for designs that align with your personality.
- Consider the Occasion: Soft florals for daytime outings or rhinestones for evening elegance—pick accordingly.
- Seasonal Colors: Stick to pastels, muted tones, and floral-inspired shades for a spring vibe.
- Keep Nail Shape in Mind: Certain designs like ballet nails look stunning on almond or coffin-shaped nails.
- DIY vs. Salon: Simplistic designs like line art are easier for DIY, while intricate details like rhinestones may need professional precision.
FAQ
How long does spring nail art last?
With proper care, most nail art designs can last up to 2-3 weeks. Using a protective top coat can extend the life of your manicure.
Can I create these designs at home without a salon?
Absolutely! While some designs, like line art or pastel rainbow, are DIY-friendly, you might want to visit a nail artist for more intricate looks like roses or hibiscus.
Are rhinestones hard to maintain on nails?
Not at all! Just be gentle with your hands and avoid excessive water exposure. You can secure rhinestones further with a strong top coat.
Which nail shape works best for spring nail art?
Spring designs look great on most shapes but tend to pop on almond or coffin nails. Ballerina nails also work wonderfully for floral and dainty patterns.
How do I take care of my nails after getting spring nail art?
Use nail oil daily, avoid harsh chemicals, and wear gloves when doing chores to protect the art and maintain healthy nails.
What is the nail color for spring?
Spring nail colors often include soft and cheerful shades like lavender, baby pink, mint green, and sky blue. Coral tones and muted nude shades are also popular for their fresh, versatile appeal. Adding sparkles or floral accents to these hues can beautifully enhance the seasonal look.
Wrapping It Up
spring nail inspo is your chance to express yourself in the most vibrant, creative way.
Whether you’re a fan of soft and subtle or bright and bold, there’s something on this list for everyone. I hope these ideas inspire you to try something fresh, fun, and totally you.
Happy spring—and happy painting!
All Image Source Link: Pinterest
This site contains affiliate links. I may earn a small commission, at no extra cost to you.