Best 15 Short New Year’s Nail Ideas
As the New Year approaches, it’s the perfect time to jazz up your look with some fabulous short New Year nail ideas!
Whether you’re heading to a party or want to feel festive, your nails can be a fun way to celebrate.
Trust me, I’ve tried a bunch of designs, and I can’t wait to share my top picks with you!
- Glittery Champagne Toast
- Midnight Sky
- Festive Fireworks
- Golden Confetti
- Winter Wonderland
- Sparkling Snowflakes
- New Year’s Countdown
- Elegant Ombre
- Metallic Magic
- Simple Stripes
- Classic Red & Gold
- Starry Night
- Bold Black & White
- Pastel Party
- Shimmering Silver
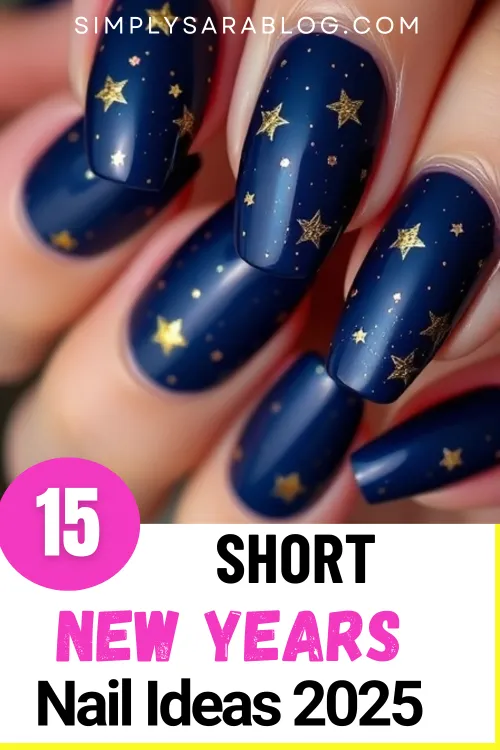
top 15 Short New Year’s Nail
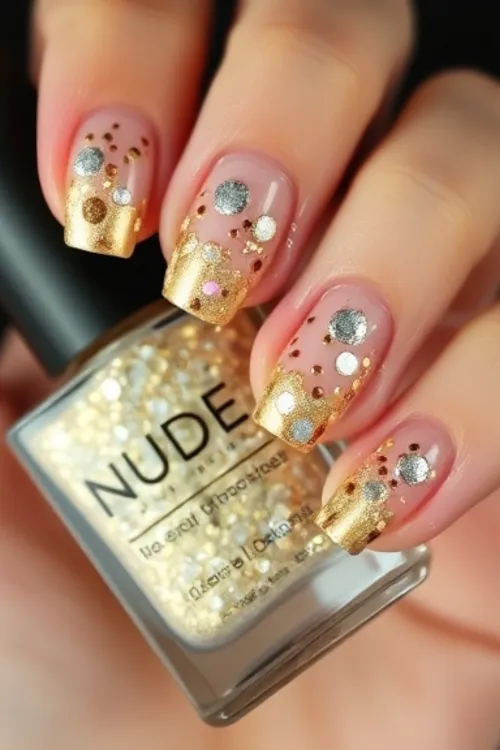
1. Glittery Champagne Toast
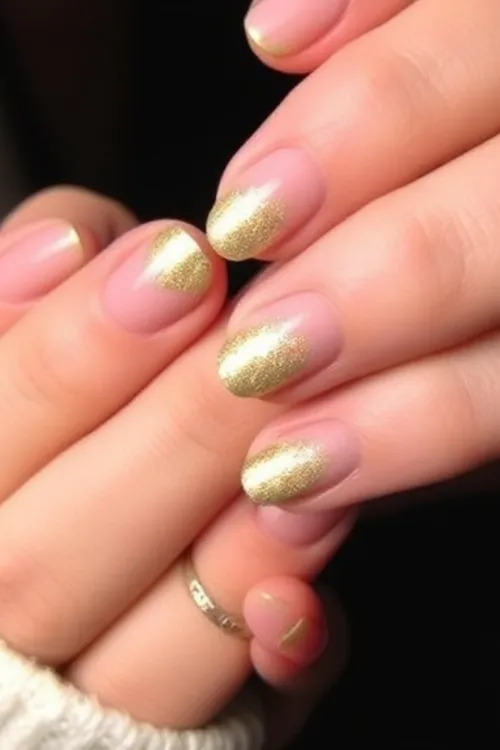
Overview: Celebrate the New Year with a design that captures the essence of a champagne toast! This look combines soft nude with sparkling gold glitter, creating an elegant touch to your short nails.
Step-by-Step Instructions:
- Apply a nude base coat.
- Once dry, add a layer of gold glitter polish to the tips.
- Seal with a top coat for extra shine.
Necessary Tools:
- Base coat
- Nude nail polish
- Gold glitter polish
- Top coat
- Nail brush
Ideal For: New Year’s Eve parties and celebrations.
2. Midnight Sky
Overview: Inspired by the night sky, this design features deep blue polish with tiny silver stars. It’s perfect for those who want a celestial vibe as they ring in the New Year.
Step-by-Step Instructions:
- Paint your nails a deep navy blue.
- Use a dotting tool to add small silver stars.
- Finish with a glossy top coat.
Necessary Tools:
- Base coat
- Navy blue nail polish
- Silver nail polish
- Dotting tool
- Top coat
Ideal For: Star gazers and night owls.
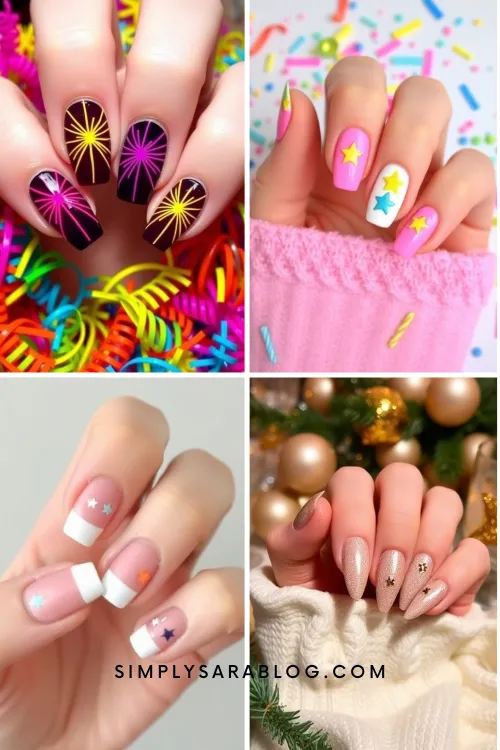
3. Festive Fireworks
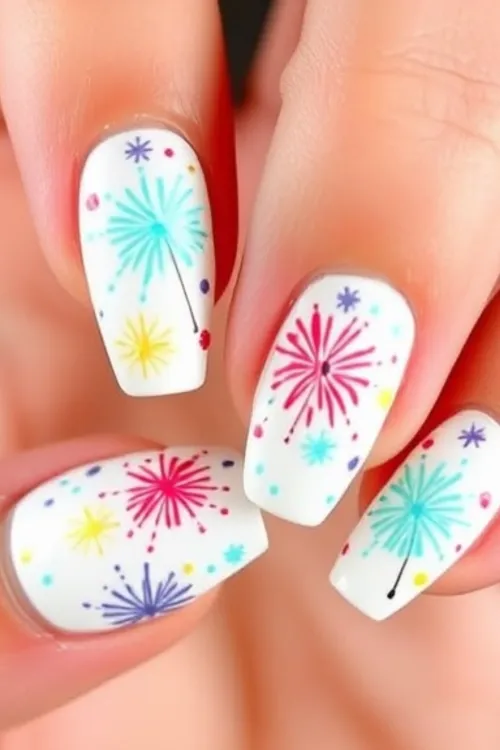
Overview: Bring the excitement of fireworks to your fingertips! This colorful design uses bold colors and sparkles to create a dazzling effect that screams celebration.
Step-by-Step Instructions:
- Start with a white base coat.
- Use a thin brush to paint colorful fireworks.
- Add glitter to enhance the effect and seal with top coat.
Necessary Tools:
- Base coat
- White nail polish
- Bright colored nail polishes
- Thin nail brush
- Glitter polish
- Top coat
Ideal For: Festive gatherings and celebrations.
4. Golden Confetti
Overview: Nothing says celebration like confetti! This fun design adds splashes of gold and silver over a neutral base, making your nails look like they’re ready for the party.
Step-by-Step Instructions:
- Apply a nude or light pink base coat.
- Use a sponge to dab gold and silver glitter randomly.
- Finish with a clear top coat.
Necessary Tools:
- Base coat
- Nude/light pink nail polish
- Gold glitter
- Silver glitter
- Makeup sponge
- Top coat
Ideal For: Casual parties and gatherings.
5. Winter Wonderland
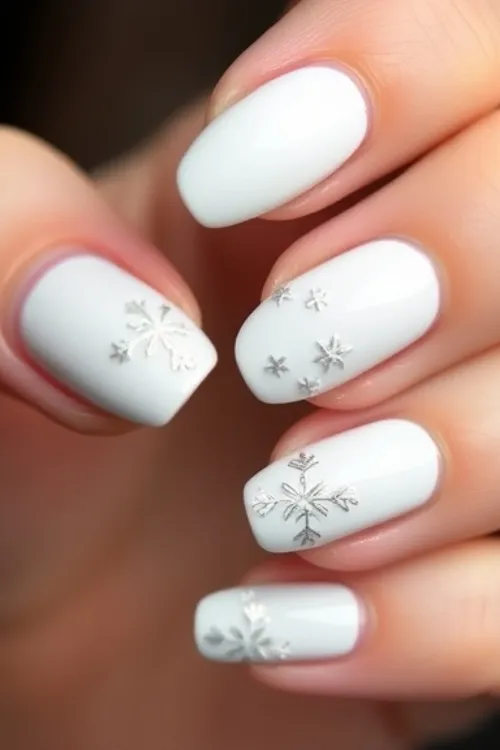
Overview: Embrace the winter season with a snowy design with white and silver accents, creating a serene and frosty look perfect for New Year’s celebrations.
Step-by-Step Instructions:
- Paint your nails white.
- Use a fine brush to draw delicate silver snowflakes.
- Seal with a glossy top coat.
Necessary Tools:
- Base coat
- White nail polish
- Silver nail polish
- Fine nail brush
- Top coat
Ideal For: Winter-themed parties and events.
6. Sparkling Snowflakes
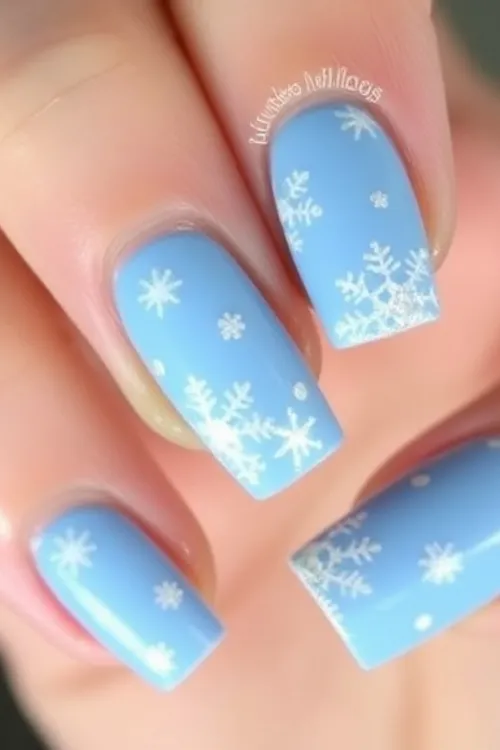
Overview: Add a touch of magic to your nails with sparkling snowflakes on a baby blue base. This design is perfect for those who enjoy a whimsical winter theme.
Step-by-Step Instructions:
- Paint your nails a soft baby blue.
- Use a dotting tool to create white snowflakes.
- Add a sprinkle of silver glitter and finish with top coat.
Necessary Tools:
- Base coat
- Baby blue nail polish
- White nail polish
- Dotting tool
- Silver glitter
- Top coat
Ideal For: Winter festivities and cozy gatherings.
7. New Year’s Countdown
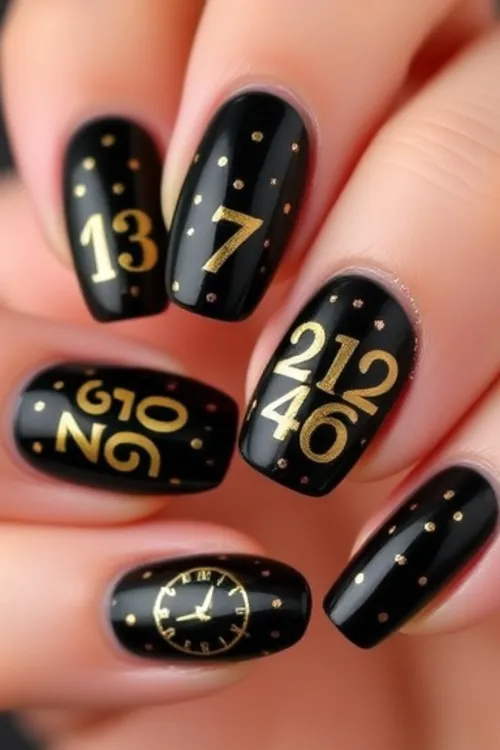
Overview: Countdown to midnight with this playful design featuring numbers and clocks. This fun look is great for those who want to celebrate the New Year’s countdown with style.
Step-by-Step Instructions:
- Apply a black base coat.
- Use gold polish to paint numbers and clock designs on each nail.
- Seal with a top coat.
Necessary Tools:
- Base coat
- Black nail polish
- Gold nail polish
- Thin nail brush
- Top coat
Ideal For: Countdown parties and celebrations.
8. Elegant Ombre
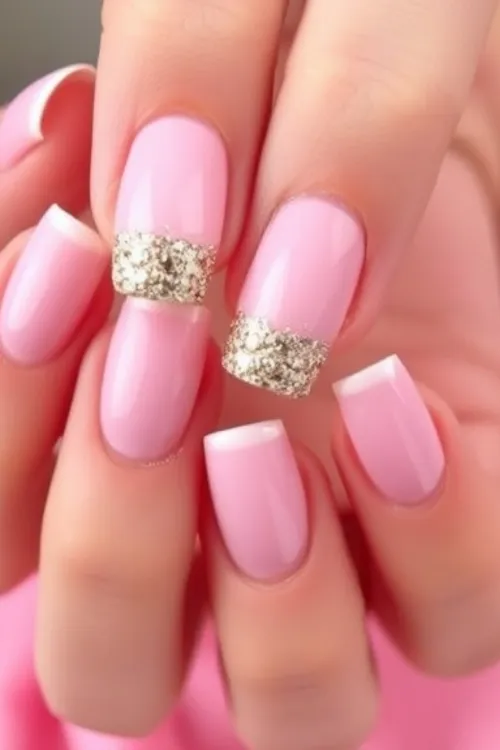
Overview: This elegant ombre design transitions from a soft pink to a shimmery gold, creating a sophisticated look that’s perfect for any New Year’s occasion.
Step-by-Step Instructions:
- Apply a soft pink base coat.
- Use a makeup sponge to blend gold at the tips.
- Seal with a glossy top coat.
Necessary Tools:
- Base coat
- Soft pink nail polish
- Gold nail polish
- Makeup sponge
- Top coat
Ideal For: Elegant parties and formal events.
9. Metallic Magic
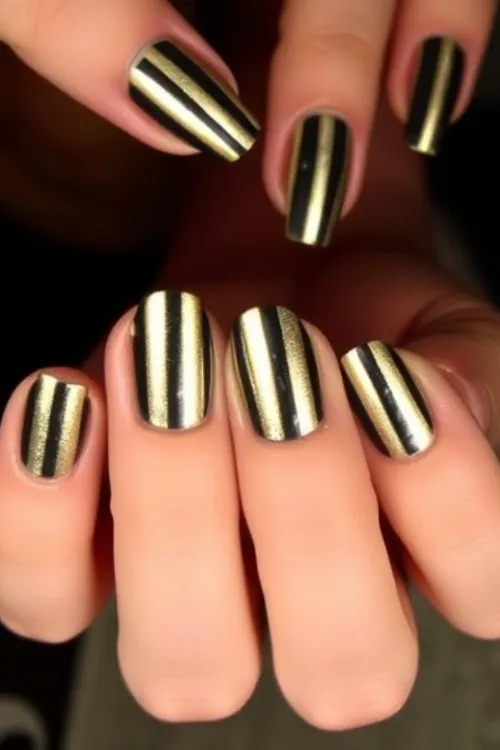
Overview: Shine bright with this metallic nail design! Using bold metallic colors, this look is perfect for those who want to make a statement as they welcome the New Year.
Step-by-Step Instructions:
- Apply a base coat of your favorite metallic color.
- Use a contrasting metallic polish to create stripes or dots.
- Finish with a top coat for extra shine.
Necessary Tools:
- Base coat
- Metallic nail polish (2 colors)
- Thin nail brush
- Top coat
Ideal For: Glamorous New Year’s parties.
10. Simple Stripes
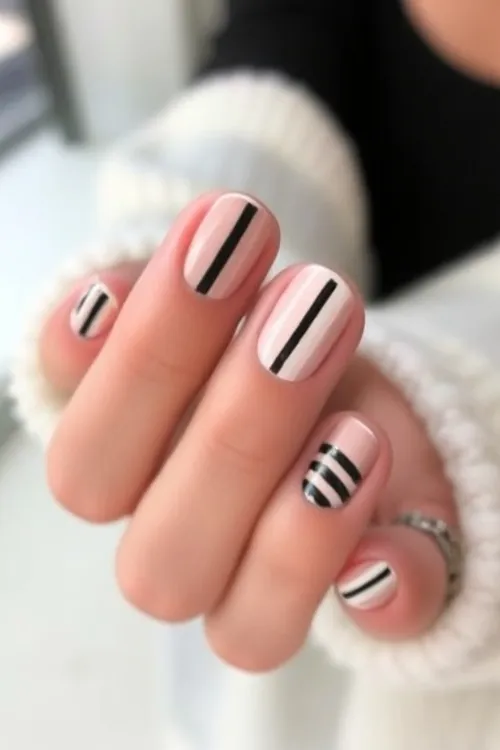
Overview: Keep it chic and simple with a striped design. This minimalist look combines two classic colors for a clean and modern aesthetic, perfect for any occasion.
Step-by-Step Instructions:
- Paint your nails with a neutral base coat.
- Use striping tape to create lines and paint over them with a contrasting color.
- Remove the tape and finish with a top coat.
Necessary Tools:
- Base coat
- Neutral nail polish
- Contrasting nail polish
- Striping tape
- Top coat
Ideal For: Casual outings and everyday wear.
11. Classic Red & Gold
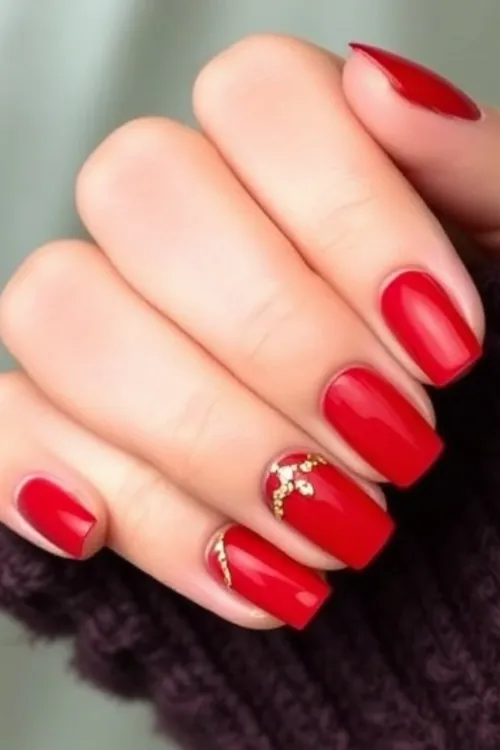
Overview: You can never go wrong with a classic! This design combines a rich red base with stunning gold accents, making your nails stand out as you celebrate the New Year.
Step-by-Step Instructions:
- Apply a red base coat.
- Use a gold polish to create dots or lines.
- Seal with a glossy top coat.
Necessary Tools:
- Base coat
- Red nail polish
- Gold nail polish
- Dotting tool or thin brush
- Top coat
Ideal For: Traditional New Year’s celebrations.
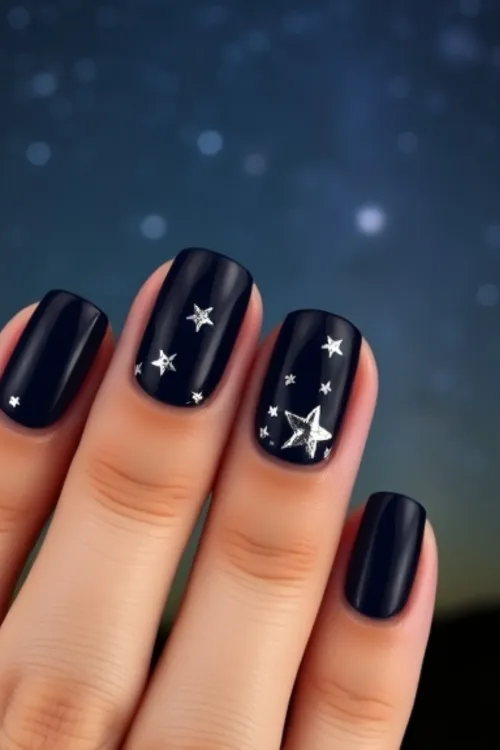
12. Starry Night
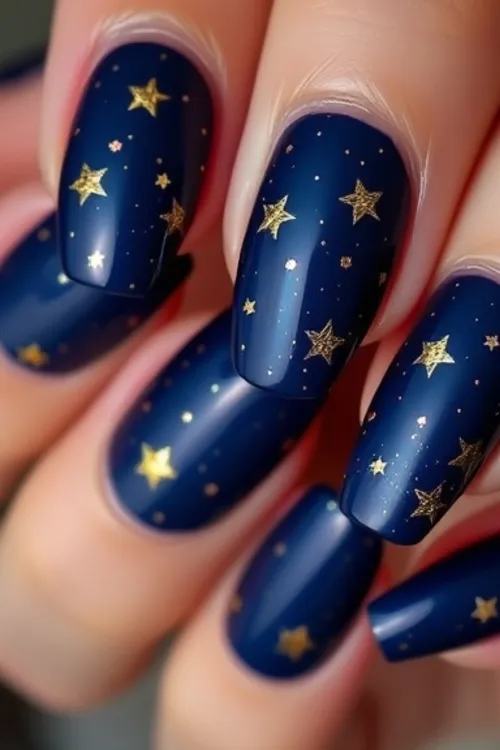
Overview: Capture the magic of a starry night with this dreamy design featuring dark blue polish and shimmering gold stars. It’s perfect for a romantic New Year’s celebration.
Step-by-Step Instructions:
- Paint your nails with dark blue polish.
- Use a dotting tool to add gold stars.
- Finish with a clear top coat.
Necessary Tools:
- Base coat
- Dark blue nail polish
- Gold nail polish
- Dotting tool
- Top coat
Ideal For: Romantic evenings and intimate gatherings.
13. Bold Black & White
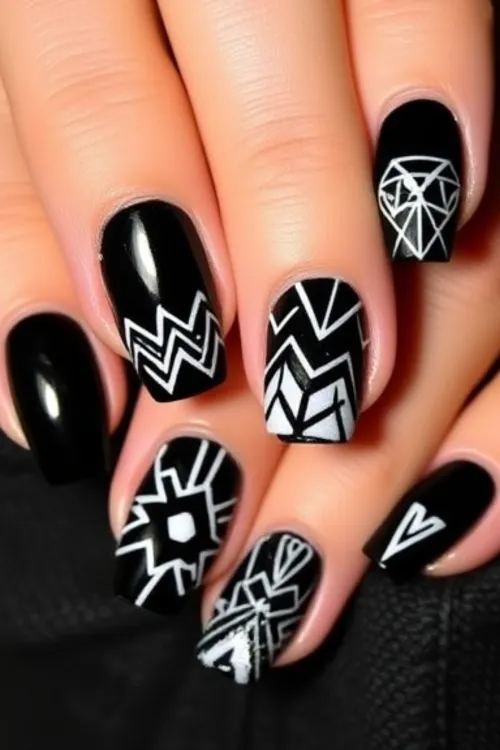
Overview: This edgy design features bold black and white contrasts, perfect for those who want to make a statement. It’s sleek and stylish, ideal for a night out.
Step-by-Step Instructions:
- Apply a black base coat.
- Use white polish to create geometric patterns.
- Seal with a top coat for shine.
Necessary Tools:
- Base coat
- Black nail polish
- White nail polish
- Thin nail brush
- Top coat
Ideal For: Edgy New Year’s parties and events.
14. Pastel Party

Overview: Celebrate the New Year with soft pastel colors! This fun design features a mix of pastel shades, perfect for those who want a playful and cheerful look.
Step-by-Step Instructions:
- Paint each nail a different pastel color.
- Use a dotting tool to add white dots or hearts.
- Finish with a clear top coat.
Necessary Tools:
- Base coat
- Pastel nail polishes (various colors)
- White nail polish
- Dotting tool
- Top coat
Ideal For: Fun and casual gatherings.
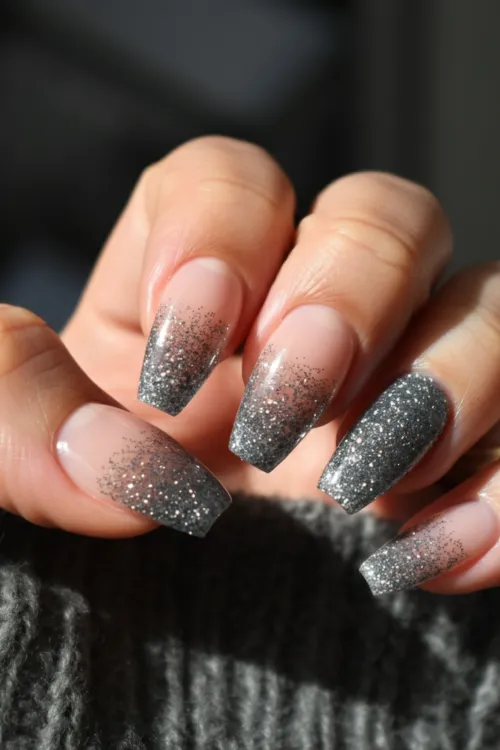
15. Shimmering Silver
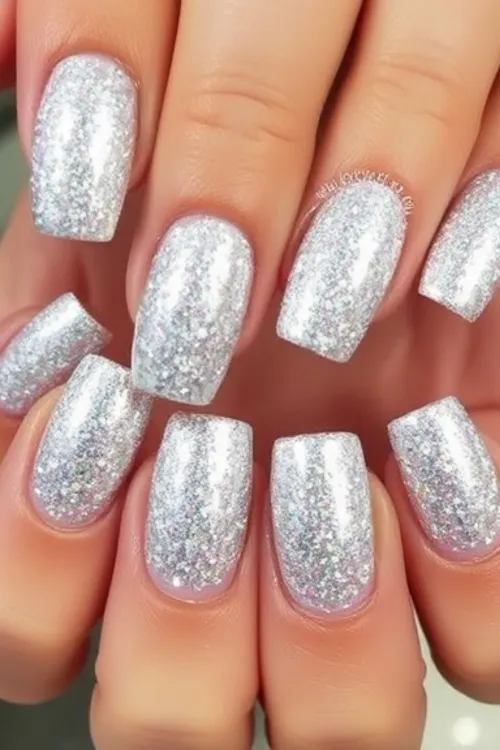
Overview: Go for glam with a shimmering silver design! This look is simple yet stunning, making it perfect for any New Year’s celebration.
Step-by-Step Instructions:
- Apply a silver base coat.
- Add a layer of glitter polish for extra sparkle.
- Seal with a top coat for durability.
Necessary Tools:
- Base coat
- Silver nail polish
- Glitter polish
- Top coat
Ideal For: Glamorous events and parties.
Choosing Tips for Nail Art Designs
When picking a nail art design for New Year’s, consider your personal style and how much time you have. If you’re short on time, go for simple designs like the Classic Red & Gold or Simple Stripes. If you’re feeling adventurous, try the Festive Fireworks or Glittery Champagne Toast. Remember, your nails should reflect your personality and the vibe of the celebration!
FAQs
1. What nail polish is best for short nails?
Opt for quick-drying, chip-resistant formulas that offer vibrant colors and good coverage.
2. How can I make my nail art last longer?
Always start with a base coat and finish with a top coat to protect your design.
3. Can I do these designs at home?
Absolutely! Most of these designs are easy to follow, even for beginners.
4. What tools do I need for nail art?
Basic tools include a base coat, top coat, nail polish, dotting tools, and brushes.
5. How do I remove glitter nail polish?
Use an acetone-based remover and soak a cotton ball on your nails for a few minutes before wiping off.
Conclusion
There you have it—my top 15 short new years nail ideas that are sure to make your celebrations even more festive! Whether you prefer something chic, playful, or bold, there’s a design here for everyone. So, gather your tools and let your creativity shine as you ring in the New Year with fabulous nails. Cheers to a stylish start to the year!