29 Red Spring Nail Ideas You’ll Want to Try Right Now
Spring is the perfect time to refresh your style with a pop of red on your nails!
With red being bold yet timeless, I’ve pulled together 29 Red Spring nail ideas that I’ve either tried, admired, or have on my nail art bucket list.
Each design pairs creativity with simplicity so you can flaunt gorgeous nails all through the season. Keep reading for step-by-step tips to recreate these looks!
Best Red Spring Nail Design Ideas 2025

1. Classic Red with a Modern Twist
There’s nothing like classic red nails, but adding a modern feature—like a diagonal glitter line—totally levels it up. It’s sleek, bold, and suits any occasion.
Steps:
- Apply a base coat.
- Paint nails with a glossy cherry-red polish.
- Add a thin diagonal line of gold or silver glitter.
- Seal with top coat.
Tools Needed
- Base coat
- Cherry-red polish
- Fine glitter polish
- Small nail art brush
- Top coat
Ideal For: Those who prefer timeless styles but want a fresh twist for spring festivities.
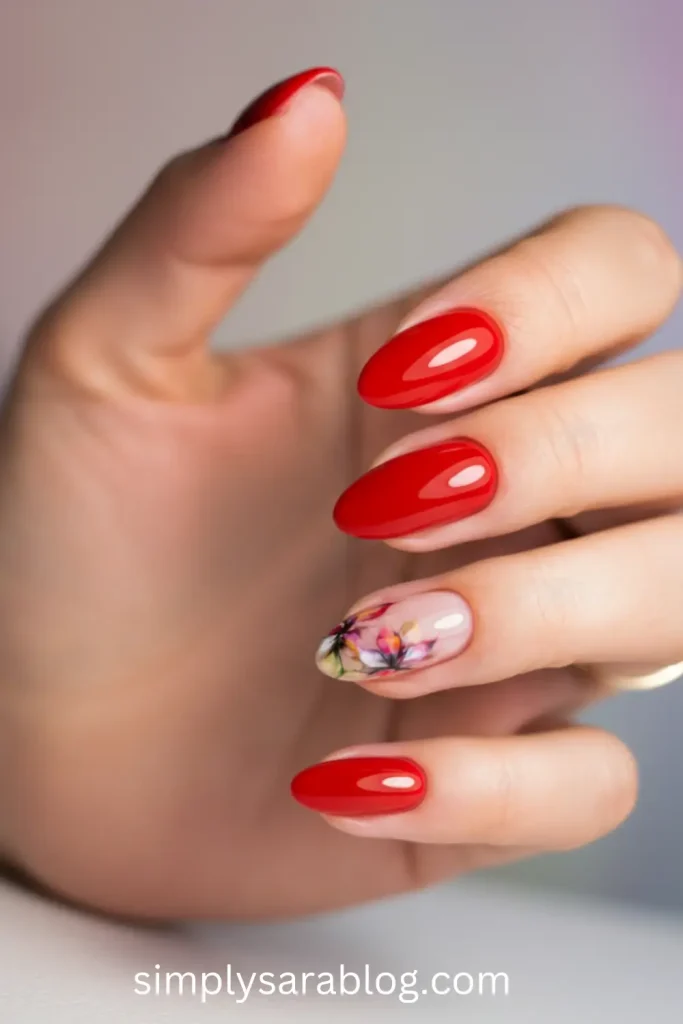
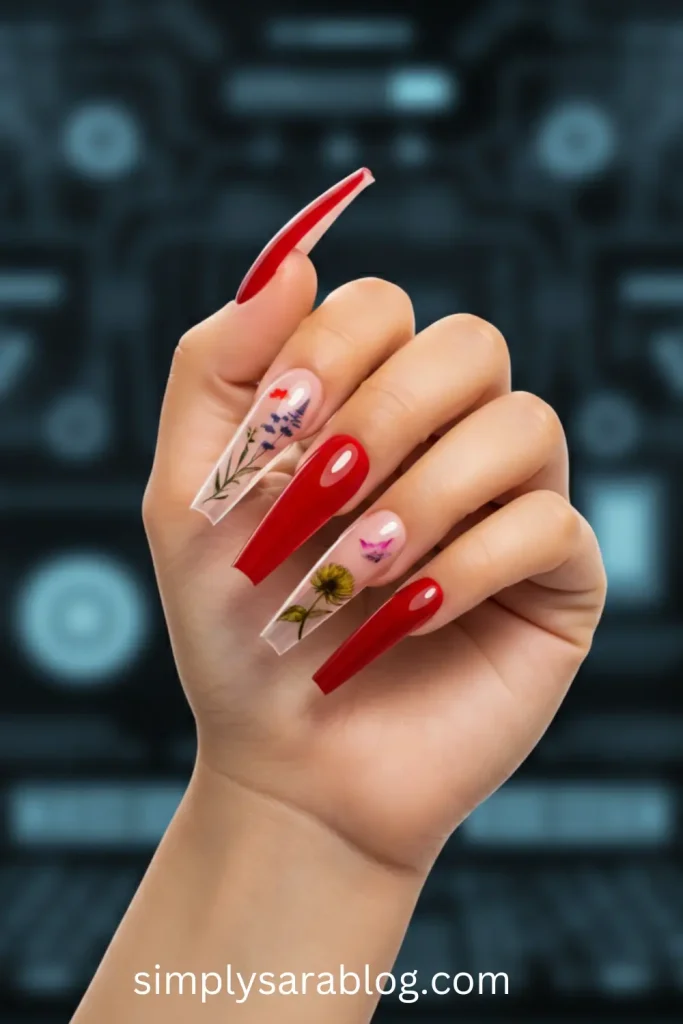
2. Blossoming Elegance
Imagine delicate red blossoms blooming on your nails. This design adds a floral touch while keeping things sophisticated.
Steps:
- Start with a nude or sheer pink base.
- Create small red flowers using a dotting tool.
- Add leaves with green nail polish.
- Finish with top coat for long-lasting shine.
Tools Needed
- Base coat
- Red polish
- Green polish
- Dotting tool or toothpick
- Top coat
Ideal For: Romantic dinner dates or garden parties where you want a soft, feminine vibe.
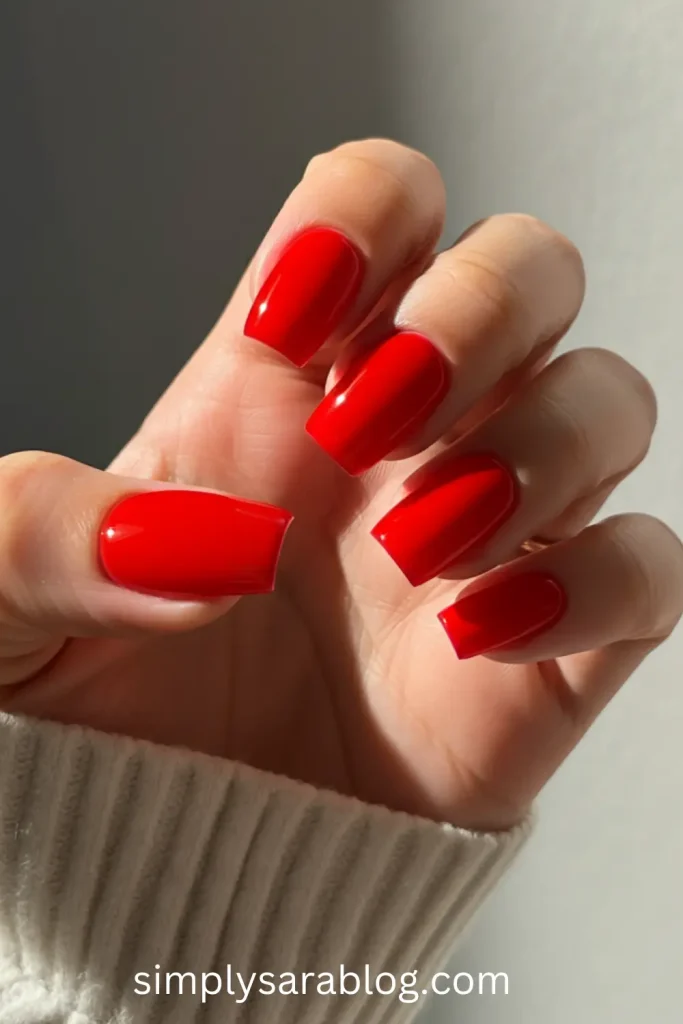
3. Glossy Red Nails
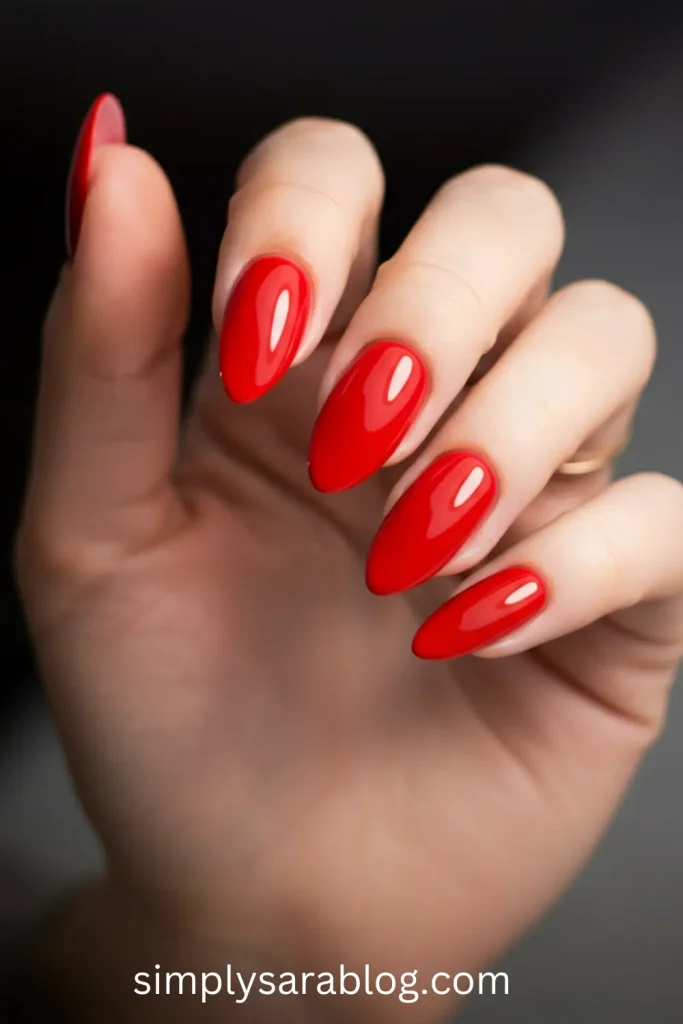
Sometimes simplicity is the loudest statement. Bold, glossy red nails are always a win, especially in spring light.
Steps:
- Prep nails with a base coat.
- Paint two coats of a high-shine red polish.
- Add a gel-like top coat for an ultra-glossy finish.
Tools Needed
- Base coat
- Glossy red polish
- Gel-like top coat
Ideal For: Everyday glam, especially when you need a confidence boost.
4. Sweet Florals on Sheer Canvas
Why use red polish only? Try light florals combined with sheer polish for a subtle pop of spring cheer.
Steps:
- Use a sheer base coat like a soft nude or pink.
- Paint red flower petals on two nails.
- Accent with white dots or smaller petals.
- Seal it all in with top coat.
Tools Needed
- Sheer pink polish
- Red and white polish
- Fine-tipped brush
- Top coat
Ideal For: Clean, fresh looks, especially for work or a simple day out.
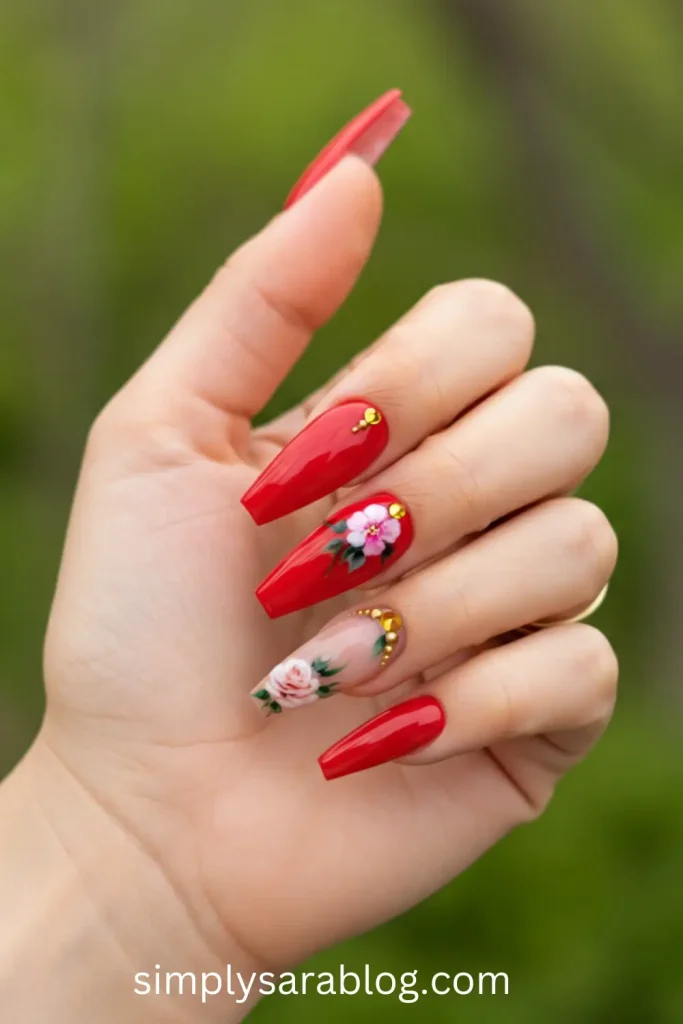
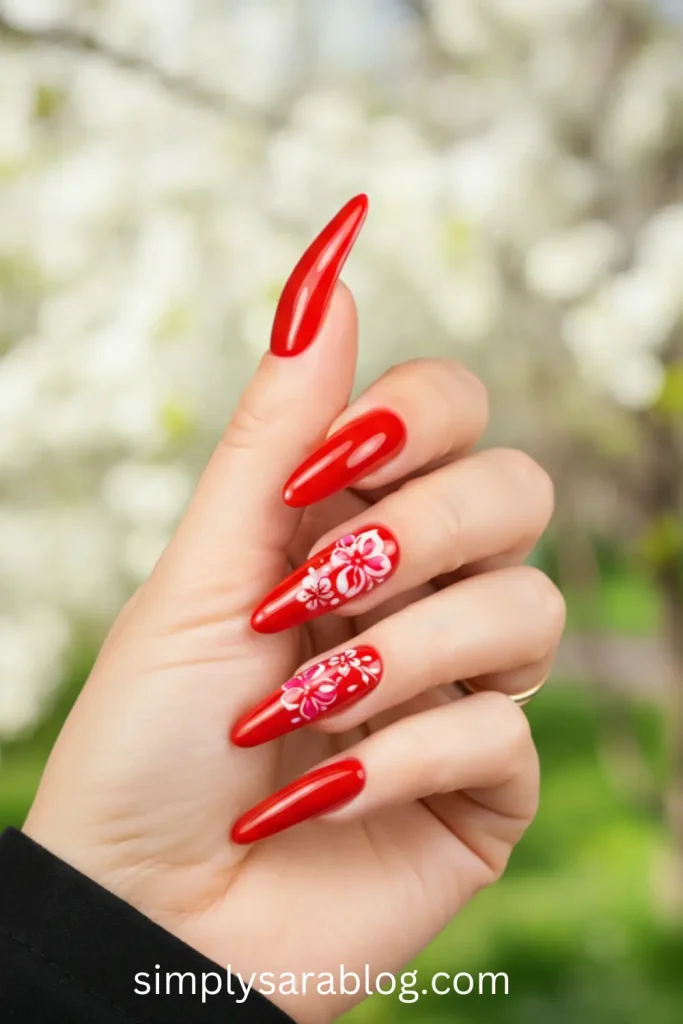
5. Red Floral Nails
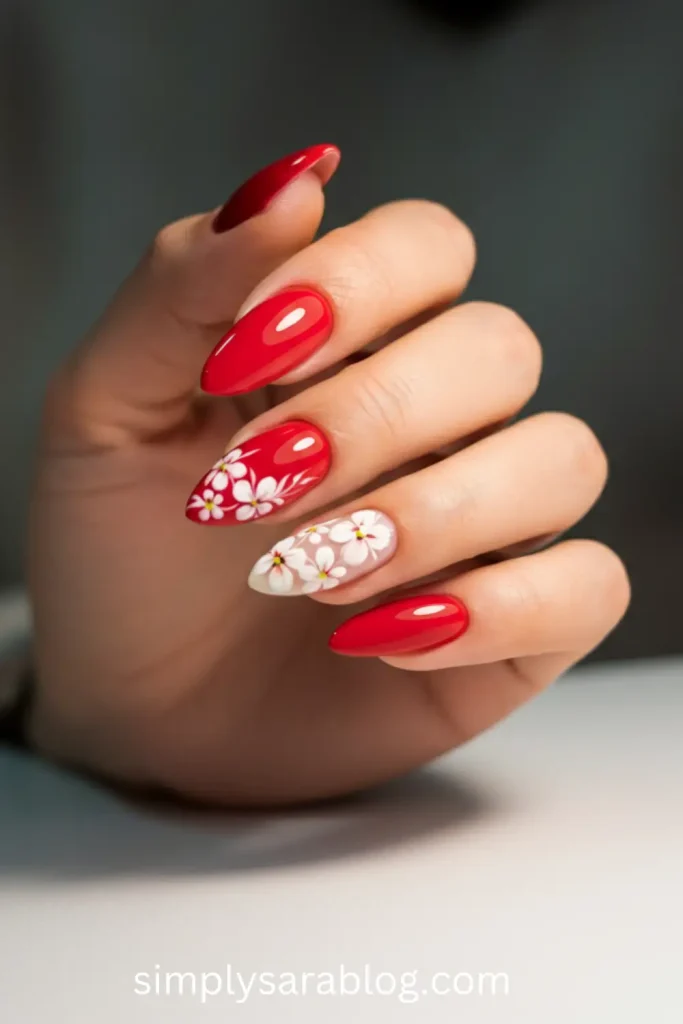
If you’re like me and can’t get enough florals, this nail art makes red flowers the star of the show—ideal for spring strolls.
Steps:
- Apply a soft white or nude polish as a base.
- Use a dotting tool to create bold, red flower petals.
- Highlight the center with yellow or white polish.
- Add a top coat for protection.
Tools Needed
- White/nude polish
- Red and yellow polish
- Dotting tool
- Top coat
Ideal For: Picnic dates where bright, flowery vibes match your spring outfit.
6. Bold and Beautiful (Neon Red Nails)
Neon red is like turning up the volume on your nail game—perfect for when you want those bright spring colors to glow.
Steps:
- Apply a base coat.
- Paint nails with neon red polish, two coats for boldness.
- Finish with a glossy top coat.
Tools Needed
- Base coat
- Neon red polish
- Glossy top coat
Ideal For: Beach hangouts and spring festivals.
Read More: 25 Short Spring Nail Ideas Perfect for 2025
7. Sleek and Chic
This nail design combines minimalism with elegance. Picture a simple glossy red base paired with a hint of metallic silver on one accent nail—so chic!
Steps:
- Apply base coat on all nails.
- Paint all nails red, except one accent nail.
- Add a touch of metallic silver polish to the accent nail.
- Seal everything with a top coat.
Tools Needed
- Base coat
- Red polish
- Metallic silver polish
- Top coat
Ideal For: A classy look perfect for formal occasions or cocktail parties.
8. Vibrant Petal Play
This one’s for flower lovers—imagine petals scattered across your nails in vibrant red and pink shades. It’s like carrying a spring garden in your hands.
Steps:
- Paint a nude or beige base coat.
- Add tiny red and pink petal shapes using a fine nail brush.
- Accent with gold specks for shimmer.
- Top it off with a clear coat.
Tools Needed
- Nude/beige polish
- Red and pink polish
- Fine nail brush
- Gold glitter polish
- Top coat
Ideal For: A fun, playful vibe for weekend outings or spring fairs.
9. Radiant Red Nails
Radiant is the word here—this design is all about bold sparkle. Think ruby red polish combined with glittery tips for added flair.
Steps:
- Apply a glossy red coat to all nails.
- Use a sponge to dab glitter polish lightly on the tips.
- Gradually build the glitter for an ombré effect.
- Finish with a sealing top coat.
Tools Needed
- Glossy red polish
- Glitter polish
- Sponge
- Top coat
Ideal For: Party-goers or anyone who loves a glamorous nail look.
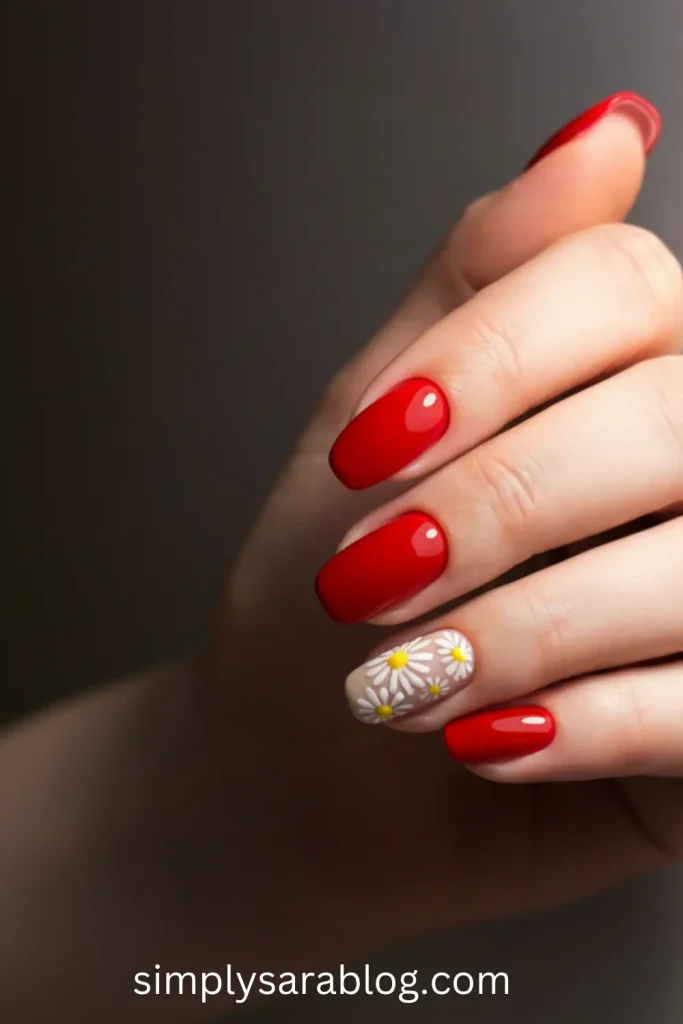
10. Minimalist Floral Red Nails
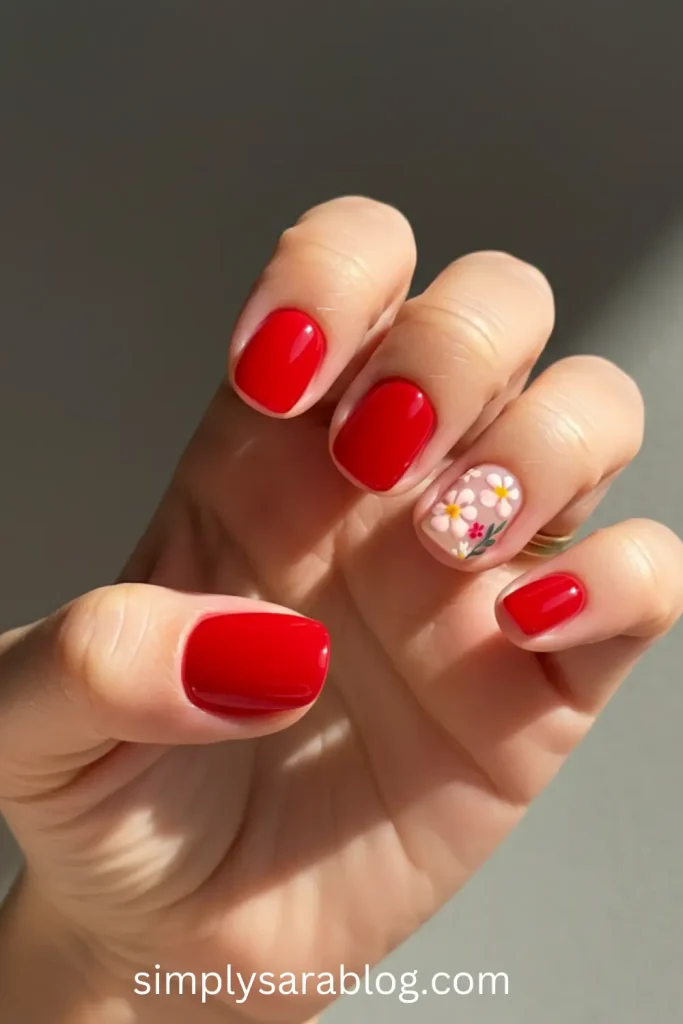
Keep it simple with just one or two small floral accents on a red background—it’s understated elegance at its best.
Steps:
- Start with a red base on all nails.
- Use a toothpick or fine brush to paint small white flowers on one or two nails.
- Add a dot of yellow in the flower centers.
- Apply a top coat to secure.
Tools Needed
- Red polish
- White and yellow polish
- Fine brush or toothpick
- Top coat
Ideal For: Minimalists who still want a touch of spring on their nails.
11. Tech-Savvy Chic
Modern and edgy, this design includes red nails with sharp geometric silver and black lines for a tech-inspired vibe.
Steps:
- Paint all nails with a red base coat.
- Use thin nail tape to create geometric shapes.
- Fill sections with silver and black polish.
- Carefully remove the tape and seal with a top coat.
Tools Needed
- Red polish
- Silver and black polish
- Nail tape
- Top coat
Ideal For: Trendsetters who love sleek, cutting-edge designs.
12. Winter Meets Spring
This dreamy design merges icy silver and frosty white accents with bright spring red—perfect for transitional vibes.
Steps:
- Apply a red base coat.
- Draw frosty white tips using a fine nail brush.
- Add silver snowflake or star accents on selected nails.
- Finish with a glossy top coat.
Tools Needed
- Red polish
- White and silver polish
- Fine nail brush
- Top coat
Ideal For: Anyone straddling winter and spring moods, especially during early spring weather.
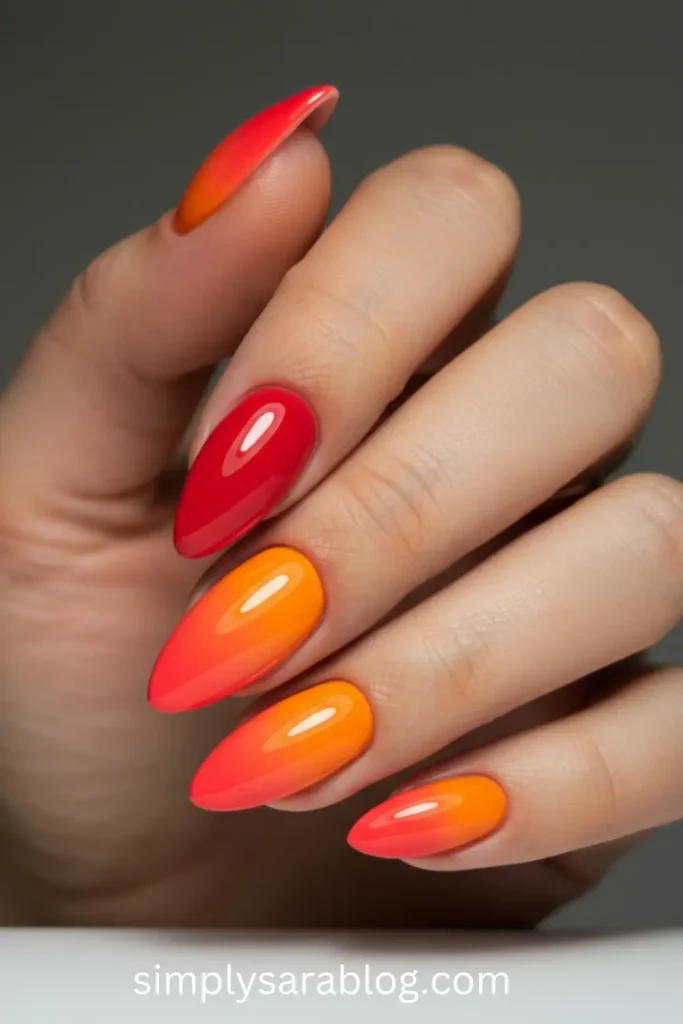
13. Flaming Coffin Nails
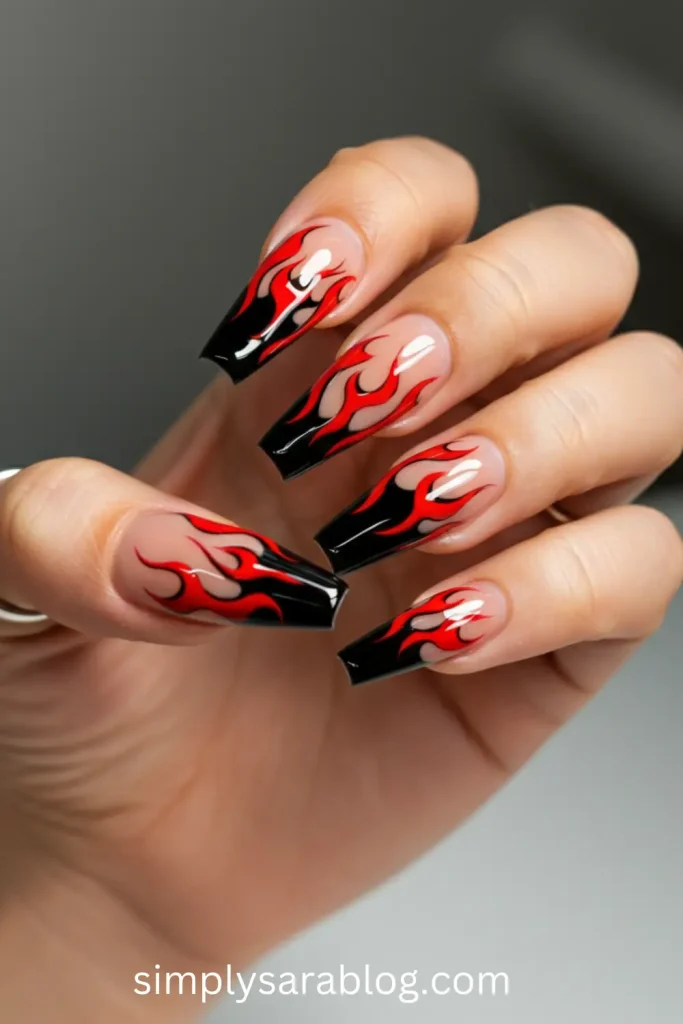
Go bold with coffin-shaped tips and a design that screams drama—flaming gradients of orange and red.
Steps:
- File nails into coffin shape.
- Paint tips with a gradient of orange fading into red toward the cuticle.
- Add subtle gold glitter streaks for a fiery effect.
- Top everything with a clear coat.
Tools Needed
- Nail file
- Red and orange polish
- Sponge or gradient tool
- Gold glitter polish
- Top coat
Ideal For: Statement-makers who love dramatic nail designs.
Read More: 59 Gorgeous Spring Nail Art Designs for a Fresh Look
14. Cherry Accent Nails

Picture glossy red nails with a juicy cherry accent on just one or two fingers. It’s playful, totally spring-inspired, and super cute!
Steps:
- Paint all nails with a red base coat.
- Use a fine brush to draw tiny cherries on an accent nail—two red circles connected by green stems.
- Add a top coat to protect the design.
Tools Needed:
- Red polish
- Green polish
- Fine-tipped brush
- Top coat
Ideal For: A quirky, flirty look that’s perfect for casual brunch dates or spring picnics.
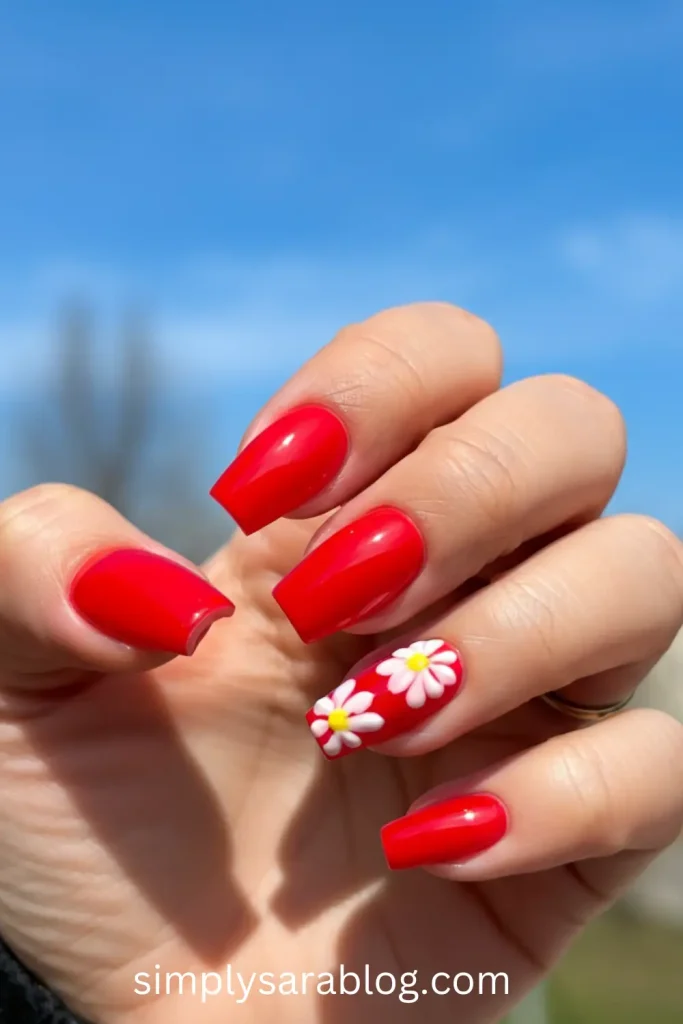
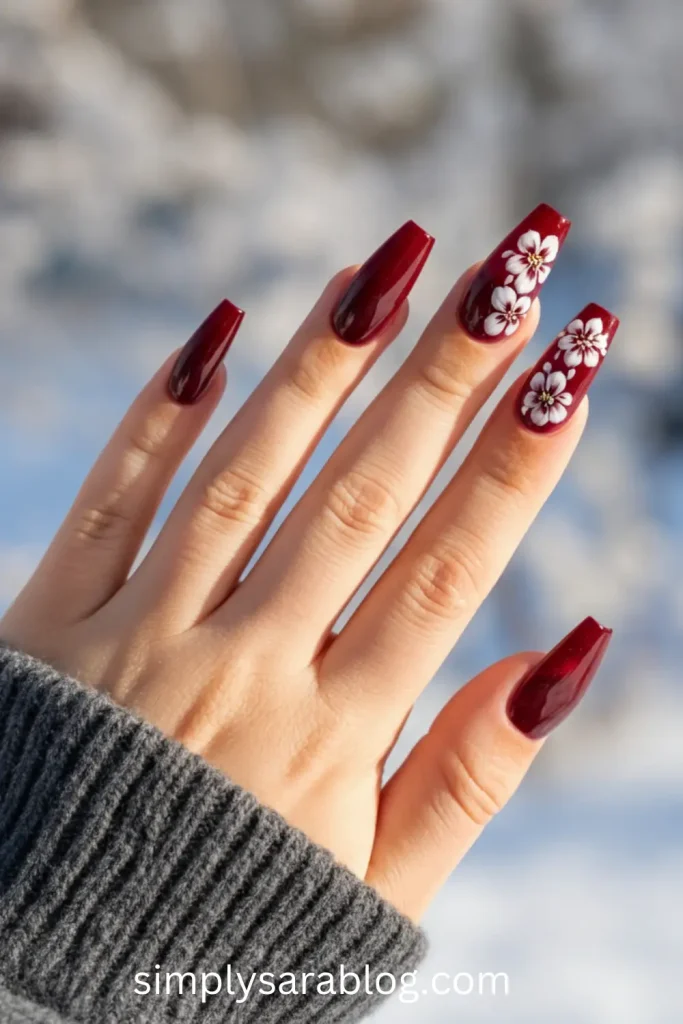
15. Floral Accent Nails
Sometimes, less is more! This design features a floral pattern on one or two nails for just the right hint of spring charm.
Steps:
- Start with a red base for all nails.
- On an accent nail, use a detail brush to draw small flowers in white and yellow.
- Seal with a clear top coat to finish.
Tools Needed:
- Red polish
- White and yellow polish
- Fine brush
- Top coat
Ideal For: Those who love subtle yet stylish nail accents.
16. Ombre Spring Nails
Fusion of bright red to soft pink gives a fresh ombré effect that screams spring vibes.
Steps:
- Apply a pink base coat.
- Use a sponge to blend red polish from the tips downward, creating a gradient.
- Repeat layers for opacity and finish with top coat.
Tools Needed:
- Pink and red polishes
- Sponge
- Top coat
Ideal For: When you can’t decide between subtle and bold—this design gives you both!
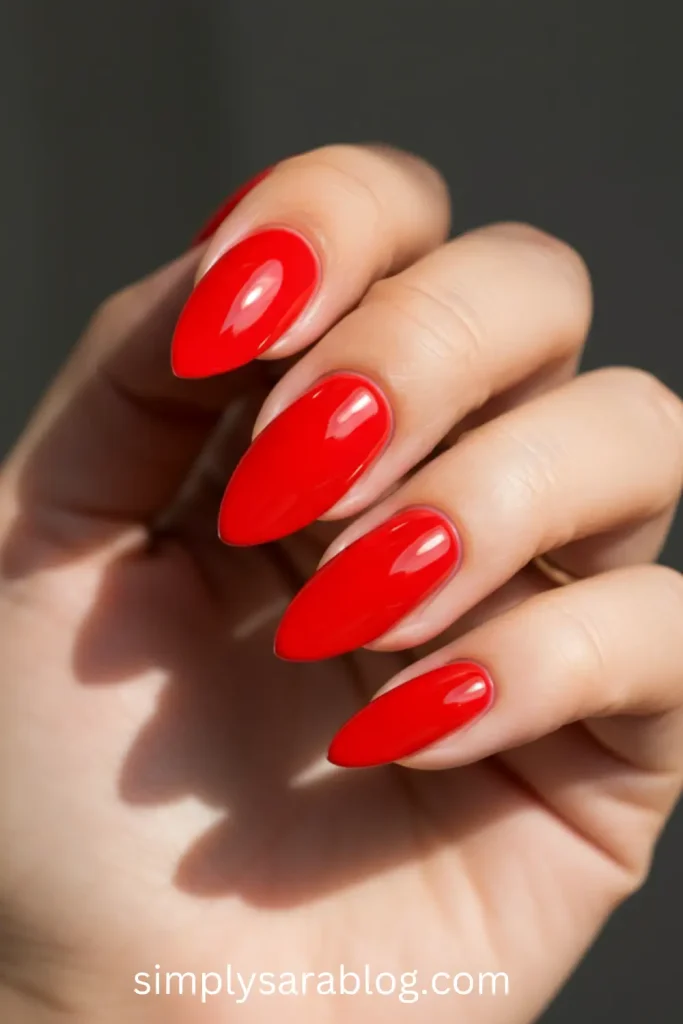
17. Shocking Red Nails
Sometimes, simple is bold. Shocking red nails with a high-gloss finish deliver drama without any extras.
Steps:
- File nails to your preferred shape.
- Apply a base coat.
- Follow with two coats of shocking red polish for opacity.
- Seal in the shine with a top coat.
Tools Needed:
- Base coat
- Shocking red polish
- Top coat
Ideal For: A bold, no-nonsense look for any occasion.
18. Geometric Grace
Clean lines, bold colors, and artistic flair—geometric nail art is as modern as it gets.
Steps:
- Apply a red base coat to all nails.
- Use straight nail tape to divide sections and fill in geometric patterns with gold or black.
- Carefully remove the tape and seal with top coat.
Tools Needed:
- Red, gold, and black polishes
- Nail tape
- Top coat
Ideal For: Art lovers or anyone who appreciates sharp, creative details.
19. A Touch of Nature

Green and red might sound like Christmas, but trust me, it works for spring! Add a leafy green accent nail alongside rich red polish.
Steps:
- Use red polish on most nails.
- Paint one accent nail green.
- Use a detail brush to add tiny white floral designs over the green base.
- Seal with a clear coat.
Tools Needed:
- Red and green polish
- White polish
- Detail brush
- Top coat
Ideal For: Nature lovers and outdoor gatherings.
20. Minimalist with a Twist
Take a minimalist red nail and add a subtle twist—a single thin gold stripe through the center of each nail.
Steps:
- Start with a glossy red base.
- Use gold nail tape or a thin brush to create a straight line across the middle of each nail.
- Lock it in with top coat.
Tools Needed:
- Red polish
- Gold nail tape or polish
- Top coat
Ideal For: A sleek, understated look that goes with everything.
Read More: 22 Stunning White Spring Nail Ideas You’ll Adore
21. Polka Dot Party
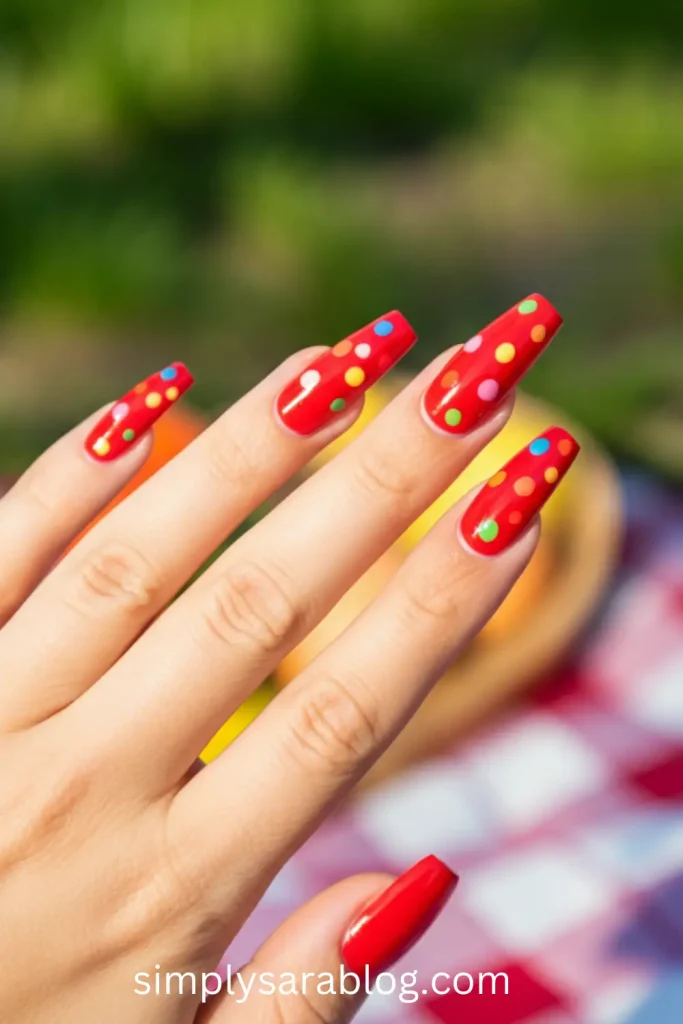
Polka dots are always a playful option, especially when combined with bright spring colors.
Steps:
- Apply a red base coat.
- Use a dotting tool to create white dots evenly across each nail.
- Add a top coat to hold the design.
Tools Needed:
- Red polish
- White polish
- Dotting tool
- Top coat
Ideal For: Playful souls who love youthful, fun designs.
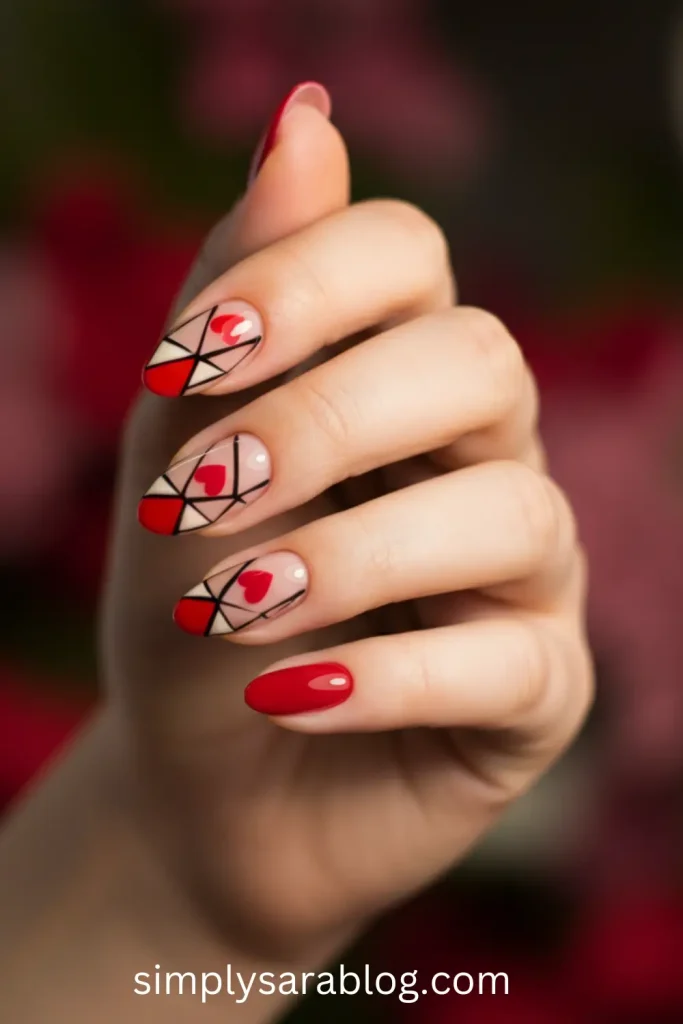
22. Love at First Swipe
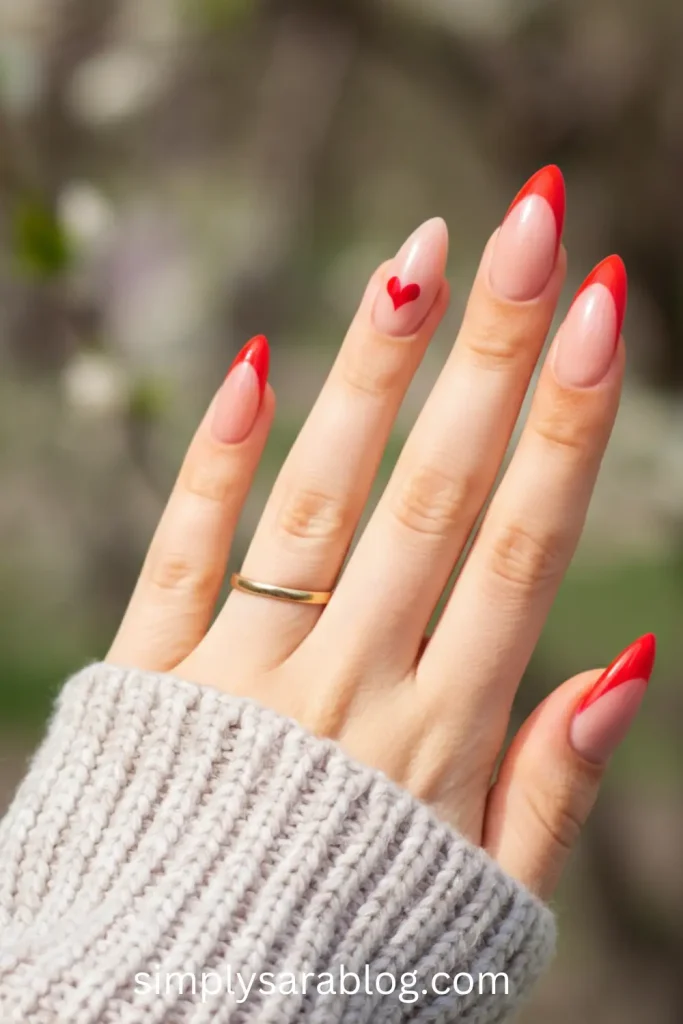
Capture love and hearts on your nails with this romantic design.
Steps:
- Paint all nails with a red base coat.
- Use a fine brush to draw tiny white hearts on an accent nail.
- Apply a glossy top coat to finish.
Tools Needed:
- Red polish
- White polish
- Fine brush
- Top coat
Ideal For: Romantic occasions or sweet dates in spring.
23. Picnic Perfect
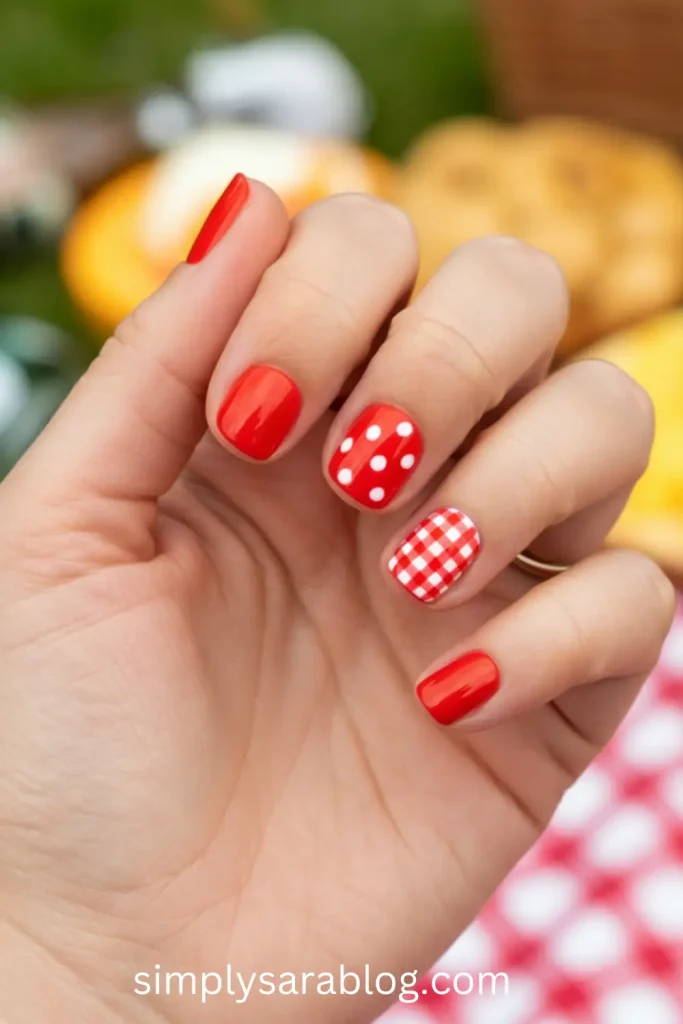
Mix cues from spring picnic tables—think bright red and checkered white patterns!
Steps:
- Paint two nails white and the rest red.
- Use a thin brush to create red checkered patterns on the white nails.
- Seal the design with a top coat.
Tools Needed:
- Red and white polish
- Fine brush
- Top coat
Ideal For: Outdoor picnics or daytime adventures.
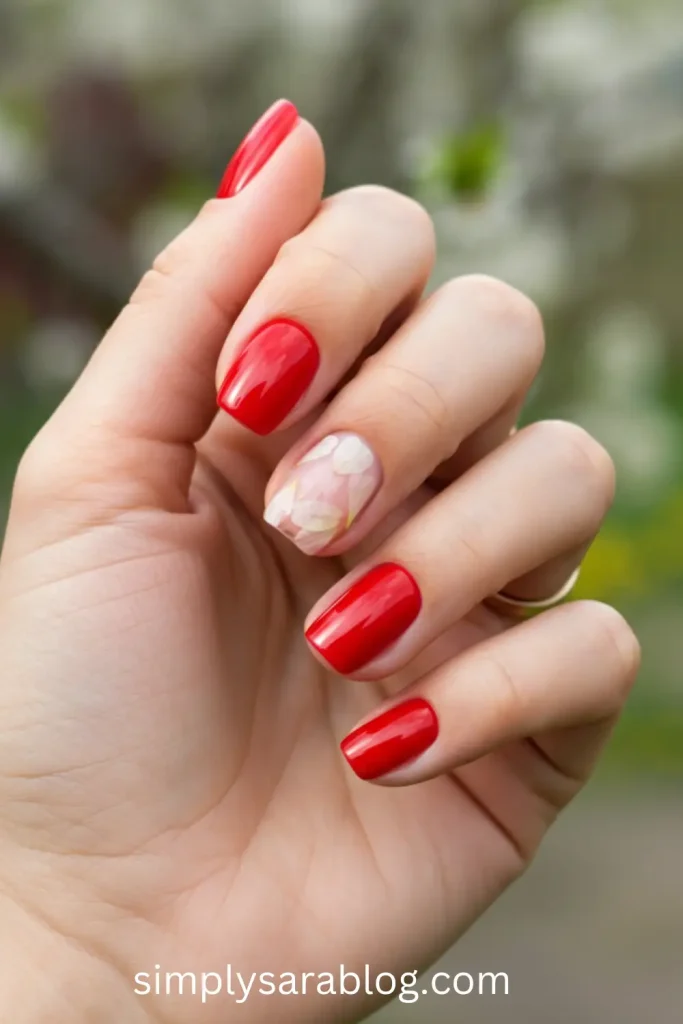
24. Springtime Blossoms
This design brings fresh flowers to your fingertips! A red base paired with hand-drawn pink blossoms creates a cheerful and vibrant spring mood.
Steps:
- Apply a red polish on all nails as the base.
- Use a fine brush to paint small pink flowers on a few nails.
- Add tiny green leaves to enhance the look.
- Seal with a clear top coat for a glossy finish.
Tools Needed:
- Red polish
- Pink and green polishes
- Fine brush
- Top coat
Ideal For: Flower enthusiasts and spring gardeners who want happy, vibrant nails.
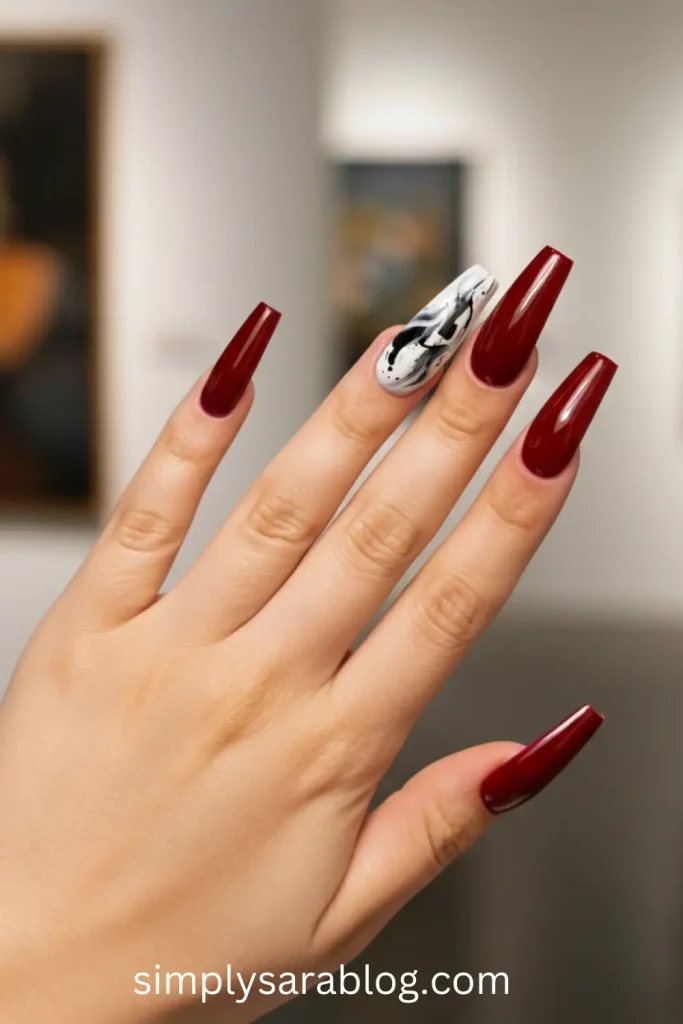
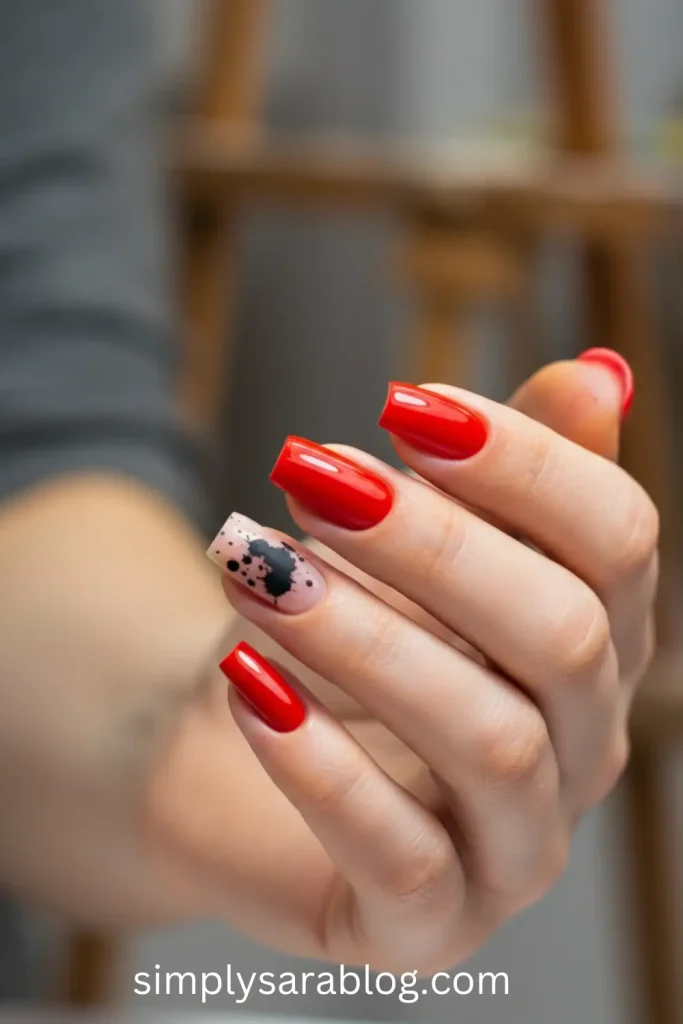
25. Abstract Artistry
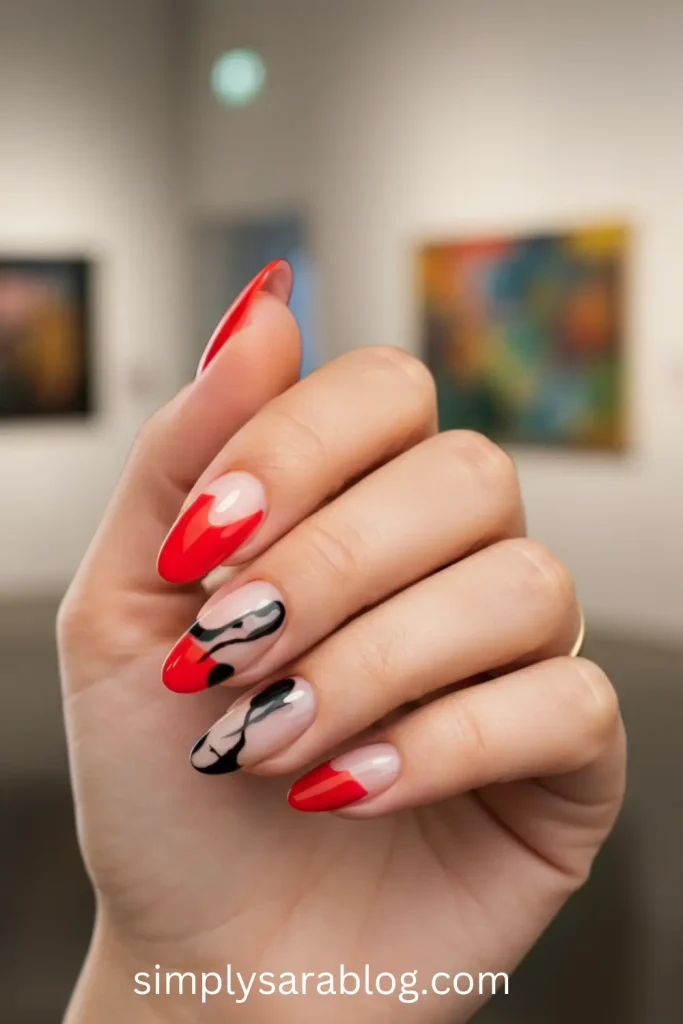
Get creative with abstract patterns! This design combines red tones with splashes of white and black for an artsy, high-fashion vibe.
Steps:
- Begin with a red base coat.
- Randomly paint irregular shapes using white and black polishes.
- Use a thin brush to add more details or streaks.
- Lock it in with a glossy top coat.
Tools Needed:
- Red, white, and black polish
- Thin nail art brush
- Top coat
Ideal For: Artistic souls who love unique, modern designs that stand out.
26. Geometric Glam

Precision meets glam in this design. Red nails paired with gold triangles or lines add structure and elegance.
Steps:
- Apply a glossy red polish to all nails.
- Use nail tape to create geometric patterns and fill them with gold polish.
- Remove the tape and seal the design with a top coat.
Tools Needed:
- Red and gold polishes
- Nail tape
- Top coat
Ideal For: Evening events or occasions that call for sharp, detailed style.
27. Floral Fantasy
You can’t go wrong with an entire garden on your nails! This design features a mix of red flowers and gold accents for ultimate spring flair.
Steps:
- Start with a nude or sheer base coat.
- Use red polish to draw various floral shapes on multiple nails.
- Add gold dots in flower centers for sparkle.
- Apply a top coat to finalize the look.
Tools Needed:
- Nude base polish
- Red and gold polishes
- Fine nail brush
- Top coat
Ideal For: Spring weddings or outdoor festivities where flowers are the star.
28. Post-Modern Pop
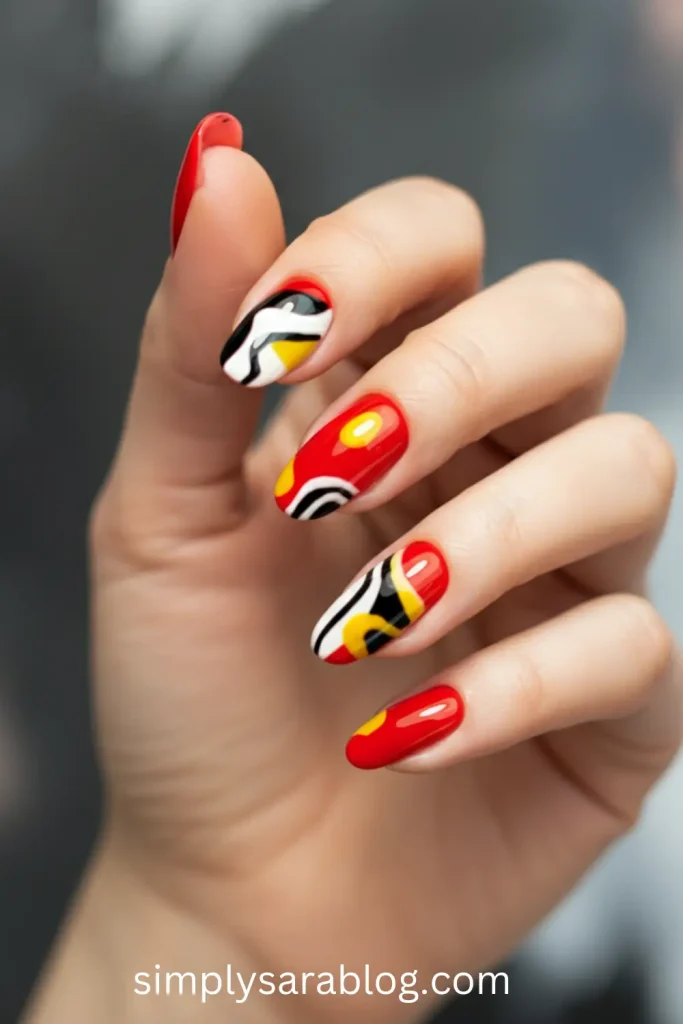
This one’s bold and unconventional! Use red as the base and add random shapes or bold color blocks in complementary shades for a post-modern vibe.
Steps:
- Apply a glossy red base coat.
- Use a fine brush to add bold shapes using black, yellow, and white polishes.
- Outline shapes or add dots for extra dimension.
- Finish with a top coat.
Tools Needed:
- Red, black, yellow, and white polishes
- Fine-tipped brush
- Top coat
Ideal For: Creative trendsetters who love bold, one-of-a-kind nail designs.
Read More: Top 23 Green Spring Nail Ideas to Freshen Up Your Look
Choosing Tips
Not sure which design to try first? Here are some tips to help you decide:
- Match the design to your personality—bold, playful, or minimalist.
- Think about the occasion, like a spring wedding or casual brunch.
- Consider your nail length and shape; some designs work better on long nails.
- Stick to basic tools if you’re DIY-ing and pick simple patterns.
- Choose seasonal elements like florals or bright hues for fresh spring vibes.
FAQs
How do I make red nail polish last longer?
To make your red nails last, start with a quality base coat, apply two thin layers of polish, and finish with a durable top coat. Don’t forget to reapply top coat every few days!
Which red nail designs work best for short nails?
Minimalist designs like bold red, geometric patterns, and single floral accents are perfect for shorter nails as they make your nails look polished without overwhelming the space.
Can I recreate these designs at home?
Yes! Most designs can be recreated with basic tools (like fine brushes or nail tape). Start with simpler patterns, practice often, and work your way to more intricate styles.
What’s the best way to fix mistakes while doing nail art?
Use a precision brush dipped in nail polish remover to clean up edges or fix small errors. If the design gets smudged, start fresh on that nail—patience is key!
Are red nails only for spring?
Not at all! Red nails are versatile and timeless. From romantic Valentine’s Day designs to festive holiday looks, red nails work for all seasons.
Wrap it Up
These 29 Red Spring nail ideas bring together timeless elegance, modern artistry, and springtime charm. Whether you’re drawn to florals, minimalism, or bold statements, these designs offer something for everyone. Now it’s your turn—pick a favorite, grab your tools, and start creating! Share your finished nails with us; we’d love to see your fabulous spring look.
All Image Source Link: Pinterest
This site contains affiliate links. I may earn a small commission, at no extra cost to you.