16 Dreamy Almond Valentines Nail Ideas You’ll Love
Ready to fall head-over-heels for some seriously sweet nail art?
This Valentine’s Day, skip the predictable and dive into the world of dreamy 15 almond Valentine’s Day nail ideas that will steal hearts.
As a nail art enthusiast, I’m so excited to share these designs with you! Get ready to discover your new go-to manicure for the season.
best Almond Valentines Nail Ideas
1. Heartfelt Ombre

Overview: A soft, romantic ombre from a light base to a heart-colored tip. This gentle fade is beautiful and looks great on almond nails. Perfect for a subtle yet loving statement. This gradient design is simply stunning.
Step-by-step:
1. Apply base coat.
2. Use a sponge to blend a light color into a pink or red at tips.
3. Let it dry completely.
4. Top with a clear coat.
Tools: Base coat, light base polish, pink/red polish, sponge, top coat.
Ideal For: Those wanting a soft, romantic style.
2. Sweetheart Sparkle
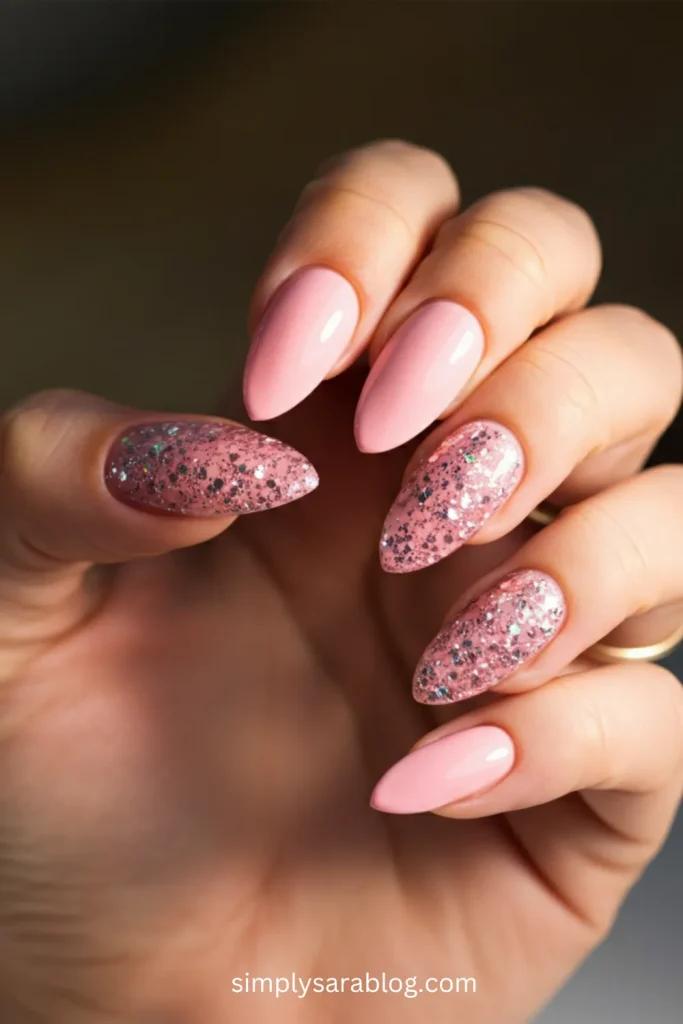
Overview: Glitter is always a good idea. This design features a sweet base color topped with sparkling glitter. It is fun, festive, and brings a little glam to your Valentine’s look. It’s perfect for a special date.
Step-by-step:
1. Apply base coat.
2. Paint nails with a light pink or white base color.
3. Add a generous coat of glitter polish.
4. Finish with top coat.
Tools: Base coat, light pink/white polish, glitter polish, top coat.
Ideal For: Those who love a touch of sparkle.
3. Love Stripes
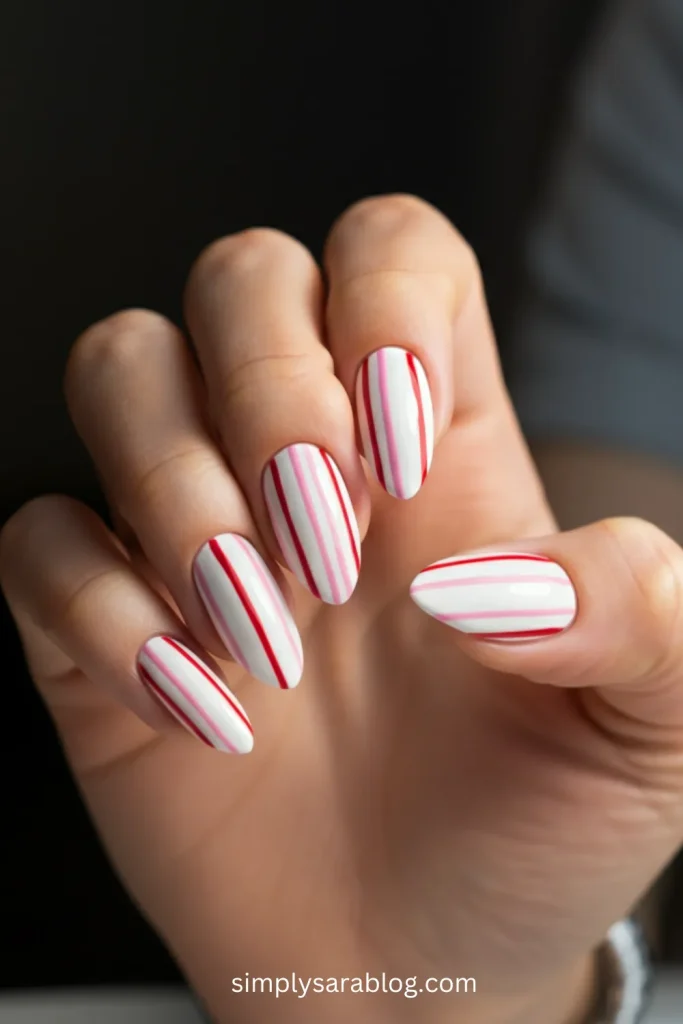
Overview: Simple yet stylish stripes add a modern twist. Use classic colors like red, pink, and white. This design is easy to create and always looks great. It is ideal for a chic look.
Step-by-step:
1. Apply base coat.
2. Create vertical or horizontal stripes using a thin brush.
3. Let it dry.
4. Top with a clear coat.
Tools: Base coat, red, pink, and white polish, thin brush, top coat.
Ideal For: Those who prefer modern, clean lines.
Read More: 22+ Gorgeous February Toe Nail Ideas You’ll Love to Try
4. Sweet XOXO

Overview: A cute and classic “XOXO” design is always charming. This playful pattern shows your love and affection. This is a fun and easy design for everyone to enjoy.
Step-by-step:
1. Apply base coat.
2. Paint nails with a base color.
3. Use a thin brush to create XOXO design
4. Finish with a clear top coat.
Tools: Base coat, base color polish, thin brush, top coat.
Ideal For: Those who love playful, affectionate designs.
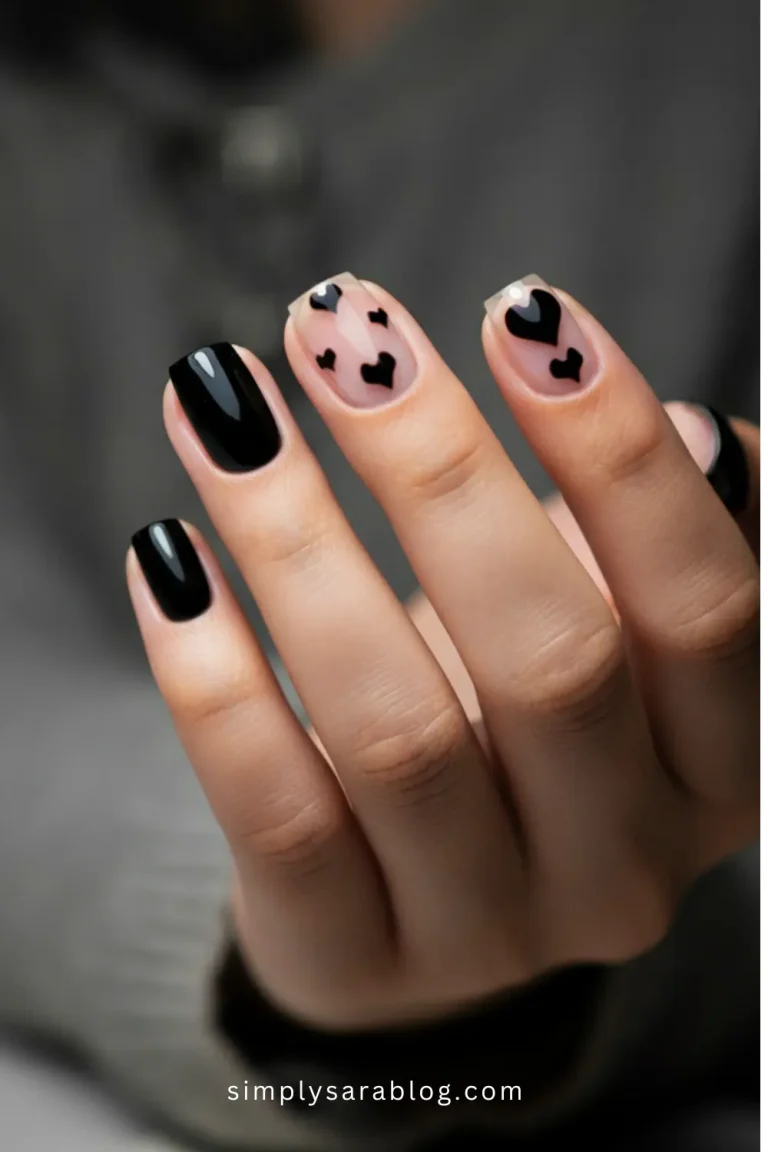
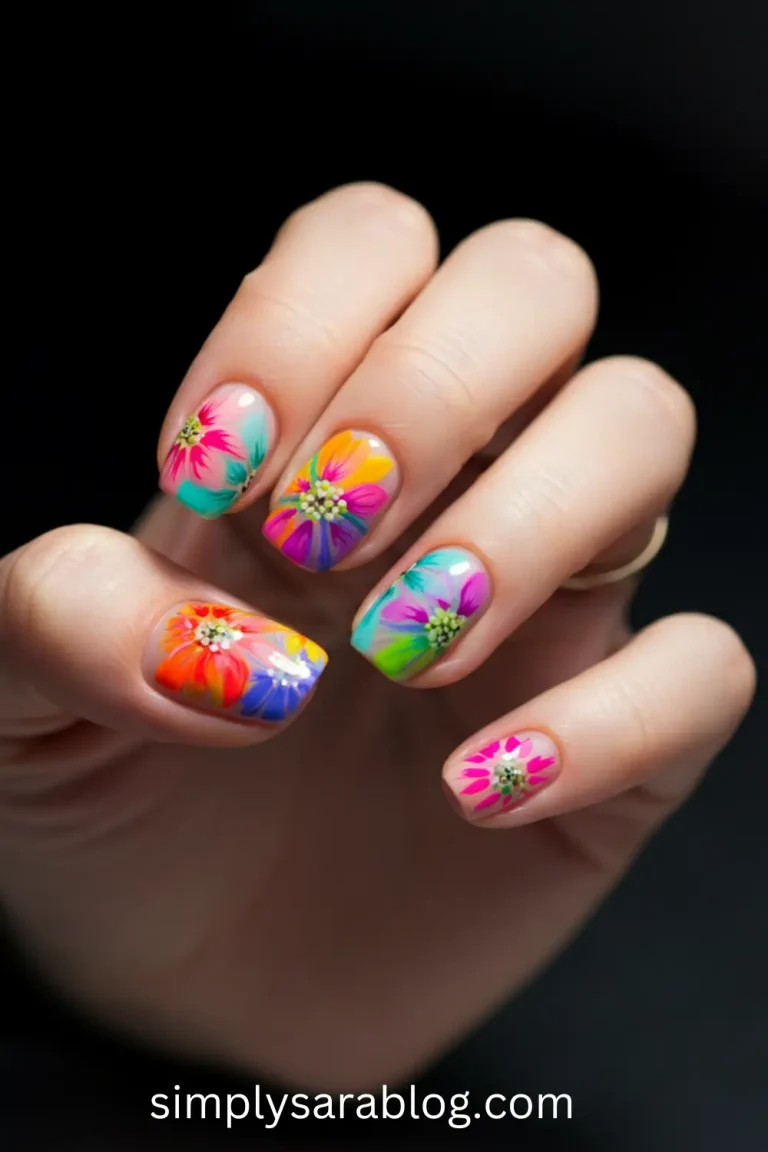
5. Blushing Hearts

Overview: Delicate hearts add a romantic touch. Soft pinks and white give a blushing look. This simple design adds subtle elegance to your nails. It’s perfect for any occasion.
Step-by-step:
1. Apply base coat.
2. Use a pale pink as a base color.
3. Add small white or pink heart designs.
4. Finish with top coat.
Tools: Base coat, pale pink polish, white/pink polish, thin brush, top coat.
Ideal For: Those who love soft, romantic looks.
Read More: 30 Stunning Valentine Toe Nail Ideas You’ll Love to Try
6. Glamorous Red Ombre
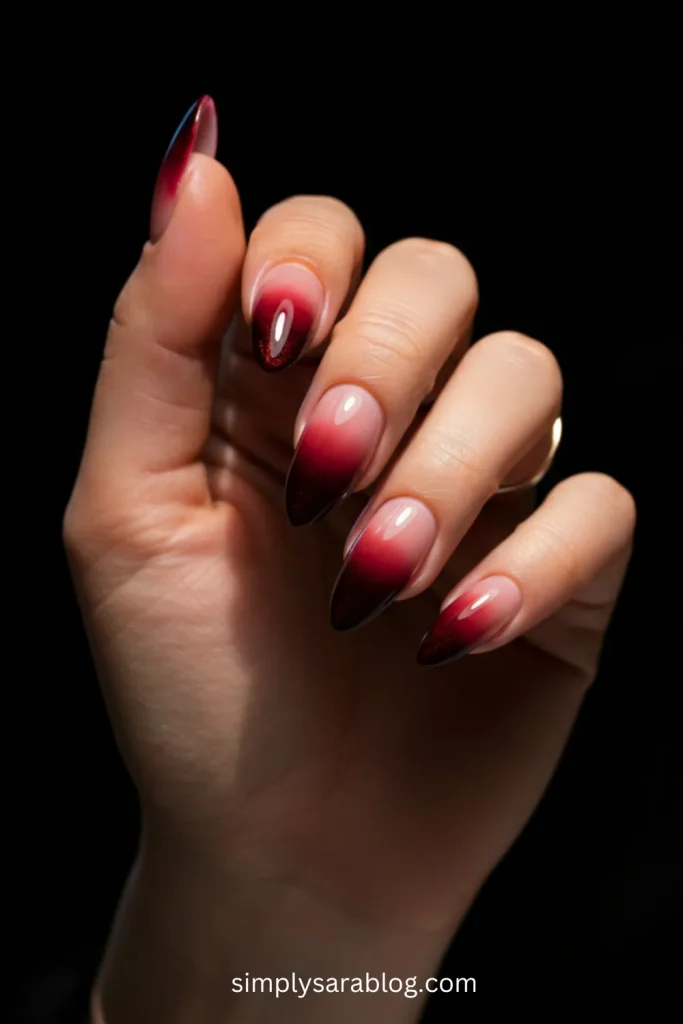
Overview: A bold red ombre design is very eye-catching. It has a touch of glamour and is sure to make a statement. Perfect for those who love bold and vibrant looks. It adds a fiery touch to your nails.
Step-by-step:
1. Apply base coat.
2. Sponge a dark red at tips blending to a lighter red at the base.
3. Allow it to dry fully.
4. Apply a top coat.
Tools: Base coat, dark red polish, light red polish, sponge, top coat.
Ideal For: Those who love bold and glamorous styles.
7. Elegant Rose Gold
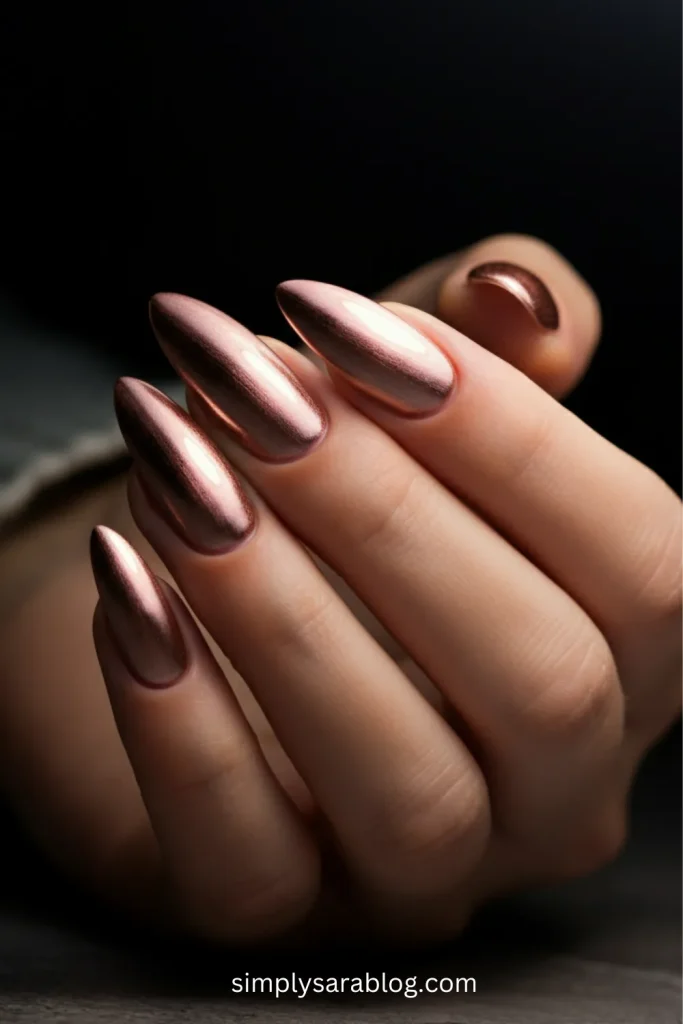
Overview: Rose gold polish is always elegant and chic. Its metallic finish makes it perfect for a special occasion. The warm tones give a luxurious look. This is a simple and beautiful choice.
Step-by-step:
1. Apply base coat.
2. Apply 2-3 coats of rose gold polish.
3. Let it dry fully.
4. Apply a glossy top coat.
Tools: Base coat, rose gold polish, top coat.
Ideal For: Those who love chic and elegant looks.
8. Pearly Hearts
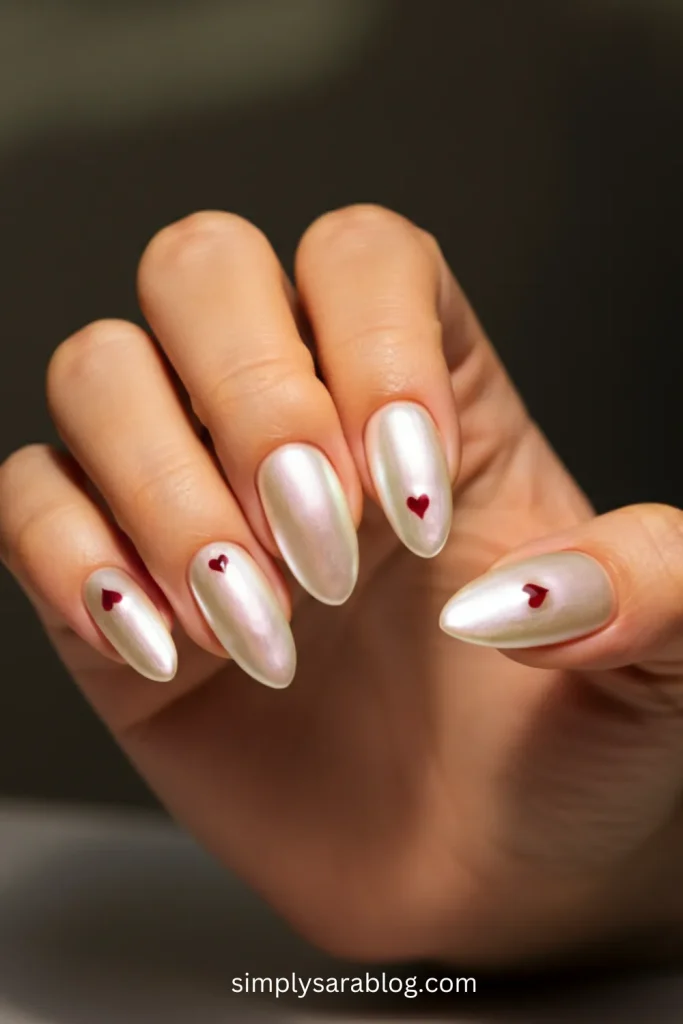
Overview: A soft, pearlescent polish gives a unique finish. Tiny hearts add a sweet touch. It’s a gentle, beautiful design that’s perfect for a romantic occasion. This design is effortlessly stylish.
Step-by-step:
1. Apply base coat.
2. Apply pearlescent polish.
3. Add small heart details with thin brush.
4. Top with clear coat.
Tools: Base coat, pearlescent polish, thin brush, top coat.
Ideal For: Those who prefer unique, subtle designs.
Read More: 20+ Red Valentine Day Nails That Turn Heads
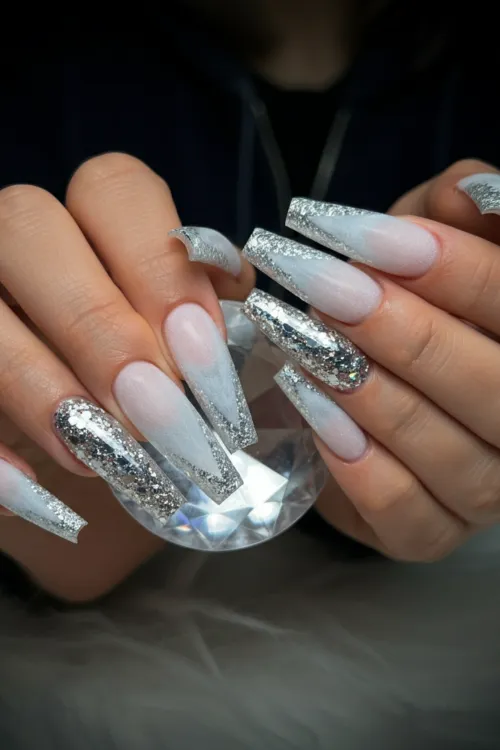
9. Silver Linin
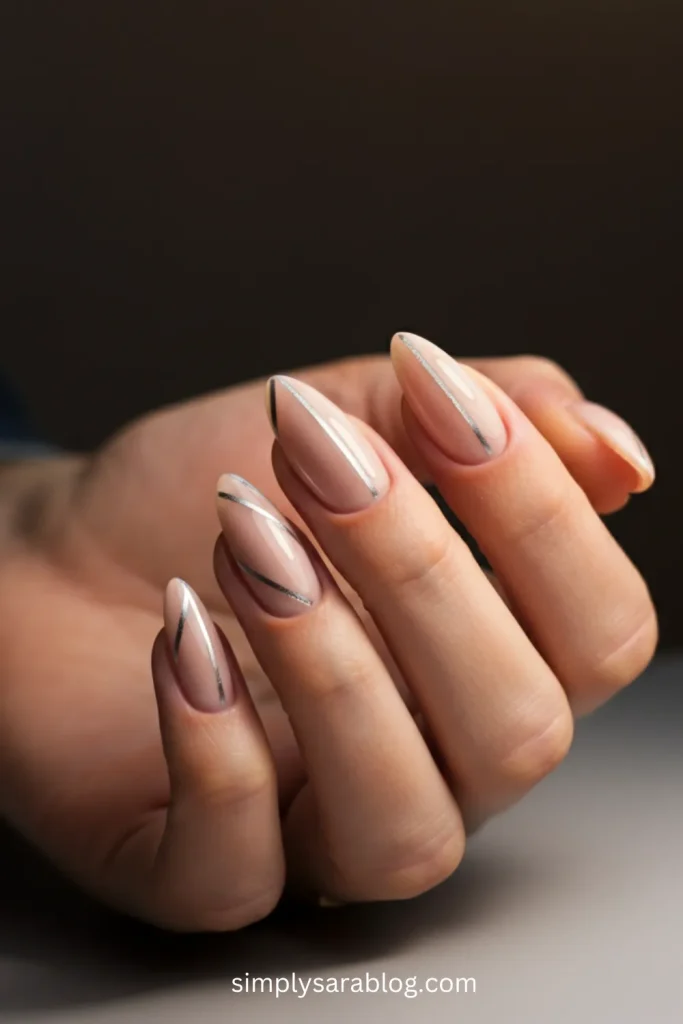
Overview: A sleek silver design is chic and modern. Add silver lines or accents over a neutral base for a classy style. Perfect for those who like subtle and sophisticated nails. It’s a minimalist and elegant look.
Step-by-step:
1. Apply base coat.
2. Use a light base color.
3. Add silver lines or shapes using thin brush
4. Apply top coat.
Tools: Base coat, light base polish, silver polish, thin brush, top coat.
Ideal For: Those who appreciate modern, sleek styles.
10. Red Velvet Elegance
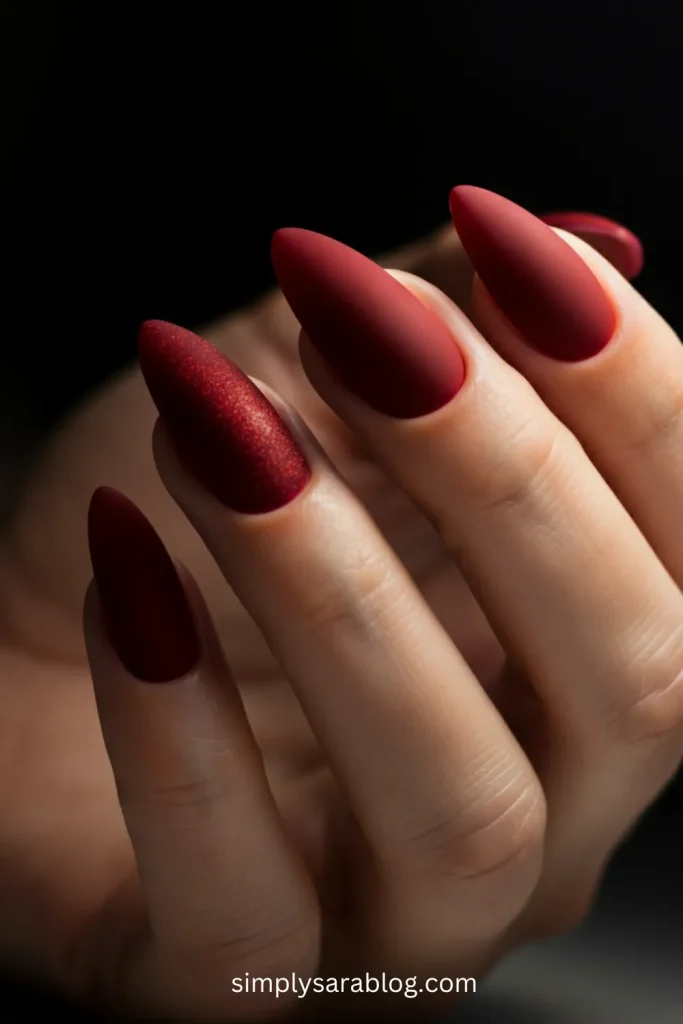
Overview: A rich, matte red polish creates a velvet effect. This design is luxurious and sophisticated. This look gives a touch of drama and romance. It is perfect for a special date night.
Step-by-step:
1. Apply base coat.
2. Apply matte red polish.
3. Let it dry.
4. Apply a matte top coat.
Tools: Base coat, matte red polish, matte top coat.
Ideal For: Those who love luxurious, sophisticated nails.
11. Iridescent Hearts
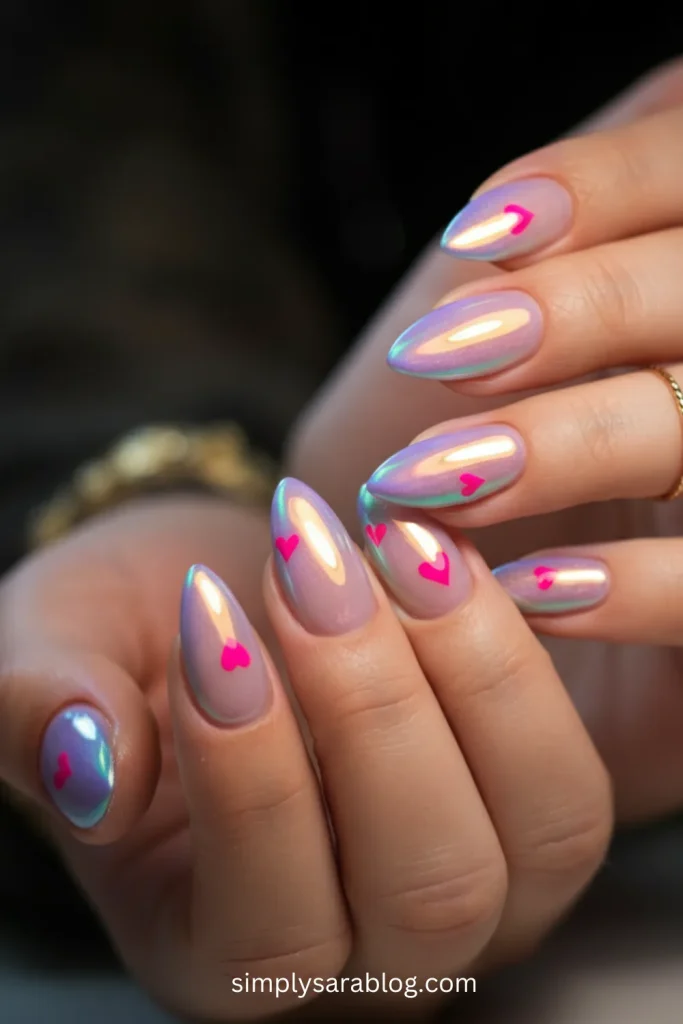
Overview: Use an iridescent polish as a base, and add heart details. This look is fun and unique. The iridescent finish adds a touch of magic and a playful twist. It’s perfect for a festive look.
Step-by-step:
1. Apply base coat.
2. Apply an iridescent polish.
3. Add hearts with contrasting polish
4. Apply top coat.
Tools: Base coat, iridescent polish, contrasting color polish, thin brush, top coat.
Ideal For: Those who love fun, unique designs.
Read More: 28 Stunning Valentine’s Heart Nail Ideas You’ll Love All Year Long
12. Crimson Love
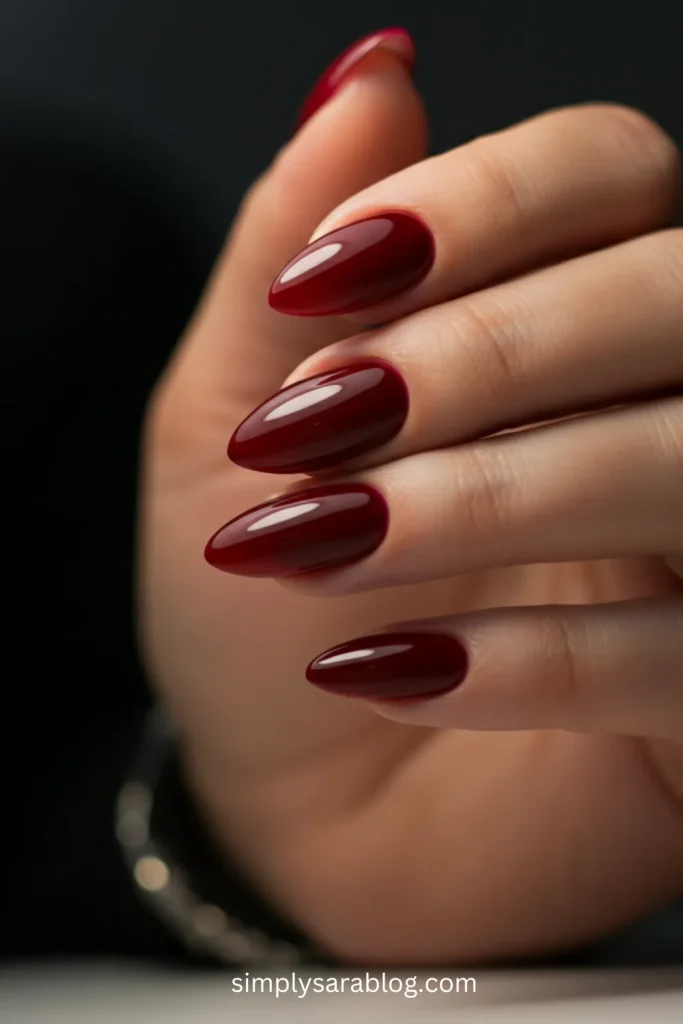
Overview: A deep crimson red is a bold choice for a classic romantic style. It looks great on almond shapes. This design adds a timeless touch to your Valentine’s look. It’s perfect for those who love classic style.
Step-by-step:
1. Apply base coat.
2. Apply 2 coats of crimson red polish.
3. Let it fully dry.
4. Finish with a top coat.
Tools: Base coat, crimson red polish, top coat.
Ideal For: Those who love timeless, classic red nails.
13. Candy Hearts
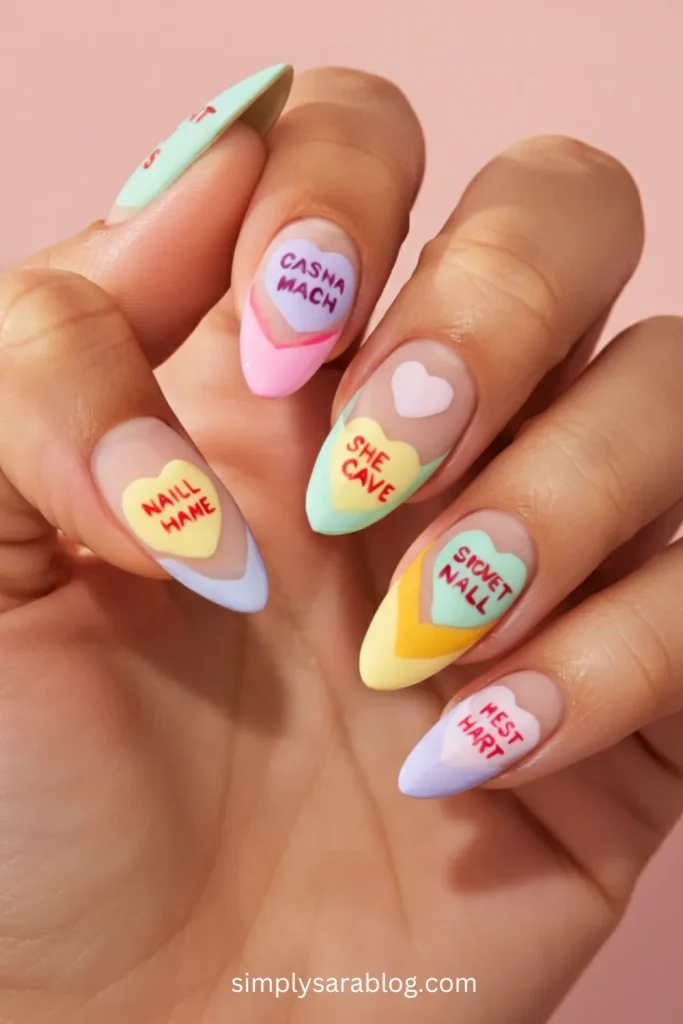
Overview: These nails are inspired by classic candy hearts. Use pastel colors with sweet phrases for a cute and fun look. It brings a nostalgic and playful touch to your Valentine’s Day. This is such a unique design.
Step-by-step:
1. Apply base coat.
2. Use pastel colors for the base.
3. Add short phrases with a thin brush.
4. Finish with a clear top coat.
Tools: Base coat, pastel polishes, thin brush, top coat.
Ideal For: Those who love fun, playful and nostalgic styles.
14. Velvet Pink
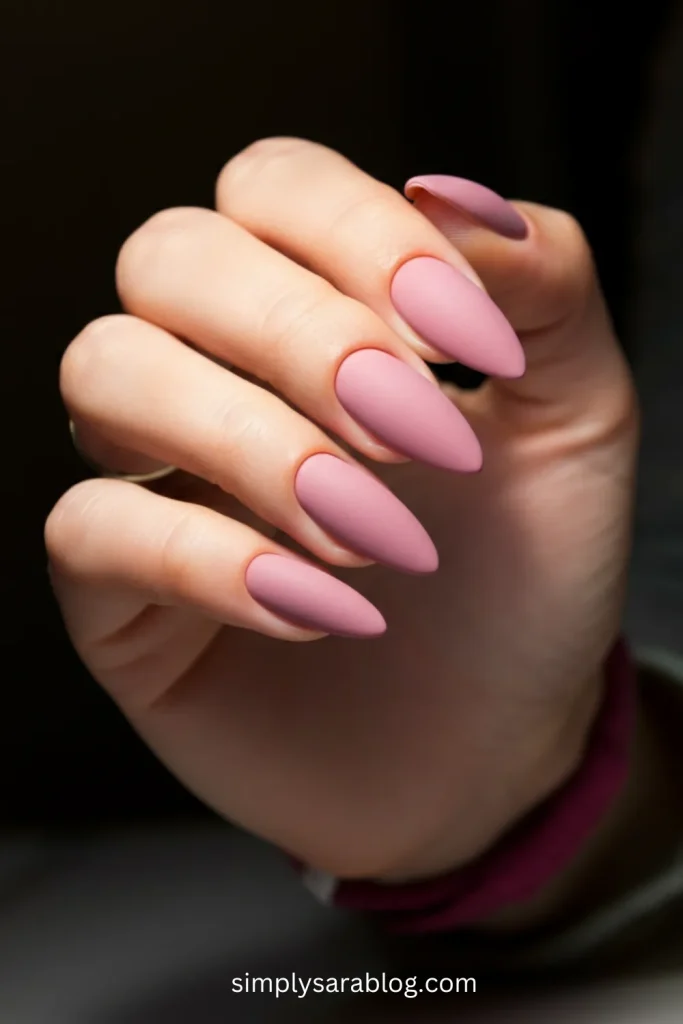
Overview: A soft, matte pink gives a velvet effect. This design is both elegant and modern. This chic design adds a touch of softness and is perfect for those who prefer a subtle look.
Step-by-step:
1. Apply base coat.
2. Apply matte pink polish.
3. Let it fully dry.
4. Apply matte top coat.
Tools: Base coat, matte pink polish, matte top coat.
Ideal For: Those who like elegant, soft, matte finishes.
15. Rosy Dots
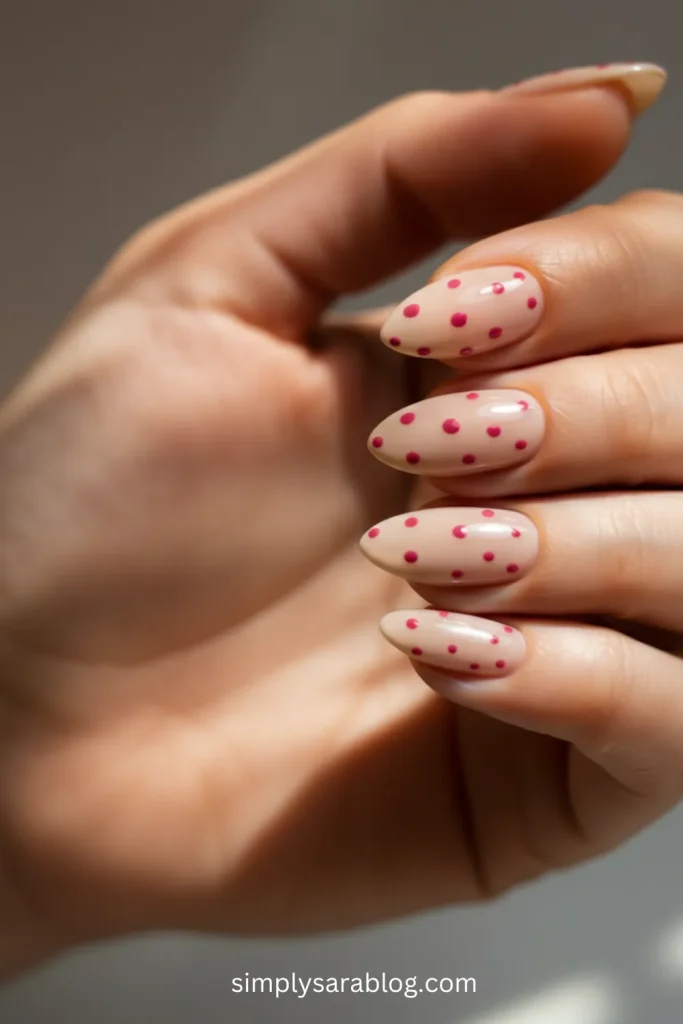
Overview: Simple dots in varying shades of rose create a cute and fun design. It’s easy to create and adds a playful touch. This look is subtle and beautiful. Perfect for adding a bit of whimsy.
Step-by-step:
1. Apply base coat.
2. Choose various shades of rose polish.
3. Use a dotting tool to create dots.
4. Top with clear coat.
Tools: Base coat, various shades of rose polish, dotting tool, top coat.
Ideal For: Those who enjoy simple, playful designs.
16. Blush Marble
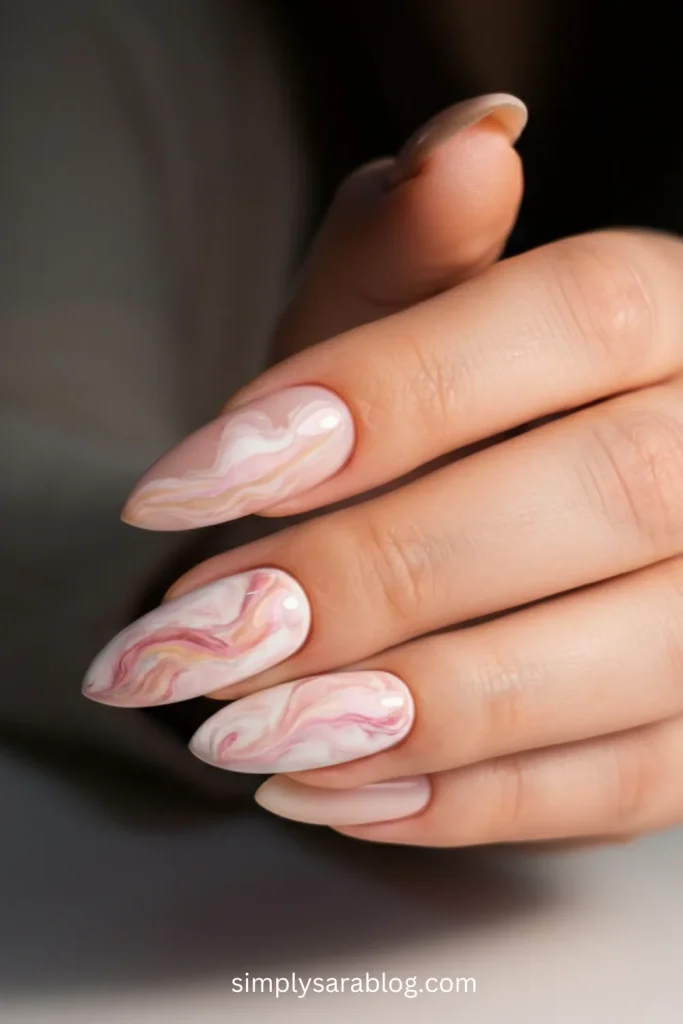
Overview: A marble effect in soft blush tones is unique and beautiful. This design is perfect for those who like sophisticated, artistic styles. It has a modern and elegant feel. It is also very easy to create.
Step-by-step:
1. Apply base coat.
2. Use a light blush as the base.
3. Gently swirl pink and white using a thin brush.
4. Finish with top coat.
Tools: Base coat, light blush polish, pink polish, white polish, thin brush, top coat.
Ideal For: Those who love artistic and unique nail designs.
Choosing Tips for Your Design
- Match Your Vibe: Pick designs that match your personal style and what you are planning for the day.
- Consider Colors: Use colors that match your outfit or the Valentine’s mood.
- Practice Makes Perfect: Don’t worry if your first attempt isn’t perfect. Take your time and practice.
- Use Good Tools: Using quality tools will help your designs look cleaner and last longer.
- Have Fun! Don’t be afraid to get creative and try new things.
FAQ
How do I make sure my glitter polish stays on?
Use a good quality glitter polish and a generous top coat for a smooth finish.
What’s the best way to clean up polish around my cuticles?
Use a small brush dipped in acetone to clean up any mistakes easily.
Can I make these designs with gel polish?
Yes, absolutely! Gel polish works great for these designs, they last longer.
How can I make my nail art last longer?
Apply a top coat every few days. This will help to prevent chips and keep your design looking fresh.
What are some essential tools for doing nail art at home?
A base coat, top coat, a variety of polishes, thin brushes, a dotting tool and some sponges.
Conclusion
These 16 almond Valentine’s Day nail ideas are perfect for anyone looking to add some love to their look! Whether you choose a simple design or something more elaborate, these ideas will definitely make you feel festive and beautiful. Enjoy creating these special designs!