16 Sweet Acrylic Valentine Nail ideas You’ll Love!
Valentine’s Day is coming, and we need cute nails, right?
I’ve been playing with many ideas for 16 acrylic Valentine’s Day nails, and I’m excited to share them.
Think hearts, pink, sparkles – everything adorable! I will break down easy steps, so get ready to make your nails date-night-ready!
Let’s get started.
- Heartfelt Romance
- Chic Red Velvet
- Golden Cupid’s Arrow
- Frosted Love
- Velvet Rose
- Enchanted Lace
- Cupid’s Kiss
- Romantic Ombre
- Blush Marble
- Rose Gold Love
- Pink Velvet Hearts
- Sweetheart Ombre
- Golden Roses
- Frosted Heart Glitter
- Vibrant Love Stripes
Best 15 Acrylic Valentine’s Day Nail Ideas with Picture
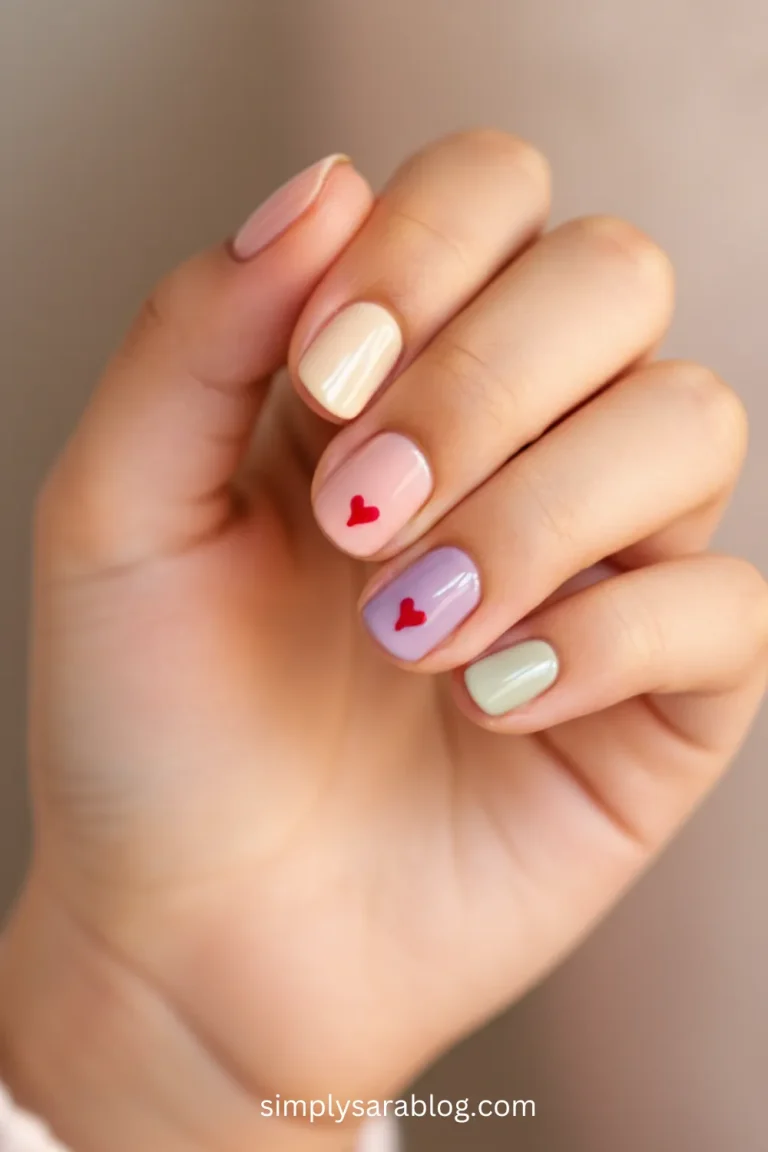
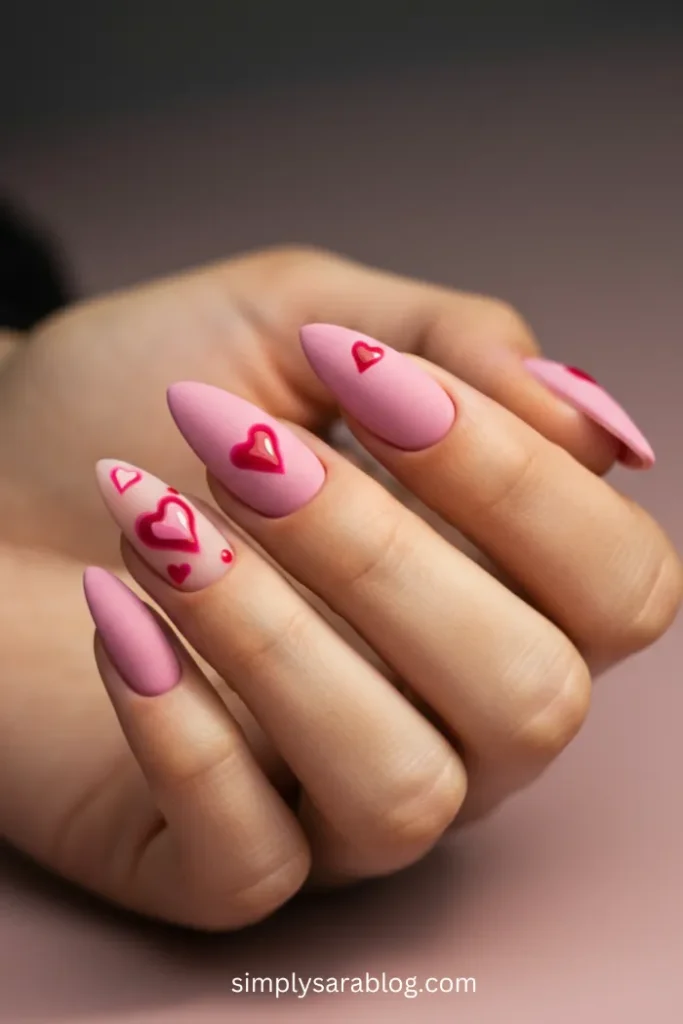
1. Heartfelt Romance
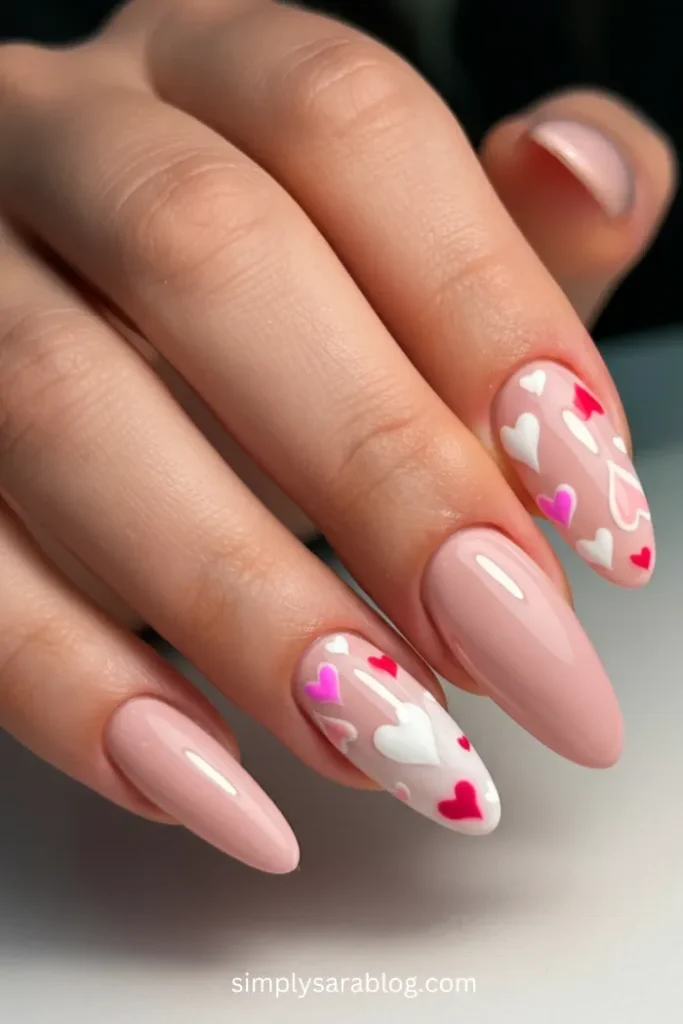
Overview: A charming design featuring tiny white and pink hearts over a soft nude palette, perfect for curling up with your special someone or celebrating Galentine’s Day with flair.
Step-by-Step Instructions:
- Apply a nude base coat.
- Use a fine nail art brush or stamping tool to create white and pink hearts.
- Seal the design with a glossy topcoat.
Necessary Tools:
- Nude polish
- Nail art brush or stamps
- Pink and white nail polish
- Topcoat
Ideal For: A sweet, understated Valentine’s look.
2. Chic Red Velvet
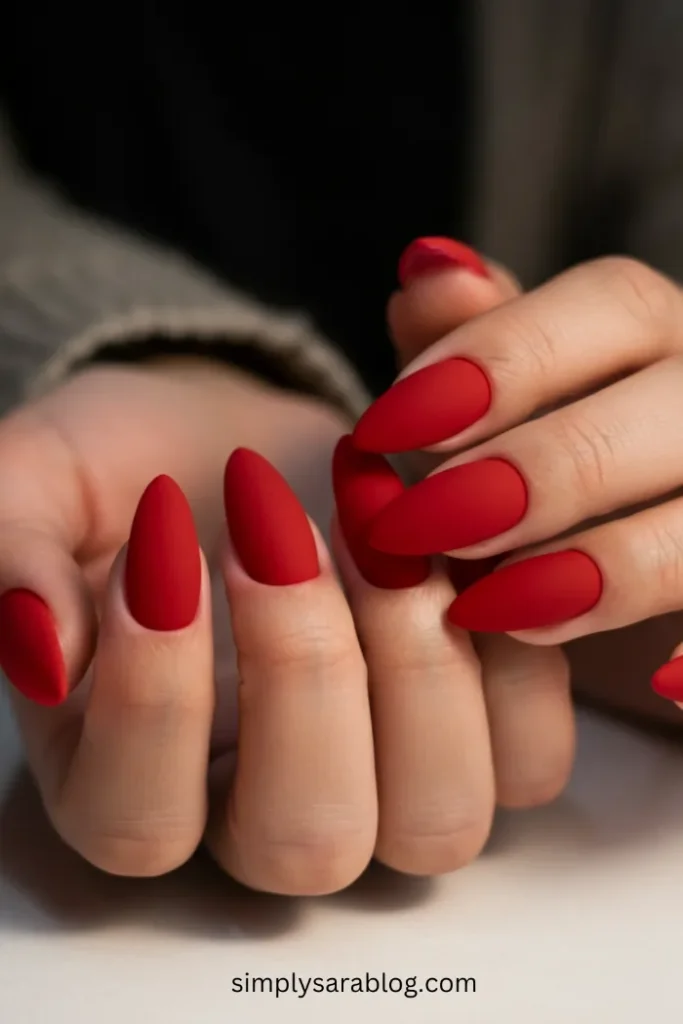
Overview: Classic red nails elevated with a velvety matte finish—the ultimate timeless Valentine’s statement.
Step-by-Step Instructions:
- Paint your nails with two coats of rich crimson red polish.
- Once dried, apply a matte topcoat for the velvety finish.
Necessary Tools:
- Crimson red nail polish
- Matte topcoat
Ideal For: Lovers of bold, classic elegance.
3. Golden Cupid’s Arrow
Overview: Shimmering gold accents and delicate arrow details create this flirty and fun Valentine’s design.
Step-by-Step Instructions:
- Start with a blush pink base.
- Draw thin golden arrows using a fine nail art brush or sticker decals.
- Add glitter polish to accentuate.
Necessary Tools:
- Blush pink base polish
- Gold nail art paint or decals
- Glitter polish
- Topcoat
Ideal For: Flirty dates or playful Valentine’s outings.
4. Frosted Love
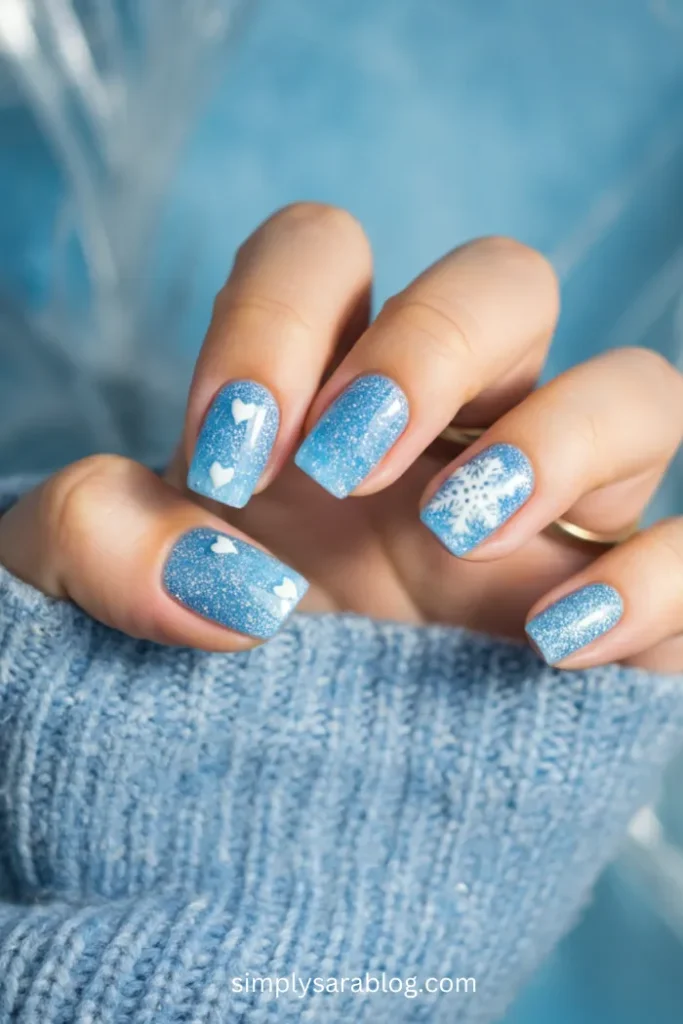
Overview: A dreamy winter-inspired look with frosty blue hues and subtle heart designs.
Step-by-Step Instructions:
- Paint nails with a pale blue base coat.
- Add frosty glitter to create a wintery effect.
- Draw delicate white hearts on alternating nails.
Necessary Tools:
- Pale blue nail polish
- Glitter polish
- White nail art brush
- Topcoat
Ideal For: A romantic winter Valentine’s setting.
5. Velvet Rose
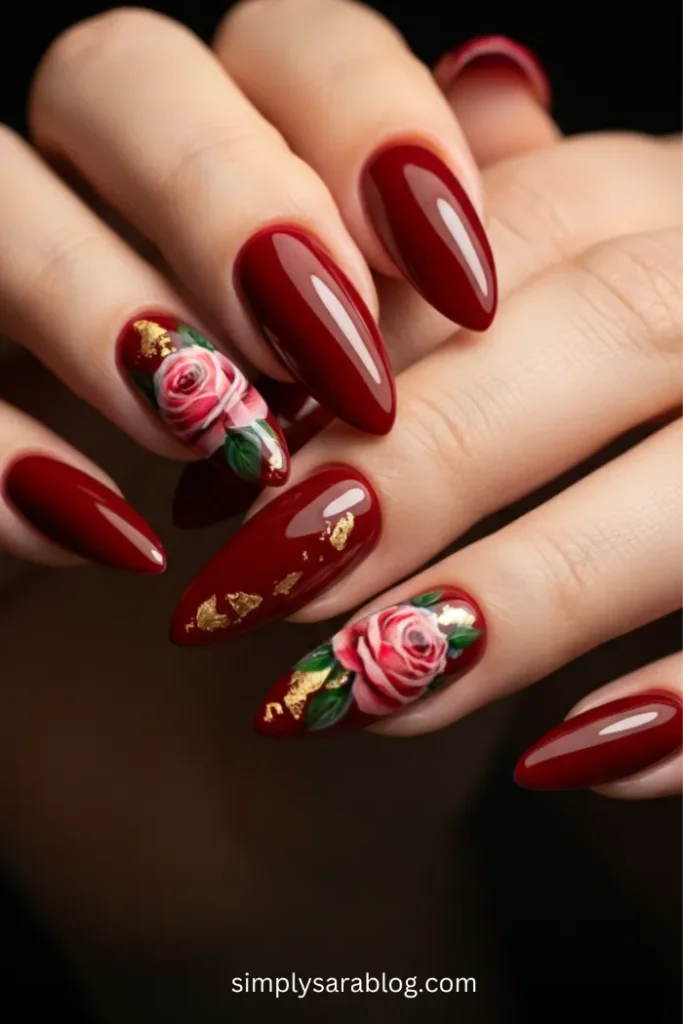
Overview: Luxurious roses in deep, velvety red, complemented by gold accents for a rich, romantic feel.
Step-by-Step Instructions:
- Apply a deep red base coat.
- Use a fine brush to paint roses in darker red tones.
- Add gold foil or glitter as an accent.
Necessary Tools:
- Deep red polish
- Nail art brush
- Gold foil or glitter
- Topcoat
Ideal For: An opulent Valentine’s night.
6. Enchanted Lace

Overview: Elegant lace patterns on a soft, sheer pink base for an ultra-feminine look.
Step-by-Step Instructions:
- Use sheer pink polish as the base.
- Paint or stamp lace patterns using white polish.
- Add rhinestones for extra glam.
Necessary Tools:
- Sheer pink polish
- White nail art polish
- Lace stamping plate or brush
- Rhinestones
Ideal For: Romantic evenings or weddings.
7. Cupid’s Kiss
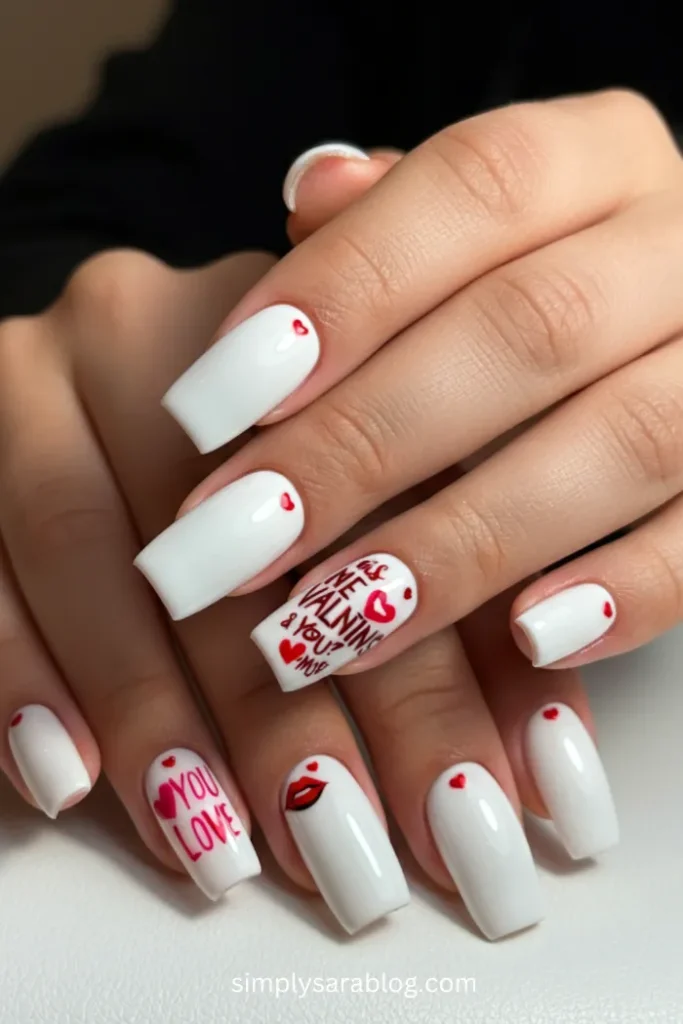
Overview: A playful combination of red lips and handwriting designs for a cheeky Valentine’s vibe.
Step-by-Step Instructions:
- Coat nails in a stark white polish.
- Use red polish to paint lips or use nail decals for ease.
- Draw black “kiss me” text for added flair.
Necessary Tools:
- White base polish
- Red nail art polish or decals
- Black nail art pen
Ideal For: Quirky Valentine’s celebrations.
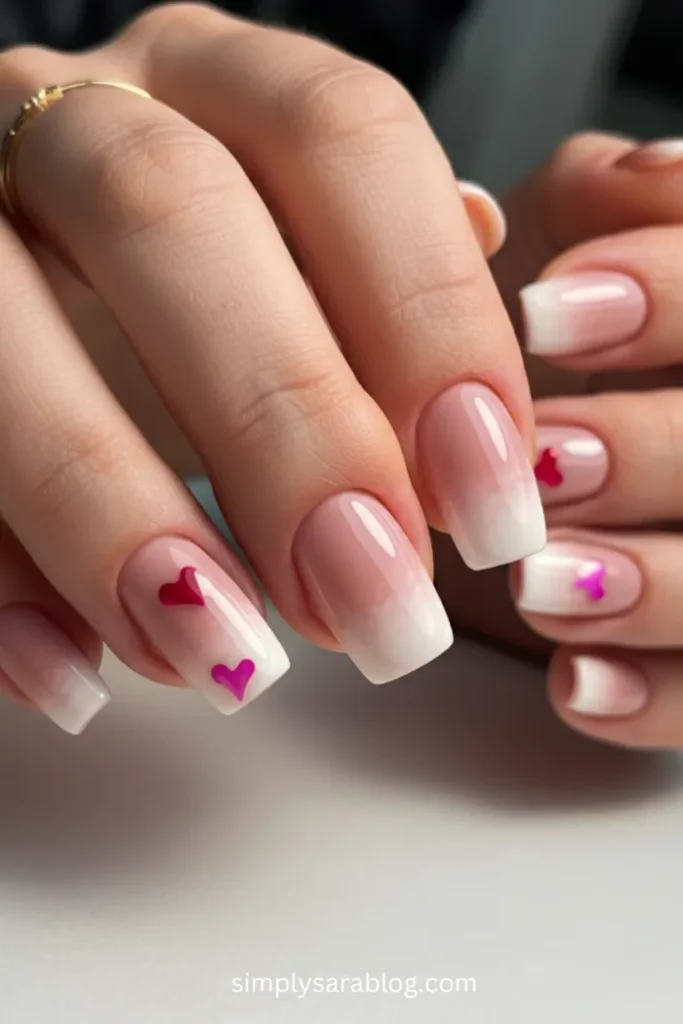
8. Romantic Ombre
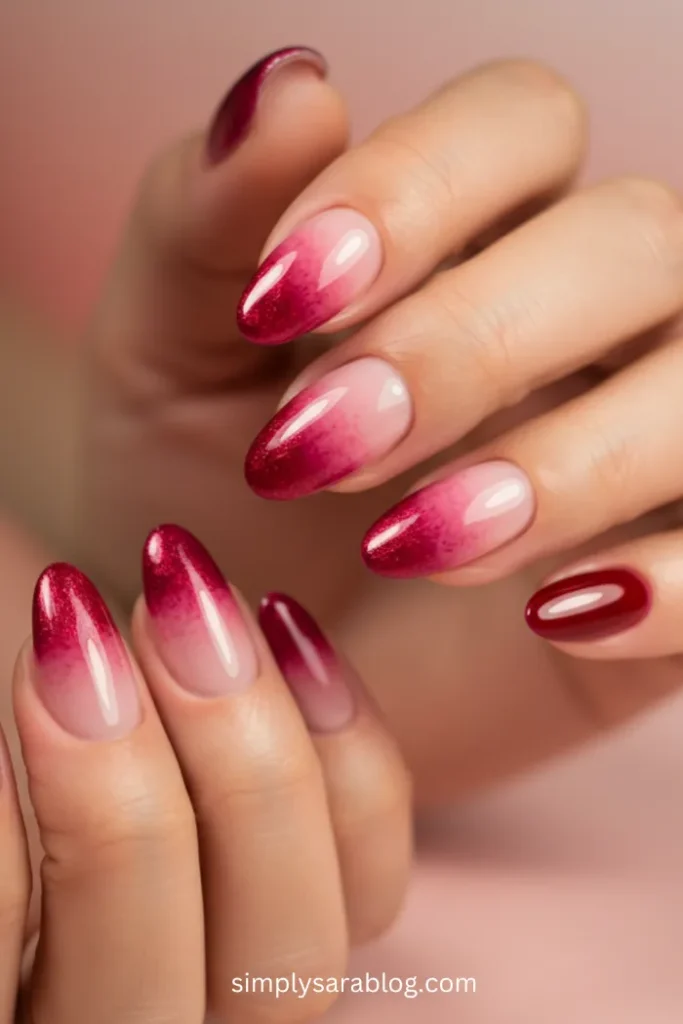
Overview: Subtle gradients from soft pink to deep red create a dreamy ombre effect perfect for date night.
Step-by-Step Instructions:
- Sponge on shades of pink-to-red polish for a gradient effect.
- Blend carefully for a seamless look.
- Apply a glossy topcoat for shine.
Necessary Tools:
- Pink and red nail polish
- Makeup sponge
- Topcoat
Ideal For: A minimalist yet romantic aesthetic.
9. Blush Marble
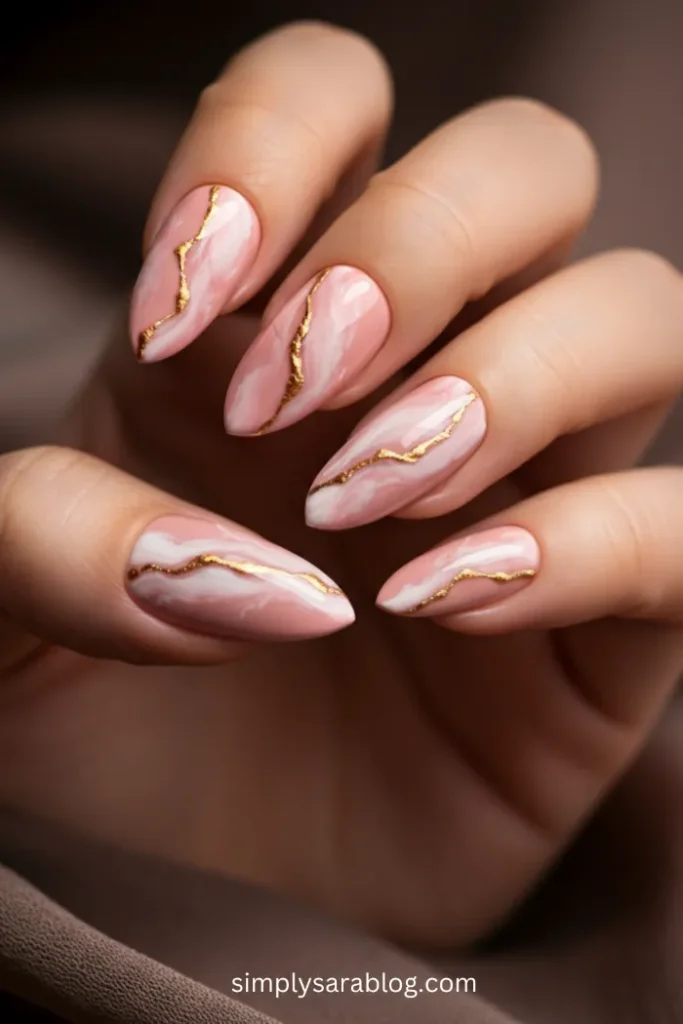
Overview: Sophisticated marble designs in blush pinks and white, accented with gold veining for a chic Valentine’s look.
Step-by-Step Instructions:
- Paint a blush pink base coat.
- Create marble patterns using white polish and a needle or brush.
- Highlight with gold nail art polish.
Necessary Tools:
- Blush pink polish
- White polish
- Gold nail art paint
- Thin brush or needle
Ideal For: Elegant dinners or professional settings.
10. Rose Gold Love
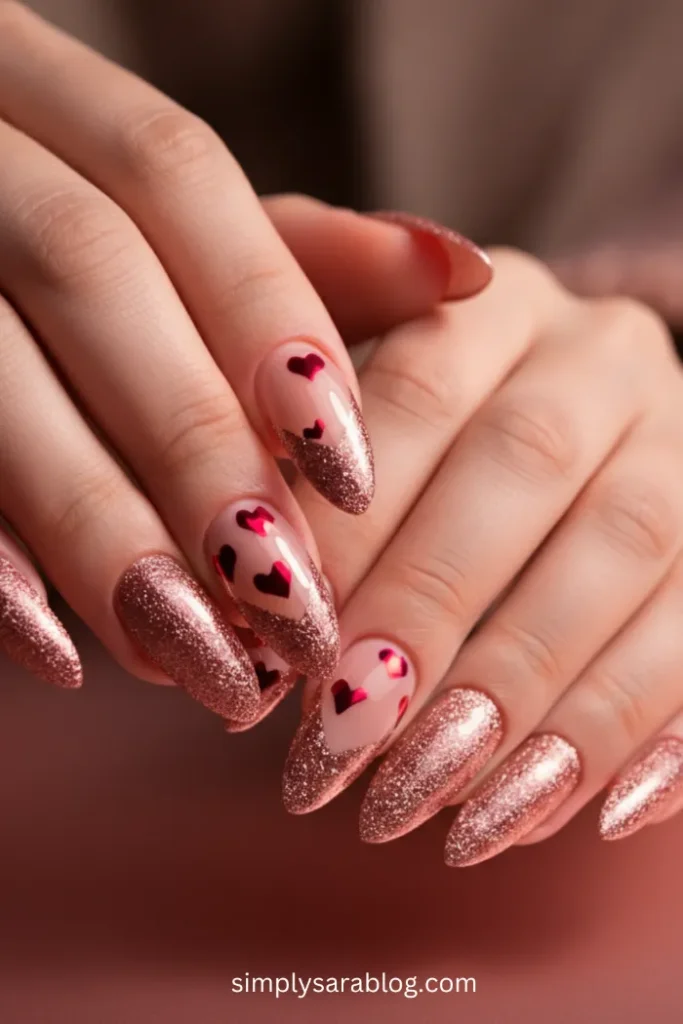
Overview: A luxurious metallic design with rose gold polish and glittery hearts.
Step-by-Step Instructions:
- Start with a rose gold base coat.
- Add glitter polish to the tips.
- Include metallic heart accents with stickers or stamping tools.
Necessary Tools:
- Rose gold polish
- Glitter polish
- Metallic heart stickers or stamps
Ideal For: Glamorous Valentine’s night looks.
11. Pink Velvet Hearts
Overview: Matte pink nails with glossy heart designs make for a soft and romantic vibe.
Step-by-Step Instructions:
- Paint nails with matte pink polish.
- Draw glossy hearts using clear polish.
- Top with a matte finish to blend textures.
Necessary Tools:
- Pink matte nail polish
- Clear shiny polish
Ideal For: Subtle yet chic Valentine’s vibes.
12. Sweetheart Ombre
Overview: A combo of baby pink and white ombre nails, topped with simple sweetheart accents.
Step-by-Step Instructions:
- Use a sponge to blend baby pink and white polish into an ombre effect.
- Add heart decals to two nails.
Necessary Tools:
- Baby pink and white polish
- Sponge
- Heart decals
Ideal For: A youthful Valentine’s aesthetic.
13. Golden Roses
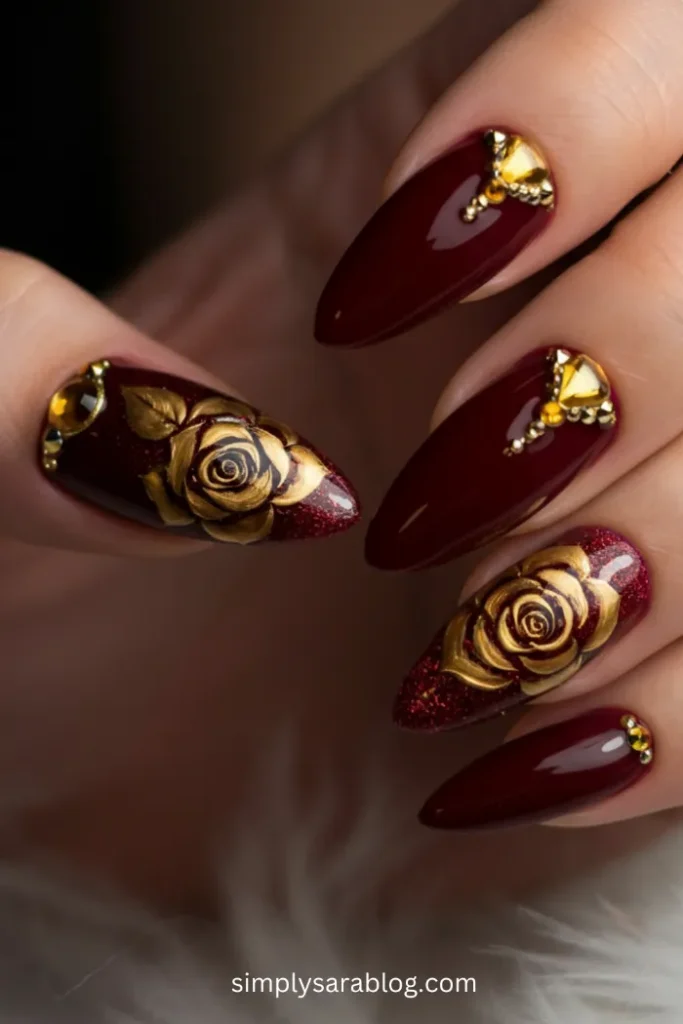
Overview: Deep burgundy nails featuring intricate gold rose details and shimmering accents.
Step-by-Step Instructions:
- Paint nails burgundy.
- Add gold rose patterns using foil or stamping tools.
- Highlight with glitter near cuticles.
Necessary Tools:
- Burgundy polish
- Gold foils
- Nail stamper
Ideal For: High-drama Valentine’s evenings.
14. Frosted Heart Glitter
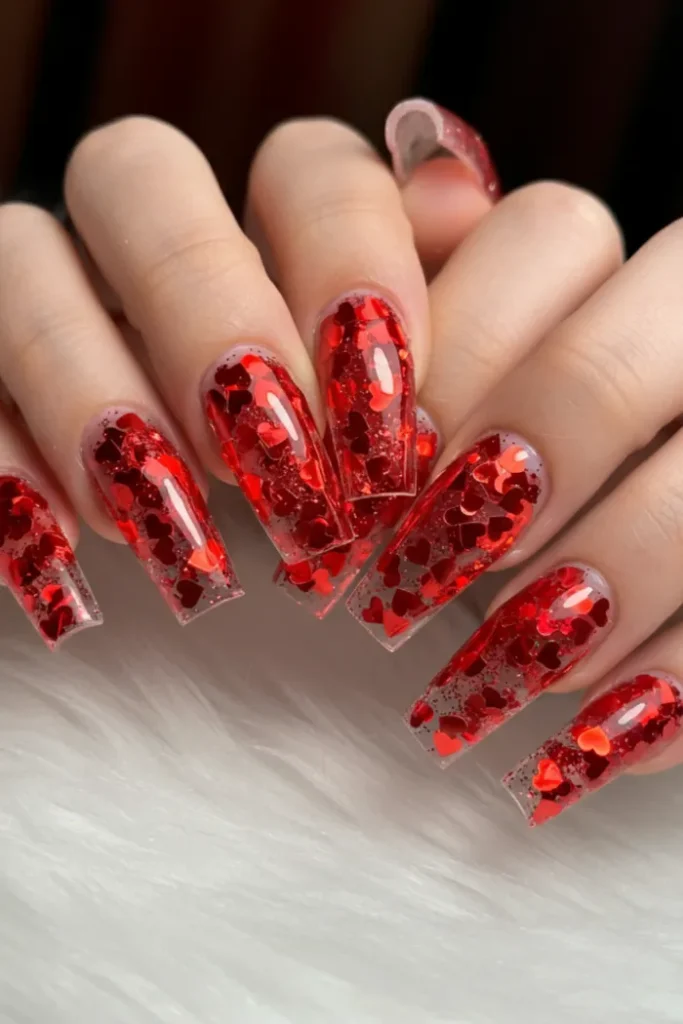
Overview: Sparkling frosted nails with bold heart-shaped glitter pieces for standout Valentine glam.
Step-by-Step Instructions:
- Apply a translucent frosty nail polish.
- Add chunky glitter hearts to random nails.
- Set with topcoat.
Necessary Tools:
- Frosty clear polish
- Chunky glitter hearts
- Topcoat
Ideal For: Dazzling Valentine’s parties.
15. Vibrant Love Stripes
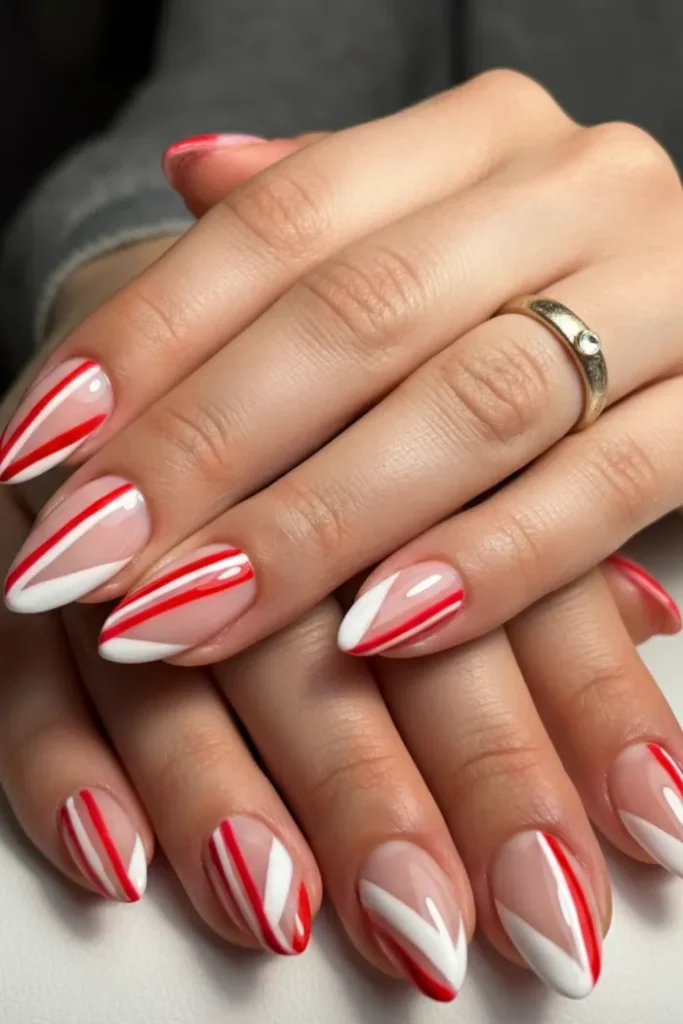
Overview: Bright stripes of red, pink, and white, topped with a high-shine finish for a fun and bold design.
Step-by-Step Instructions:
- Paint a nail base coat in solid white.
- Use a striping brush to create bold red and pink stripes.
- Seal with topcoat.
Necessary Tools:
- White base polish
- Red and pink polish
- Striping brush
Ideal For: Fun and casual Valentine’s celebrations.
Choosing Tips:
- Consider your lifestyle: If you work with your hands a lot, go for shorter nails with a less intricate design.
- Think about your outfits: Match the nail colors to your wardrobe if you like to coordinate.
- Pick a theme: Choose a theme like hearts, pink, or glitter to keep all your nails cohesive.
- Try a variety: Mix and match different nail art ideas for a unique look.
- Have fun: Nails are a great way to express yourself, so don’t be afraid to get creative!
FAQ:
How long do acrylic nails typically last?
Acrylic nails usually last 2-3 weeks, depending on your nail growth.
Can I do these designs at home?
Yes, with a little practice! Start simple and build up to more complex designs.
How do I make my nail art last longer?
Always use a good base coat and top coat, and avoid using your nails as tools.
What if I don’t have all the tools?
Don’t worry, use what you have! A toothpick can substitute a dotting tool, or try using a piece of sponge.
How do I remove glitter nails?
Soak cotton balls in acetone, place them on each nail, wrap with foil, and let it sit for 10-15 minutes.
Conclusion:
Alright, bestie, I hope you’re feeling totally inspired to create your own stunning acrylic Valentine’s Day nails! Remember, nail art is all about expressing yourself, so don’t be afraid to experiment and make these designs your own. Whether you go for classic hearts, sparkly tips, or something totally unique, I know you’ll rock it. Happy Valentine’s Day, and happy nail-ing!